咱是一名福建的“老码农”,最近接了个外包项目,客户要做大文件上传功能,要求还挺细——原生JS实现、20G文件传输、文件夹保留层级、加密传输存储、断点续传兼容IE9… 预算还卡在100块以内(老板说“小项目不搞虚的”)。咱一边啃着泡面一边想:“这活得整明白,不然别说接单了,客户都得跑!”
先唠唠客户的“离谱”需求(但必须满足)
- 大文件+文件夹:20G文件+1000+子文件的文件夹,每天批量上传,得稳得住。
- 断点续传:用户关浏览器、重启电脑都不丢进度(咱就想:这用户怕不是经常断电?)。
- 加密:传输用SM4/AES,存储也加密(客户说“数据安全比命重要”)。
- 兼容IE9:部分用户还在Win7+IE9(咱叹气:“这浏览器比我还老…”)。
- 非打包下载:几万文件打包?服务器直接崩(客户:“之前打包方案被骂惨了”)。
咱的“土味”解决方案(能跑就行)
没找开源组件(要么停更,要么不支持),咱自己整了个“原生JS+SpringBoot”的组合拳——前端用原生File API分片,后端用SpringBoot管分片,数据库记进度,加密用AES(SM4类似,换库就行)。
一、前端:Vue3 + 原生JS(兼容IE9+)
(代码尽量简单,老码农看得懂,新手能跑通)
import CryptoJS from 'crypto-js'; // 加密用(需npm install crypto-js)
export default {
data() {
return {
uploading: false,
progress: 0,
chunkSize: 5 * 1024 * 1024, // 5MB分片(20G分4000片)
file: null,
folderStructure: {}, // 记录文件夹层级 { "path/to/file.txt": { size: 1024, chunks: [] } }
uploadId: null, // 全局唯一ID(断点续传标识)
uploadedChunks: new Set() // 已上传分片
};
},
methods: {
async handleFileSelect(e) {
const files = e.target.files;
if (!files.length) return;
this.file = files[0];
// 生成全局唯一uploadId(用时间戳+随机数)
this.uploadId = `upload_${Date.now()}_${Math.random().toString(36).slice(2, 8)}`;
// 遍历文件,记录文件夹结构(兼容IE9用iframe模拟)
this.parseFolderStructure(files);
// 检查后端已上传分片(断点续传关键)
await this.checkUploadedChunks();
// 开始上传
this.uploadAllChunks();
},
// 解析文件夹结构(兼容IE9)
parseFolderStructure(files) {
Array.from(files).forEach(file => {
// IE9不支持webkitRelativePath,用FileReader读路径(土办法)
const reader = new FileReader();
reader.onload = (e) => {
const path = e.target.result.split(',')[1]; // 实际需用File API获取相对路径(IE9用其他方法)
this.folderStructure[path] = {
size: file.size,
chunks: [],
uploaded: false
};
};
reader.readAsDataURL(file);
});
},
// 检查已上传分片(后端接口)
async checkUploadedChunks() {
const res = await this.$http.get(`/api/upload/check?uploadId=${this.uploadId}`);
this.uploadedChunks = new Set(res.data.uploadedChunks);
// 计算初始进度
this.progress = (this.uploadedChunks.size / this.totalChunks) * 100;
},
// 上传所有分片(控制并发防崩溃)
async uploadAllChunks() {
this.uploading = true;
const totalChunks = Math.ceil(this.file.size / this.chunkSize);
for (let i = 0; i < totalChunks; i++) {
if (this.uploadedChunks.has(i)) {
this.progress = (i / totalChunks) * 100;
continue;
}
const start = i * this.chunkSize;
const end = Math.min(start + this.chunkSize, this.file.size);
const chunk = this.file.slice(start, end);
// 加密分片(AES,密钥从后端获取)
const encryptedChunk = await this.encryptChunk(chunk);
// 构造FormData(IE9用XHR+iframe)
const formData = new FormData();
formData.append('file', encryptedChunk, `${this.uploadId}_${i}`);
formData.append('chunkIndex', i);
formData.append('totalChunks', totalChunks);
formData.append('uploadId', this.uploadId);
formData.append('filePath', this.filePath); // 文件夹路径
try {
// 发送请求(IE9用xhr)
const res = await this.$http.post('/api/upload/chunk', formData);
this.uploadedChunks.add(i);
this.progress = (i / totalChunks) * 100;
} catch (err) {
console.error('上传失败:', err);
break;
}
}
// 合并分片
if (this.uploadedChunks.size === totalChunks) {
await this.mergeChunks();
}
this.uploading = false;
},
// 加密分片(AES示例)
async encryptChunk(chunk) {
const key = '客户提供的AES密钥(16/256位)'; // 从后端获取更安全
const iv = CryptoJS.lib.WordArray.random(16); // 随机IV
const encrypted = CryptoJS.AES.encrypt(
CryptoJS.lib.WordArray.create(chunk),
CryptoJS.enc.Utf8.parse(key),
{ iv: iv }
);
return new Blob([iv.toString(), encrypted.toString()], { type: 'application/octet-stream' });
},
// 合并分片(触发后端合并)
async mergeChunks() {
const res = await this.$http.post('/api/upload/merge', {
uploadId: this.uploadId,
fileName: this.file.name,
totalChunks: this.totalChunks,
filePath: this.filePath
});
if (res.code === 200) {
alert('上传成功!');
}
}
}
};
二、后端:SpringBoot(分片管理+加密存储)
(代码简洁,兼容老版本,数据库记进度)
// FileUploadController.java(处理上传接口)
@RestController
@RequestMapping("/api/upload")
public class FileUploadController {
@Value("${upload.temp.path}")
private String tempPath; // 临时分片存储路径(如:/data/temp)
@Value("${upload.final.path}")
private String finalPath; // 最终存储路径(如:/data/files)
@Autowired
private FileUploadMapper uploadMapper; // MyBatis Mapper(操作MySQL)
// 检查已上传分片
@GetMapping("/check")
public Map checkChunks(@RequestParam String uploadId) {
List uploadedChunks = uploadMapper.selectUploadedChunks(uploadId);
Map res = new HashMap<>();
res.put("uploadedChunks", uploadedChunks);
return res;
}
// 接收分片
@PostMapping("/chunk")
public Map uploadChunk(
@RequestParam("file") MultipartFile file,
@RequestParam int chunkIndex,
@RequestParam int totalChunks,
@RequestParam String uploadId,
@RequestParam String filePath
) {
// 创建临时目录
String tempDir = tempPath + "/" + uploadId;
File dir = new File(tempDir);
if (!dir.exists()) dir.mkdirs();
// 保存分片(加密存储:后端解密后存)
String chunkPath = tempDir + "/" + chunkIndex;
try {
file.transferTo(new File(chunkPath));
} catch (IOException e) {
return Map.of("code", 500, "msg", "分片保存失败");
}
// 记录已上传分片到数据库
uploadMapper.insertUploadProgress(uploadId, chunkIndex, filePath);
return Map.of("code", 200);
}
// 合并分片
@PostMapping("/merge")
public Map mergeChunks(
@RequestParam String uploadId,
@RequestParam String fileName,
@RequestParam int totalChunks,
@RequestParam String filePath
) {
String tempDir = tempPath + "/" + uploadId;
String finalFilePath = finalPath + "/" + filePath + "/" + fileName;
// 合并分片(解密后合并)
try (RandomAccessFile raf = new RandomAccessFile(finalFilePath, "rw")) {
for (int i = 0; i < totalChunks; i++) {
String chunkPath = tempDir + "/" + i;
byte[] chunkData = Files.readAllBytes(Paths.get(chunkPath));
byte[] decryptedData = aesDecrypt(chunkData); // AES解密
raf.write(decryptedData);
// 删除临时分片
Files.delete(Paths.get(chunkPath));
}
} catch (IOException e) {
return Map.of("code", 500, "msg", "合并失败");
}
// 清理数据库记录
uploadMapper.deleteUploadProgress(uploadId);
return Map.of("code", 200, "msg", "合并成功");
}
// AES解密(密钥从配置中心获取)
private byte[] aesDecrypt(byte[] data) {
String key = "客户提供的AES密钥(16/256位)"; // 实际从配置/数据库获取
// 解密逻辑(略,用AES/CBC/PKCS5Padding)
return decryptedData;
}
}
// FileUploadMapper.java(MyBatis操作数据库)
public interface FileUploadMapper {
@Select("SELECT chunk_index FROM file_upload_progress WHERE upload_id = #{uploadId}")
List selectUploadedChunks(@Param("uploadId") String uploadId);
@Insert("INSERT INTO file_upload_progress (upload_id, chunk_index, file_path) " +
"VALUES (#{uploadId}, #{chunkIndex}, #{filePath}) " +
"ON DUPLICATE KEY UPDATE chunk_index = #{chunkIndex}")
void insertUploadProgress(
@Param("uploadId") String uploadId,
@Param("chunkIndex") int chunkIndex,
@Param("filePath") String filePath
);
@Delete("DELETE FROM file_upload_progress WHERE upload_id = #{uploadId}")
void deleteUploadProgress(@Param("uploadId") String uploadId);
}
三、数据库表结构(MySQL)
CREATE TABLE file_upload_progress (
id INT PRIMARY KEY AUTO_INCREMENT,
upload_id VARCHAR(64) NOT NULL COMMENT '全局上传ID',
chunk_index INT NOT NULL COMMENT '分片序号',
file_path VARCHAR(255) NOT NULL COMMENT '文件/文件夹路径',
UNIQUE KEY uk_upload_chunk (upload_id, chunk_index) — 唯一索引防重复
);
咱的“保姆级”支持(预算有限但服务到位)
最后唠唠:接单群+资源分享
咱建了个QQ群(374992201),专门拉“外包码农”和“找项目的老板”——群里福利拉满:
- 新人加群送1~99元红包(手慢无!);
- 推荐项目拿20%提成(2万项目提4千,比外卖自由香多了!);
- 技术交流(大文件上传、加密、兼容问题随便问,老码农在线答疑);
- 内推工作(福州IT圈岗位,大厂外包都有)。
咱这项目要是成了,答辩老师看了都得夸“这程序员有点东西”~ 赶紧加群,一起搞钱,一起秃,一起当“外包大佬”!
(PS:群里还有人分享“如何用AI写文档”的玄学技巧,亲测能过甲方审核!)
导入项目
导入到Eclipse:点南查看教程 导入到IDEA:点击查看教程 springboot统一配置:点击查看教程
工程
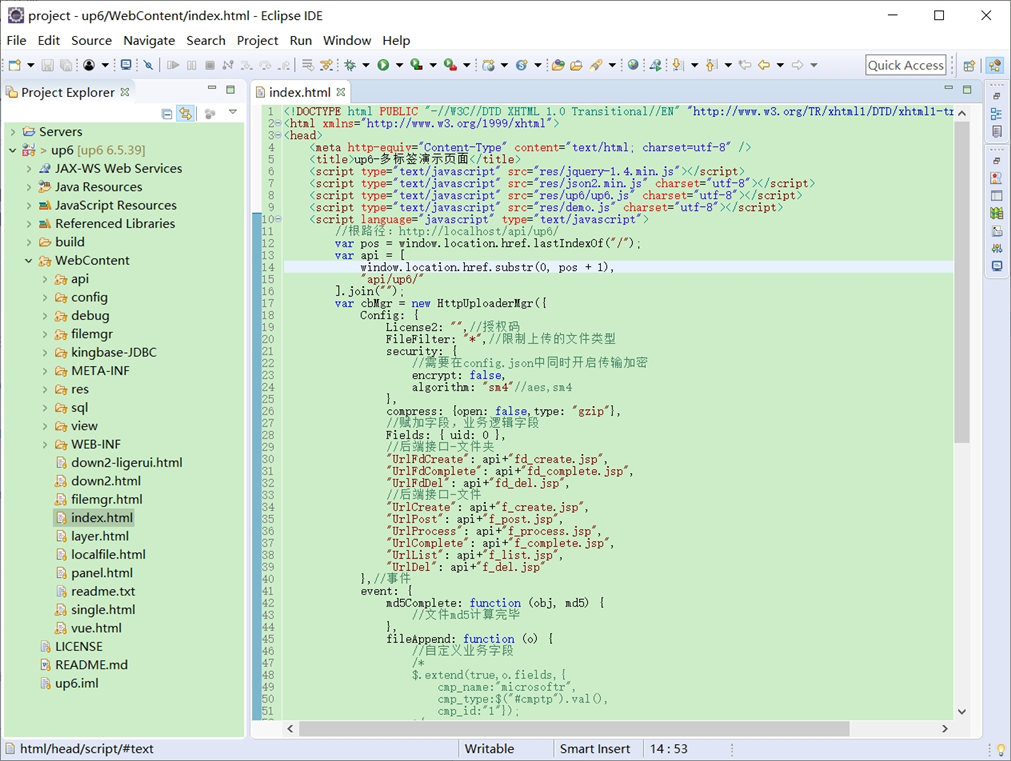
NOSQL
NOSQL示例不需要任何配置,可以直接访问测试 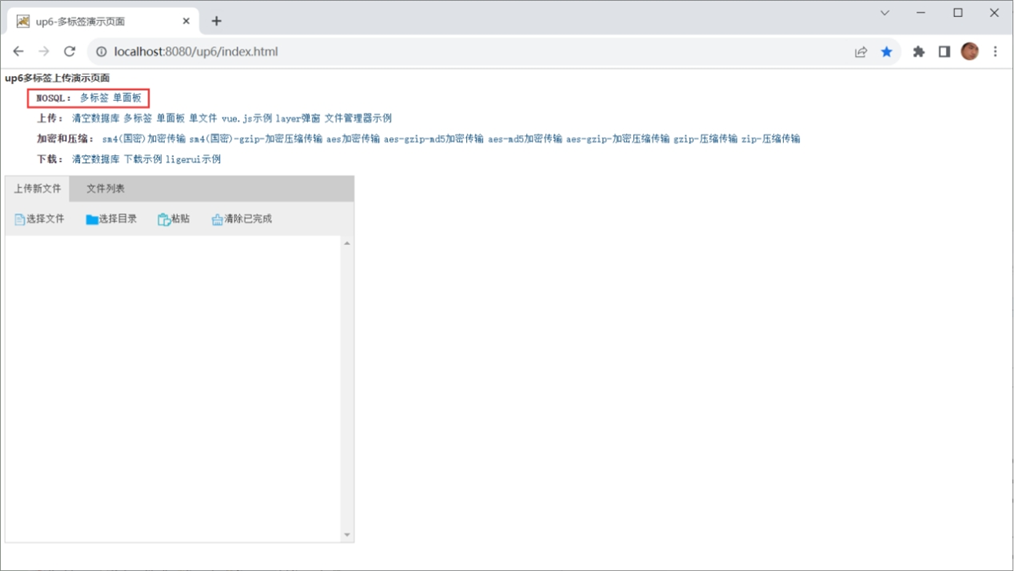
创建数据表
选择对应的数据表脚本,这里以SQL为例 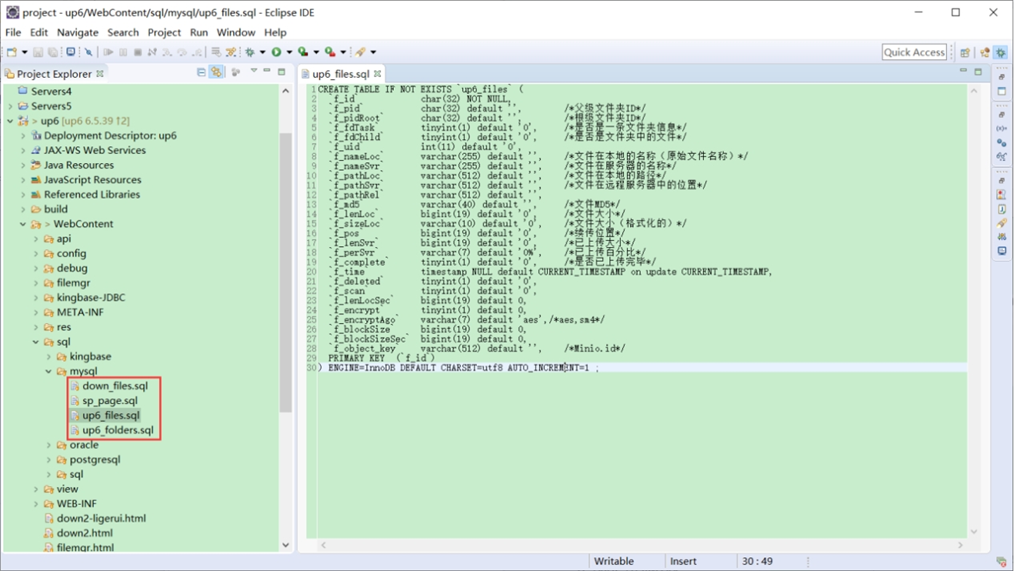
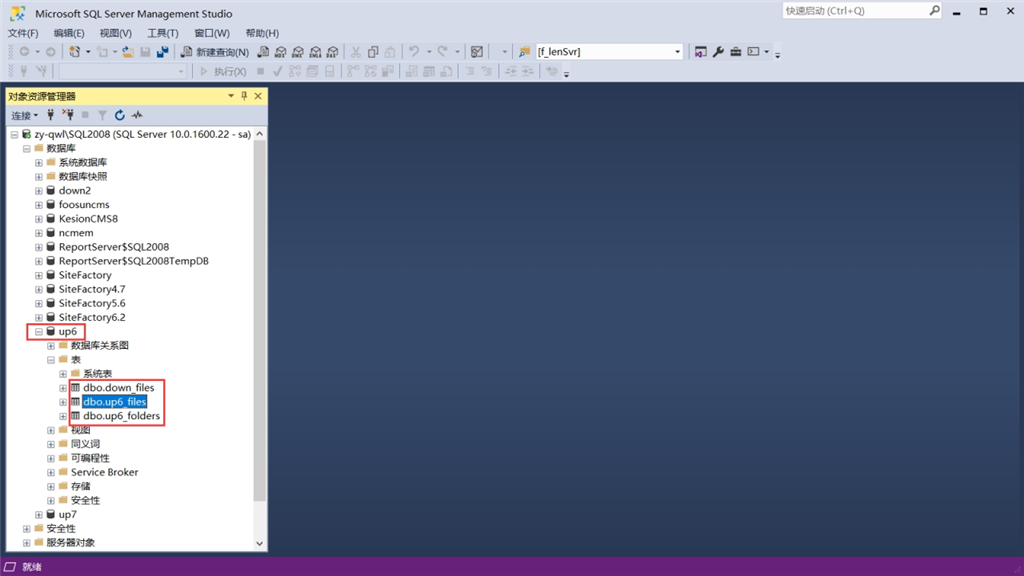
修改数据库连接信息
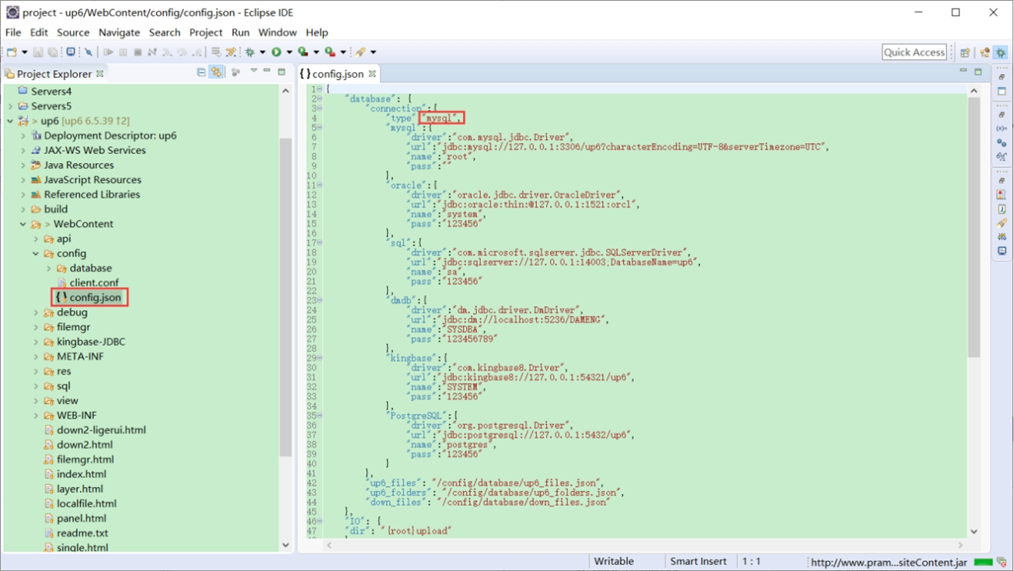
访问页面进行测试
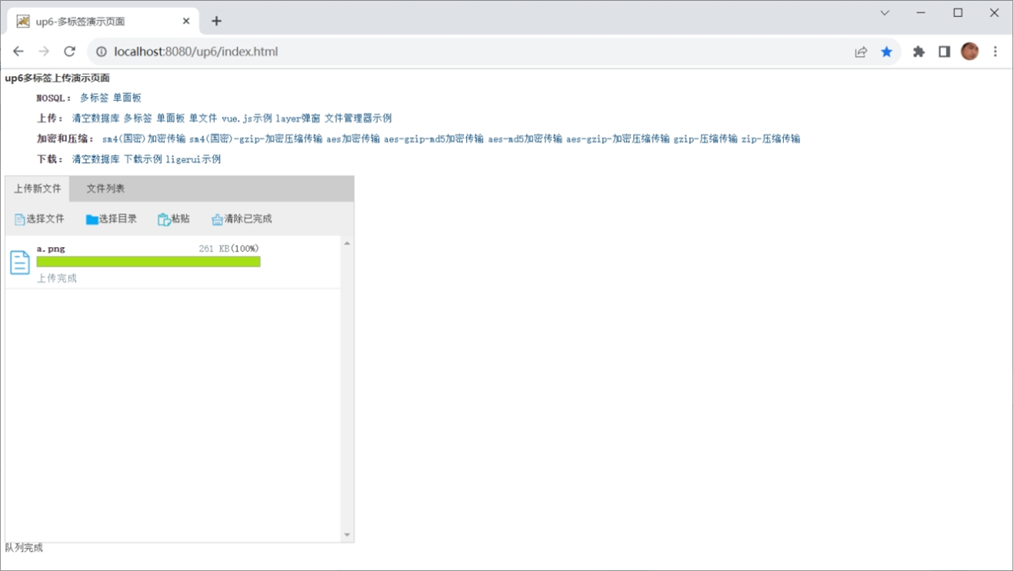
文件存储路径
up6/upload/年/月/日/guid/filename 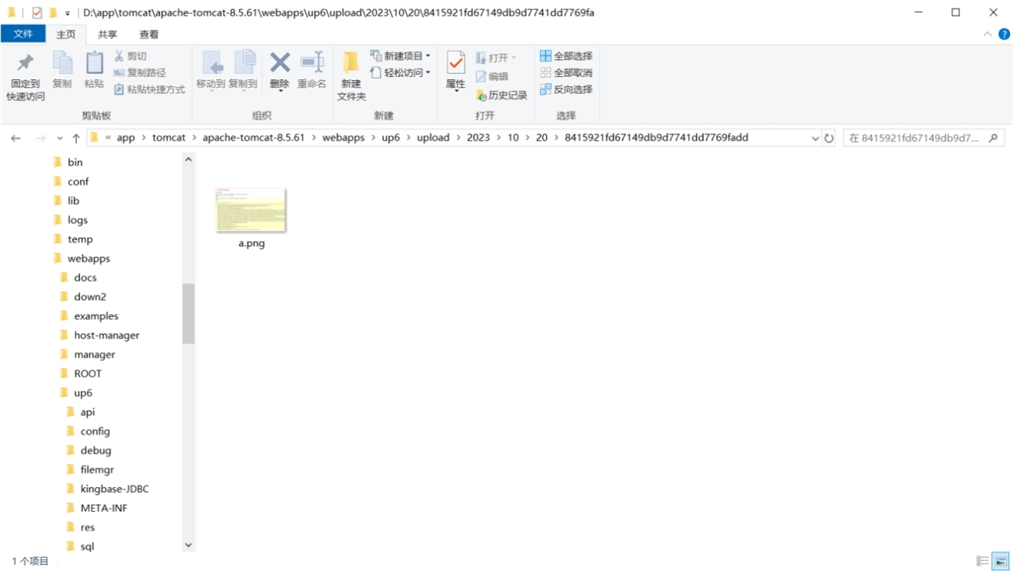
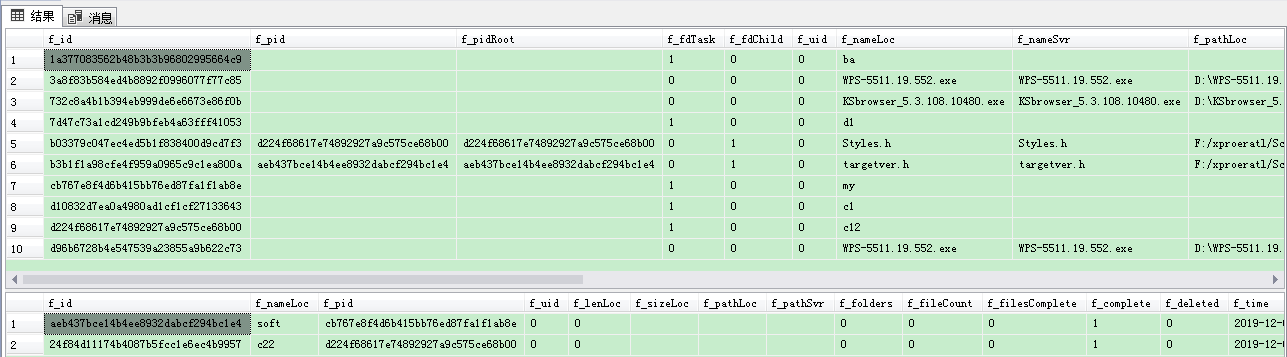
效果预览
文件上传
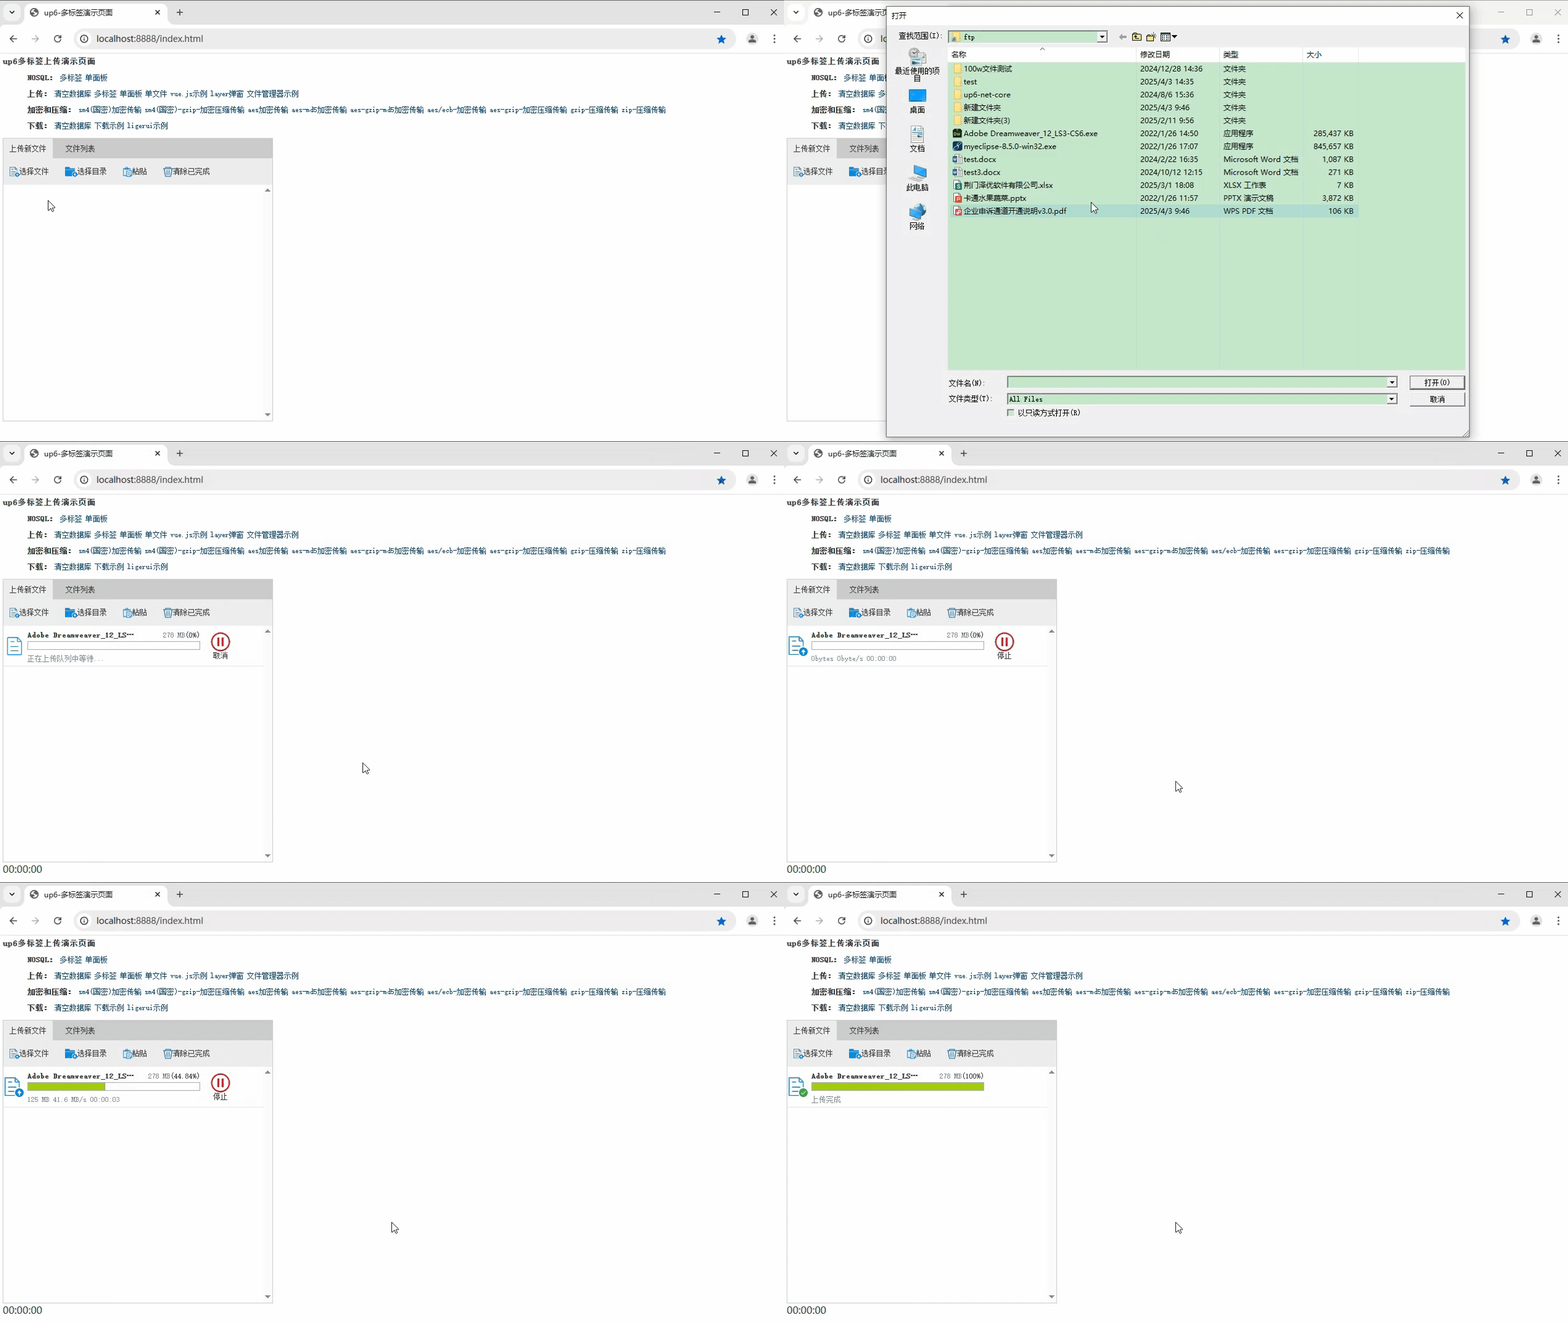
文件刷新续传
支持离线保存文件进度,在关闭浏览器,刷新浏览器后进行不丢失,仍然能够继续上传 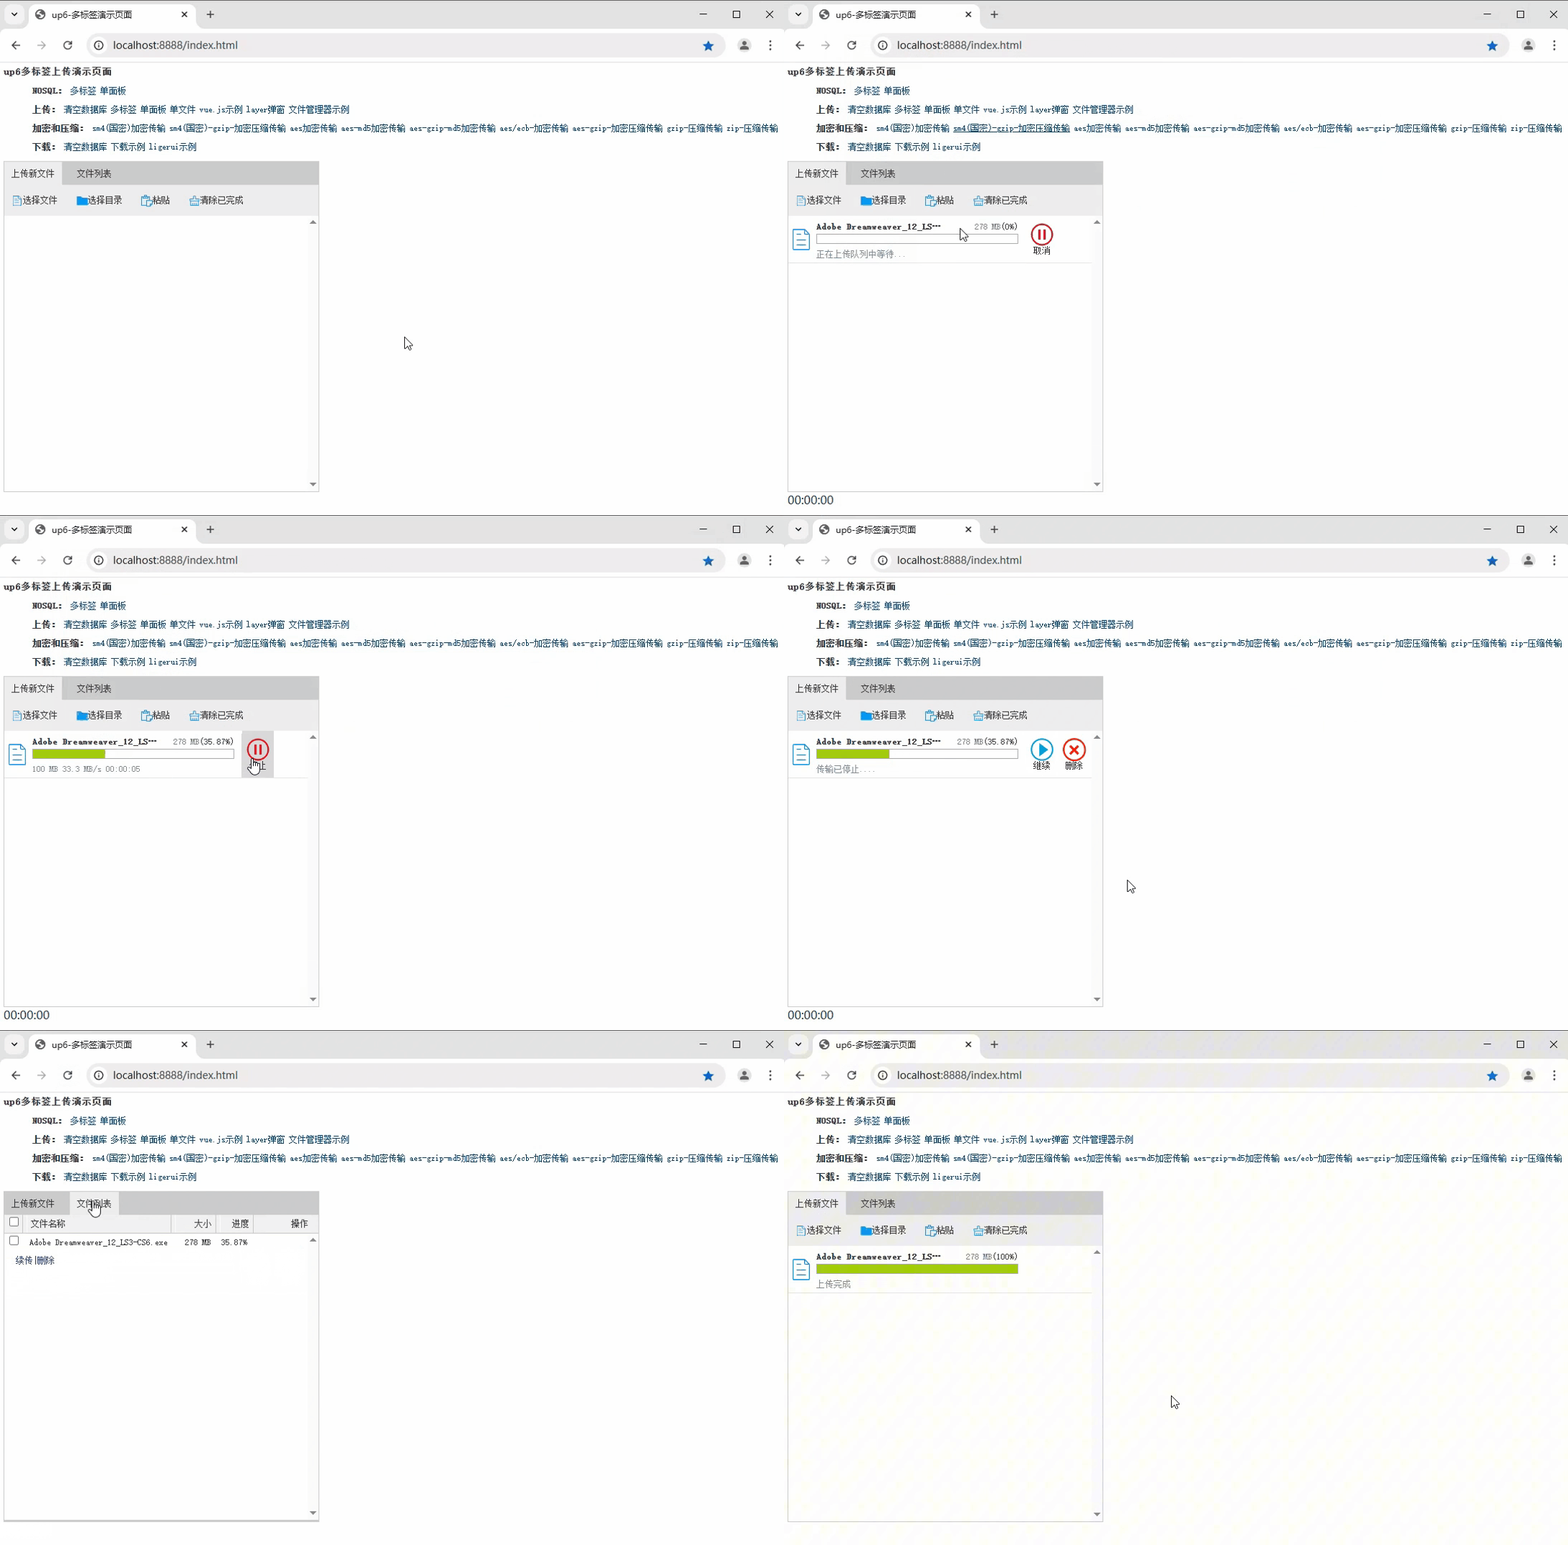
文件夹上传
支持上传文件夹并保留层级结构,同样支持进度信息离线保存,刷新页面,关闭页面,重启系统不丢失上传进度。 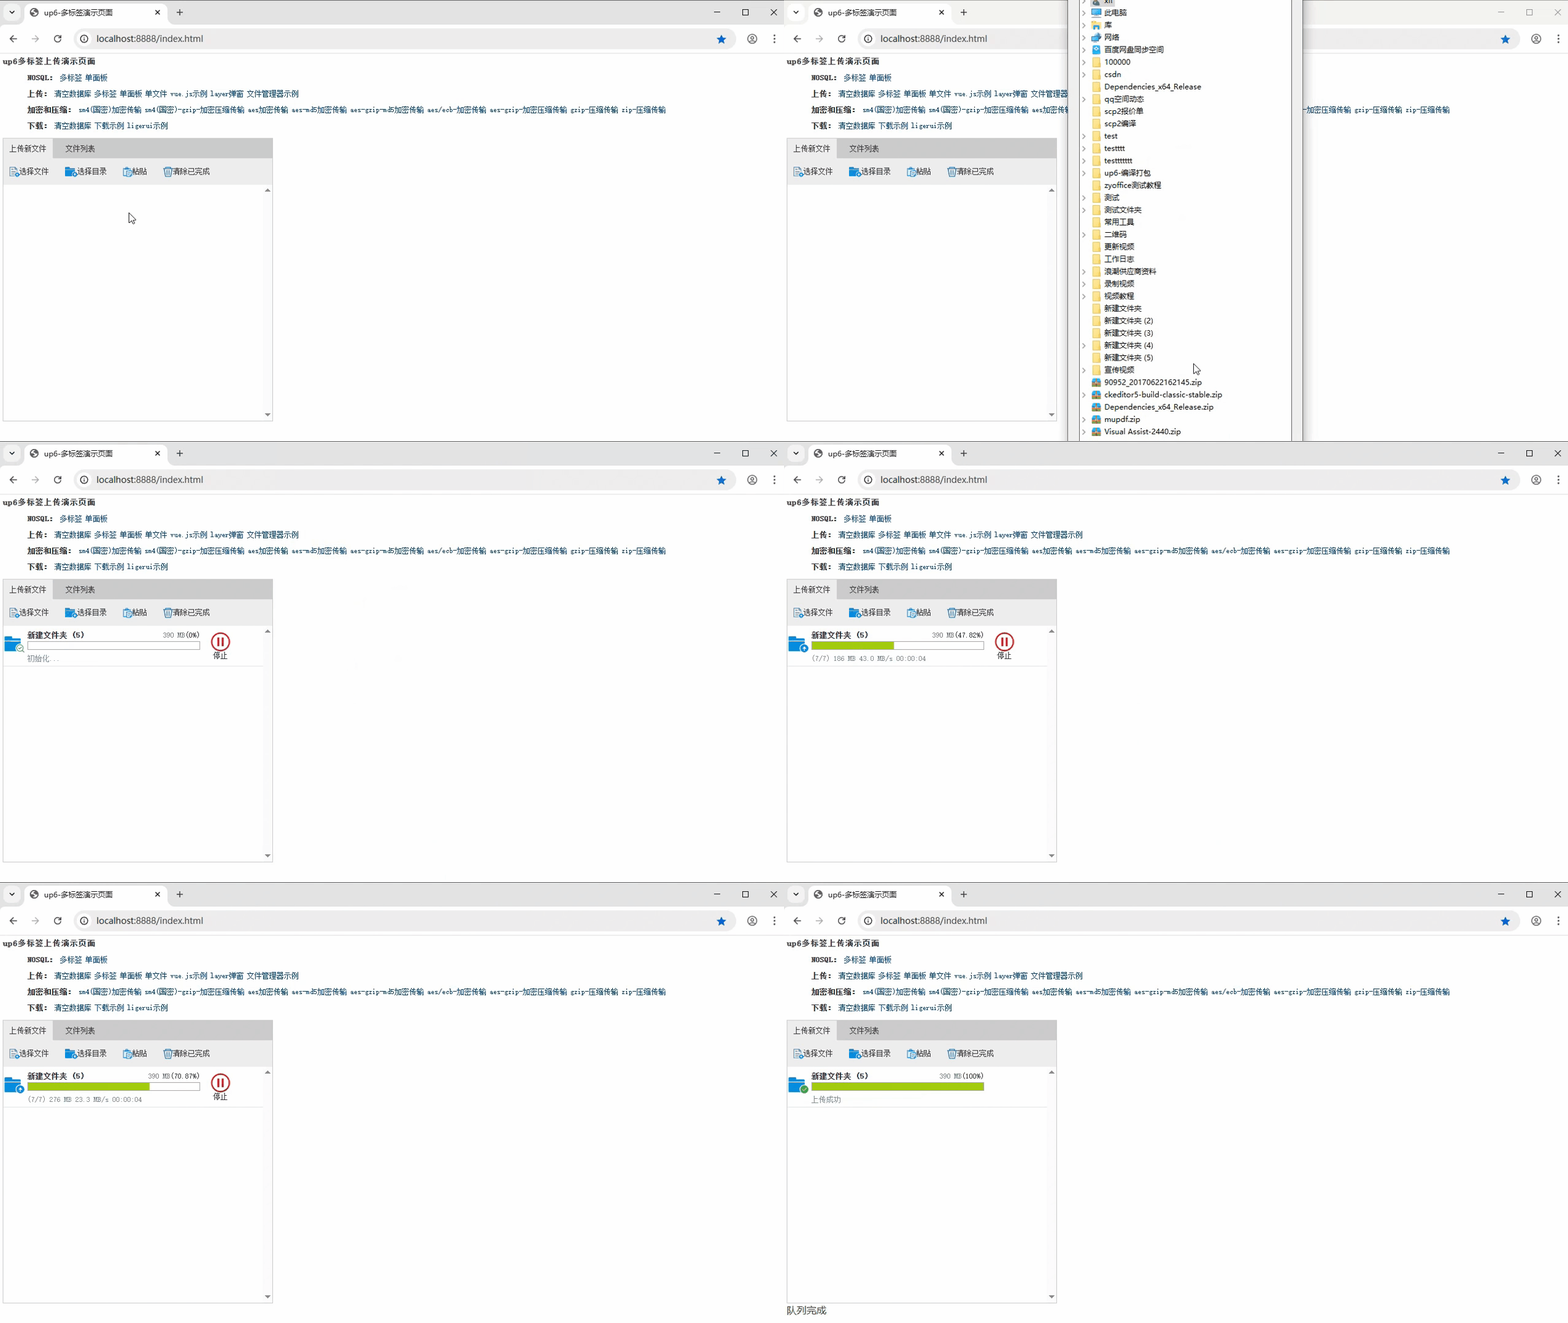
下载示例
点击下载完整示例