1.华为云基本概念
项目上线就需要使用工作环境,工作环境分为两种:
-
本地真实机房中的服务器
-
云主机(云服务器):远程的虚拟机
-
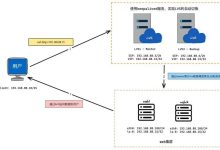
注意:机房本身是不联网的,若想被外部访问,需要做安全管理机制(防火墙),还有就是本地地址转化的问题。所以一般比较核心的,比如数据库服务器,我们会使用本地机房,但是对外站点一般使用更加轻量级的云服务器,我们这里使用的工作环境是——华为云。
-
华为云地址:https://www.huaweicloud.com/
2.购买云主机、公网IP
依次购买数据库服务器、数据库公网IP,编译服务器、编译公网IP,后端服务器、后端公网IP,代理服务器、代理公网IP。(注意:代理服务器的公网IP是对项目进行访问)

1.1 在服务列表中,选择“弹性云服务器”。
自定义购买 > 按需计费 > 区域选择距离近一点的 > 随机分配 > 根据项目情况选择合适的CPU架构,我这里选择4核8G s7 > 选择Rocky Linux 8.5 > 系统盘默认即可 > 关闭备份 > 主网卡选择手动分配IP地址,否则自动分配太随机了 > 安全组自定义,起个名称 > 选择开放所有端口 > 弹性公网IP选择暂不购买 > 云服务器名称做到见名知意 > 密码设置 > 我同意,购买。
1.2 在网络与安全中,选择“弹性公网IP”
按需计费 > 区域选择与云服务器的地址一样 > 带宽配置默认 > 名称见名知意 > 立即购买
1.3 绑定公网IP
在弹性公网IP列表页,选择下图“绑定”按钮,在弹窗中选择我们前面购买的云服务器,打开弹性云服务器,查看公网IP是否已绑定。
3.部署过程
这里可以通过使用WindTerm进行远程连接云服务器。
3.1 部署database数据库服务器
3.1.1 安装插件工具
- 安装Tab键补齐及安装下载功能
[root@database ~]# dnf -y install bash-completion 安装tab键补齐功能
[root@database ~]# dnf -y install lrzsz 安装上传下载功能
3.1.2 安装配置MySQL数据库
- 安装MySQL并启动
[root@database ~]# dnf -y install mysql-server mysql 安装MySQL数据库软件
[root@database ~]# systemctl start mysqld 启动数据库服务
[root@database ~]# systemctl enable mysqld 将数据库服务设置为开机自启动
[root@database ~]# ss -nutlp | grep :3306 查看数据库端口
- 修改MySQL数据库root用户密码为123qwe
[root@database ~]# mysqladmin -uroot password '123qwe'
mysqladmin: [Warning]警告不用管
[root@database ~]# mysql -uroot -p'123qwe'
mysql> show databases;
+——————–+
| Database |
+——————–+
| information_schema |
| mysql |
| performance_schema |
| sys |
+——————–+
4 rows in set (0.01 sec)
mysql> quit
- 将数据库迁移到当前服务器(RZ后弹出对话框选择项目.sql文件)
[root@database ~]# pwd
/root
[root@database ~]# rz
[root@database ~]# mysql -uroot -p'123qwe' < /root/hello.sql 使用SQL文件还原数据
[root@database ~]# mysql -uroot -p'123qwe' 进入MySQL数据库
mysql> SHOW DATABASES;
这里会查看到所有数据库
mysql> use hello;
mysql> SHOW TABLES;
查看 hello 数据库中的所有表
- 先创建用户,再授权业务用户:hello,密码为:123qwe 下方复制,不要手敲!!!
# 创建一个名为 hello 的用户,该用户可以从任何主机(%表示任何主机除了hello@localhost本身)连接到 MySQL 服务器,因为springboot要连数据库服务器
mysql> CREATE USER hello@'%' IDENTIFIED BY '123qwe';
# 创建一个名为 hello 的用户,该用户只能从 localhost 连接到 MySQL 服务器
mysql> CREATE USER hello@'localhost' IDENTIFIED BY '123qwe';
# 授予 hello@'%' 用户对 hello 数据库的所有权限
mysql> GRANT ALL ON hello.* TO hello@'%';
# 授予 ivos@'localhost' 用户对 hello 数据库的所有权限
mysql> GRANT ALL ON hello.* TO hello@'localhost';
# 刷新权限表,使权限更改立即生效
mysql> FLUSH PRIVILEGES;
mysql> EXIT;
3.1.3 安装部署Redis服务
-
部署Redis数据库服务,密码为123456
[root@database ~]# dnf -y install redis 安装redis
[root@database ~]# vim /etc/redis.conf 修改配置文件
:set nu :69 :507 i进入插入模式 Esc :wq保存退出
修改69行 bind 0.0.0.0 允许被所有主机访问
修改507行 requirepass 123456 设置redis的连接密码为12346
[root@database ~]# systemctl start redis 启动redis服务
[root@database ~]# systemctl enable redis 将服务设置为开机自启动
[root@database ~]# ss -nutlp | grep :6379 查看redis端口号
[root@database ~]# redis-cli 连接redis
127.0.0.1:6379> ping 没有输入密码,所以失败
(error) NOAUTH Authentication required. 未认证
127.0.0.1:6379> AUTH 123456 输入密码
OK
127.0.0.1:6379> ping 成功
PONG
127.0.0.1:6379> EXIT 退出
3.2 部署compile编译服务器
3.2.1 安装插件工具
- 安装Tab键补齐及安装下载功能
[root@compile ~]# dnf -y install bash-completion 安装tab键(退出重新连接生效)
[root@compile ~]# dnf -y install lrzsz 安装上传下载功能
- 安装 OpenJDK 8 的运行时环境、开发工具包以及 Maven 构建工具
[root@compile ~]# dnf -y install java-1.8.0-openjdk java-1.8.0-openjdk-devel maven
3.2.2 配置阿里云镜像仓库
[root@compile ~]# cp /etc/maven/settings.xml /opt/ 备份一份,防止改坏
[root@compile ~]# ls /opt/
[root@compile ~]# vim /etc/maven/settings.xml 改源配置文件
…此处省略一万字…
复制到159行上面,鼠标右键粘贴 :set nu :159
<mirror> <!– 配置阿里云镜像仓库 –>
<id>alimaven</id>
<name>aliyun maven</name>
<url>http://maven.aliyun.com/nexus/content/groups/public/</url>
<mirrorOf>central</mirrorOf>
</mirror>
…此处省略一万字…
3.2.3 上传
[root@compile ~]# rz
/project/carfb.tar.gz上传至compile主机的/root目录
[root@compile ~]# ls
carfb.tar.gz
[root@compile ~]# du -sh carfb.tar.gz 查看文件的空间使用情况 -s(summary)总和 -h人类可读
85M carfb.tar.gz
[root@compile ~]# tar -xf /root/carfb.tar.gz 解压
[root@compile ~]# ls
carfb.tar.gz hello hello-web
[root@compile hello]# cd hello 必须进到pom.xml所在的位置!
[root@compile hello]# ls target
classes generated-sources hello-0.0.1-SNAPSHOT.jar hello-0.0.1-SNAPSHOT.jar.original maven-archiver maven-status
[root@compile hello]# rm -rf target/hello-0.0.1-SNAPSHOT.jar 删除原有的成品jar包,自己再手动打一次
[root@compile hello]# mvn clean package -Dmaven.test.skip=true 自己再做一遍手动打包,只要屏幕还在滚动,就耐心等待
…
[INFO] BUILD SUCCESS 说明打包成功了
…
[root@compile hello]# ls target 创建好的jar包在target目录下,大概4min
3.2.4 修改 yml 文件
# 数据库连接信息
spring.datasource.url=jdbc:mysql://192.168.0.10:3306/hello?
spring.datasource.username=hello
spring.datasource.password=123qwe
# 这样设置后files static两个文件夹都是静态资源文件夹
# spring.web.resources.static-locations=file:d:/files,classpath:static
spring.web.resources.static-locations=file:${file-path},classpath:static
# 自定义文件存储路径 写自己磁盘真实的存储路径就可以
file-path = /img
#注意ip要写自己的ip
spring.redis.host=192.168.0.10
spring.redis.port=6379
spring.redis.password=123456
spring.redis.database=0
[root@compile ~]# head -24 /root/hello-web/src/main.js | tail -11
//5.配置根路径
//const BASE_URL = 'http://localhost:8080';
const BASE_URL = '/api';
//window里面添加的内容是全局内容,可以在任意script标签内部使用
window.BASE_URL = BASE_URL;
//3.createApp(App)创建一个vue实例
const app = createApp(App)
//6.在VUE实例中也要添加全局内容,BASE_URL才可以在template标签内部使用
app.config.globalProperties.BASE_URL = BASE_URL;
3.3 部署javaserver后端服务器
3.3.1 导入jar包到后端服务器
- 将 jar 包从compile远程传输到javaserver服务器
[root@compile ~]# hostname
compile
[root@compile ~]# ping 192.168.0.9 这是javaserver服务器的私有地址
PING 192.168.0.9 (192.168.0.9) 56(84) bytes of data.
64 bytes from 192.168.0.9: icmp_seq=1 ttl=64 time=0.207 ms
64 bytes from 192.168.0.9: icmp_seq=2 ttl=64 time=0.222 ms
^C
[root@compile ~]# cd /root/hello
[root@compile hello]# ls target
classes generated-sources hello-0.0.1-SNAPSHOT.jar hello-0.0.1-SNAPSHOT.jar.original maven-archiver maven-status
[root@compile hello]# scp target/hello-0.0.1-SNAPSHOT.jar root@192.168.0.9:/root/
输入yes 输入自己云主机的密码 忽略警告
3.3.2 启动 jar 包
- 在javaserver主机启动 jar 包
[root@javaserver ~]# dnf -y install bash-completion 安装tab键(退出重新连接生效)
[root@javaserver ~]# mkdir /img 创建图片存储路径
[root@javaserver ~]# dnf -y install java-1.8.0-openjdk 安装Java运行环境
[root@javaserver ~]# mkdir -p /opt/hello/api 创建jar包存放目录
[root@javaserver ~]# mkdir -p /opt/hello/log 创建日志目录
[root@javaserver ~]# chmod 777 /opt/hello/api/ 授予权限 读 写 执行
[root@javaserver ~]# chmod 777 /opt/hello/log/ 授予权限
[root@javaserver ~]# cp ivos-0.0.1-SNAPSHOT.jar /opt/ivos/api/
[root@javaserver ~]# cd /opt/ivos/api/
[root@javaserver api]# ls
ivos-0.0.1-SNAPSHOT.jar
[root@javaserver api]# nohup java -jar ivos-0.0.1-SNAPSHOT.jar &> ivos.log &
[root@javaserver api]# ss -nutlp | grep java
nohup: 允许命令在用户退出终端后继续运行
java -jar ivos-0.0.1-SNAPSHOT.jar: 使用 Java 运行一个 JAR 文件
&>: 将标准输出(stdout)和标准错误输出(stderr)重定向到同一个文件
ivos.log: 指定输出的日志文件名
&: 将命令放入后台运行
3.4 部署 helloproxy 代理服务器
3.4.1 返回complie服务器准备前端环境
返回complie服务器!!!
- 上传资料并安装node
[root@compile ~]# rz 上传node-v14.10.0-linux-x64.tar.gz
[root@compile ~]# ls
carfb.tar.gz hello hello-web node-v14.10.0-linux-x64.tar.gz
[root@compile ~]# tar -xf node-v14.10.0-linux-x64.tar.gz 安装node
[root@compile ~]# mv node-v14.10.0-linux-x64 /usr/local/node 重命名
[root@compile ~]# ls /usr/local/node
bin CHANGELOG.md include lib LICENSE README.md share
[root@compile ~]# ls /usr/local/node/bin
node npm npx
- 修改环境变量
[root@compile ~]# cd /root/hello-web
[root@compile hello-web]# npm -v
[root@compile hello-web]# node -v
上面这两句查不到版本号是因为没有配置node的环境变量,所以需要在下方的bashrc文件中进行配置
[root@compile ~]# vim /etc/bashrc
…前面省略1万字,在命令模式下按 G ,在这个文件的最后加这两句代码
定义Node.js安装路径,并将Node.js的可执行文件路径添加到系统的搜索路径中
export NODE_HOME="/usr/local/node/"
export PATH=${NODE_HOME}/bin/:$PATH
[root@compile ~]# source /etc/bashrc 刷新此配置文件
[root@compile hello-web]# npm -v
6.14.8
[root@compile hello-web]# node -v
v14.10.0
${NODE_HOME}/bin/ 代表了Node的bin目录,配置环境变量就需要把node的bin目录设置给PATH
这样将可执行文件路径添加到系统的搜索路径PATH中,系统在执行命令时就可以找到并执行 node 和 npm 等 Node.js 相关的命令
:$PATH 的作用是确保在添加新路径的同时,保留现有的 PATH 环境变量中的所有路径,避免覆盖现有的配置
- 设置前端仓库并构建项目
[root@compile ~]# cd hello-web 进入hello前端工程
[root@compile hello-web]# npm config set registry "https://registry.npmmirror.com/" 设置仓库
[root@compile hello-web]# npm install 下载node_moudules
[root@compile hello-web]# npm config list 查看仓库配置
[root@compile hello-web]# npm run build 构建前端项目,生成生产环境可用的代码,此处会生成一个存放所有前端资源的dist文件夹
[root@compile hello-web]# ls dist 可以看看最终生成的dist文件夹里有什么
css favicon.ico imgs index.html js 智慧车辆效果图 我们前端项目的HTML CSS JS 图片,注意:Vue是一个单页面工程!
3.4.2 返回Nginx服务器设置动静分离
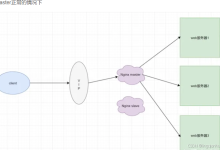
静态页面由nginx直接处理,动态页面由192.168.0.9的javaserver来处理
- 安装tab键补全
[root@ivosproxy ~]# dnf -y install bash-completion 安装tab键(退出重新连接生效)
- 安装部署Nginx
[root@helloproxy ~]# dnf -y install nginx
[root@helloproxy ~]# vim /etc/nginx/nginx.conf
…此处省略1万字…
42 root /usr/share/nginx/html/dist;
…此处省略1万字…
47 location / {
48 try_files $uri $uri/ /index.html;
49 }
50
51 location /api/ {
52 proxy_pass http://192.168.0.9:8080/;
53 }
…此处省略1万字…
- 启动Nginx服务
[root@helloproxy ~]# systemctl start nginx 启动服务
[root@helloproxy ~]# systemctl enable nginx 将服务设置为开机自启
[root@helloproxy ~]# ss -nutlp | grep :80 查看端口号
3.4.3 返回compile服务器传输前端内容
返回compile服务器!!!
-
将compile编译好的前端内容上传至helloproxy代理主机
[root@compile hello-web]# cd
[root@compile hello-web]# hostname
compile
[root@compile ~]# ls
carfb.tar.gz hello hello-web
[root@compile ~]# cd hello-web
[root@compile hello-web]# ls
babel.config.js dist jsconfig.json node_modules package.json package-lock.json public README.md src vue.config.js
[root@compile hello-web]# ls dist
css favicon.ico imgs index.html js 智慧车辆效果图
[root@compile hello-web]# scp -r dist/ root@192.168.0.8:/usr/share/nginx/html
yes
3.5 访问测试
-
访问http://proxy代理服务器的公网IP地址/
-
注意:database与javaserver是不对外的,用户通过代理服务器来访问项目
别人眼里的 0 和 1,是我们笔下的万千可能 —— 每一行代码都在搭建通往理想的阶梯,每一次调试都是在为突破扫清障碍,慢慢来,你写的每一个字符,终将拼凑出想要的未来。
创作不易加个关注呀!!!