文章目录
- 一、requests模块(用于发送请求)
-
- 1、环境配置
-
- 1. 下载reqeusts/pytest模块
- 2. requests模块的第一个接口测试
- 2、requests模块说明
-
- 简介
- API使用
-
- 示例1
- 示例2
- 二、pytest(用于组织和管理用例)
-
- 常见命令
- pytest.ini
- 三、前后置
- 四、参数化(mark.parametrize)
- 五、函数上下文管理(fixture)
-
- fixture基本使用
- yield与fixture结合
- fixture的参数
- 与conftest.py文件配合
- 六、yml与JSON Schema
-
- yml
- JSON Schema
-
- 数据类型
- 字符串特殊校验
- 数组约束
- 对象约束
- 必需属性
- 依赖关系
- 代码示例
- 七、日志模块
-
- logging
- logger
- FileHandel
- 八、Allure
-
- 安装
- 使用
一、requests模块(用于发送请求)
1、环境配置
1. 下载reqeusts/pytest模块
这个模块可以发送请求到指定接口,并且可以配置请求中的参数/解析响应值,进而实现接口自动化。
控制台输入下面的命令:
pip install requests==2.31.0
pip install pytest==8.3.2
2. requests模块的第一个接口测试
我们通过代码的方式,判断百度网址是否运行正常:
import requests
def test1():
request=requests.request(method="GET", url="http://www.baidu.com")
assert request.status_code==200
print(request.text)
执行结果通过: 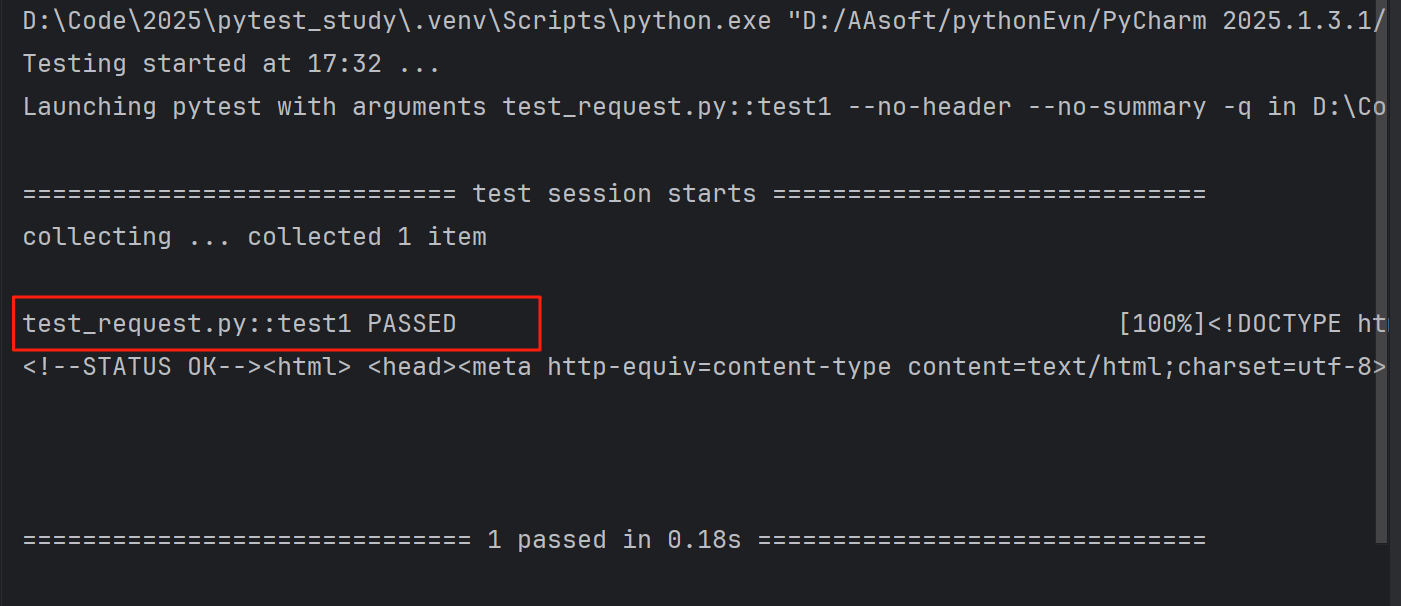
2、requests模块说明
简介
requests库是一个非常流行的HTTP客户端库。它可以发送http请求给到指定url,并且返回一个Response对象,这个对象包含对应url返回的所有信息
API使用
requests模块常用的请求方法:
# 发起get请求
def get(url, params=None, **kwargs):
pass # 函数体省略
# 发起post请求
def post(url, data=None, json=None, **kwargs):
pass # 函数体省略
# 支持不同请求方式,method: 指定请求方法,(底层实际就是调用上述的原子方法)
# 支持 `get`, `OPTIONS`, `HEAD`, `post`, `PUT`, `PATCH`, or `DELETE`
def request(method, url, **kwargs):
pass # 函数体省略
通过request获取请求后可以得到一个Response对象,对象中返回的信息如下:
| r.status_code | 响应状态码 |
| r.content | 字节方式的响应体,会自动解码gzip和deflate压缩 |
| r.headers | 以字典对象存储服务器响应头,若键不存在则返回None |
| r.json() | Requests中内置的JSON解析方法,将响应体解析为JSON格式 |
| r.url | 获取实际请求的URL |
| r.encoding | 编码格式,根据响应头部的字符编码确定 |
| r.cookies | 获取服务器设置的cookies |
| r.raw | 返回原始响应体,不进行任何处理 |
| r.text | 字符串方式的响应体,会自动根据响应头部的字符编码进行解码 |
| r.raise_for_status() | 失败请求(非200响应)抛出异常 |
示例1
import requests
url = "http://localhost:8090/blog/getBlogDetail"
# 定义查询参数
params = {
"blogId": 9773
}
# 定义请求头信息
header = {
"user_token_header": "eyJhbGciOiJIUzI1NiJ9.eyJpZCI6MSwidXNlcm5hbWUiOiJ6aGFuZ3NhbiIsImV4cCI6MTczNTU1ODk2Mn0.72oh-gQ-5E6_aICLsjotWL4ZHmgy0jF1794JDE-uUkg",
"x-requested-with": "XMLHttpRequest"
}
r = requests.post(url=url, params=params, headers=header)
print(r.json())
示例2
import requests
url = "http://localhost:8090/user/login"
# 定义要发送的数据
data = {
"username": "dd",
"password": "111"
}
r = requests.post(url=url, data=data)
print(r.json())
二、pytest(用于组织和管理用例)
常见命令
使用下面的命令,可以按照我们指定的方式,获取到被执行测试的用例结果:
| pytest | 在当前目录及其子目录中搜索并进行测试。 | |
| pytest -v | 增加输出的详细程度。 | |
| pytest -s | 显示测试中的 print 语句。 | |
| pytest test_module.py | 运行指定的测试模块。 | |
| pytest test_dir/ | 运行指定目录下的所有测试。 | |
| pytest -k <keyword> | 只运行测试名包含指定关键字的测试。 | |
| pytest -m <marker> | 只运行标记为指定标记的测试。 | |
| pytest -q | 减少输出的详细程度。 |
pytest.ini
我们安装完pytest后,如果项目中的文件按照下面的命名规范,pytest就会认为它们是一个的测试用例:
| 测试文件 (文件名) | 以 test_ 开头 或 以 _test.py 结尾 |
| 测试函数 (函数名) | 以 test_ 开头 |
| 测试类 (类名) | 以 Test 开头 (且无 __init__ 方法) |
| 测试方法 (类中的方法名) | 以 test_ 开头 |
例如: 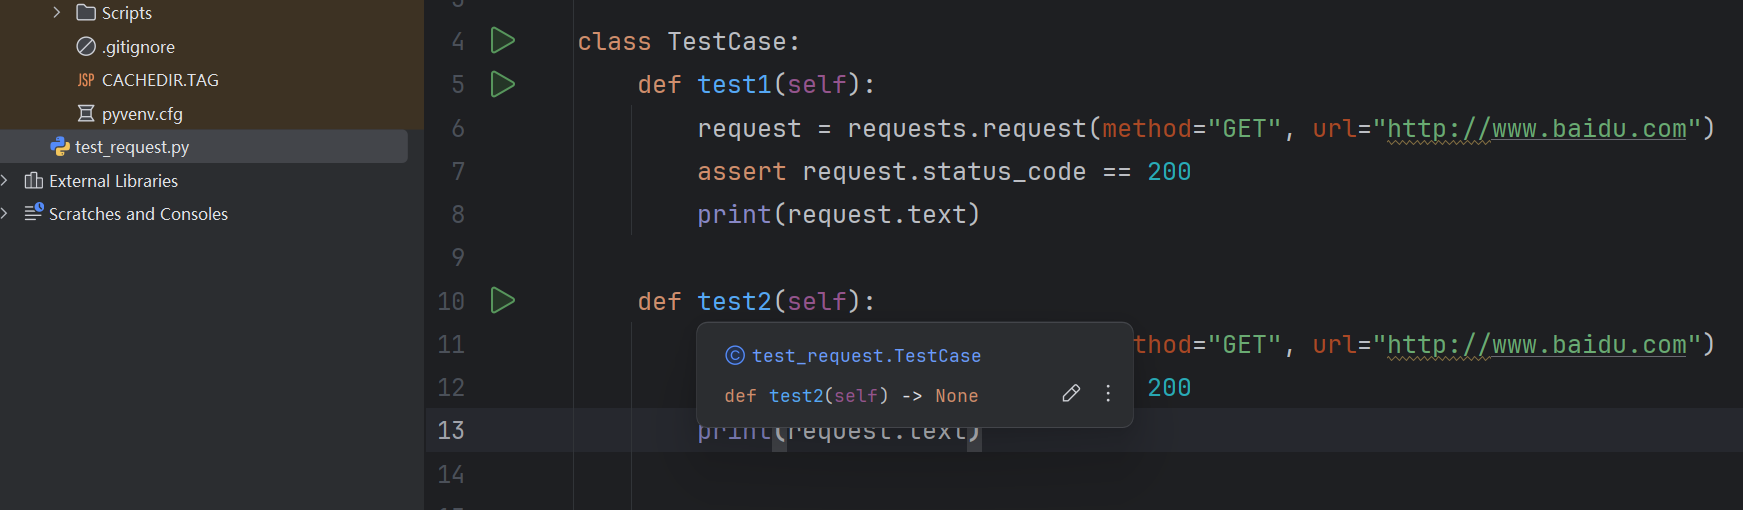
我们使用命令行,运行pytest命令,test1和test2就会被pytest执行: 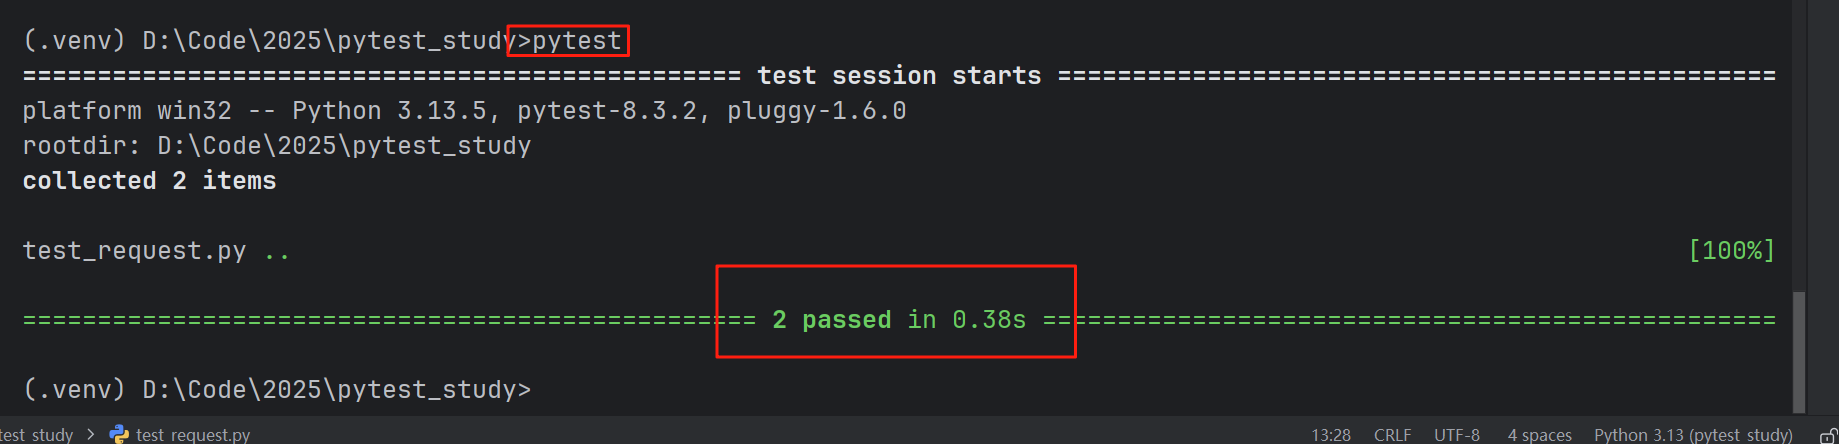
以上是默认的命名规范,我们可以通过pytest.ini配置文件进行自定义的命名规范,让pytest按章我们的想法去筛选需要测试的文件、类、方法: 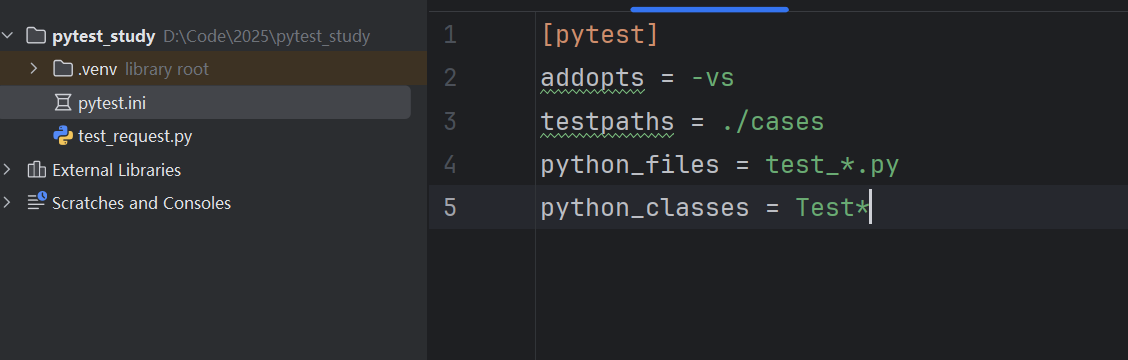
| addopts | -vs | 设置默认的命令行参数。 |
| testpaths | ./cases | 指定执行测试的目录。 |
| python_files | test_*.py | 自定义测试文件的匹配规则。 |
| python_classes | Test* | 自定义测试类的匹配规则。 |
三、前后置
pytest框架提供了三种前后置方法:
演示(前置方法和函数必须在类中定义才会生效):
import pytest
class Test:
def setup_method(self):
print("方法初始化")
def teardown_method(self):
print("方法关闭资源")
def setup_class(self):
print("类初始化")
def teardown_class(self):
print("类关闭资源")
def test1(self):
print("test1")
def test2(self):
print("test2")
四、参数化(mark.parametrize)
看下面这个测试函数:
def test3(self, a, b):
print("test3")
print(a)
print(b)
如果a和b需要输入多个用例作为参数测试多组数据怎么办? 这时候我们可以通过pytest的注解,手动定义多组参数:
@pytest.mark.parametrize("a,b",[(1,2),(3,4)])
def test3(self, a, b):
print("test3")
print(a)
print(b)
此方法执行了两次: 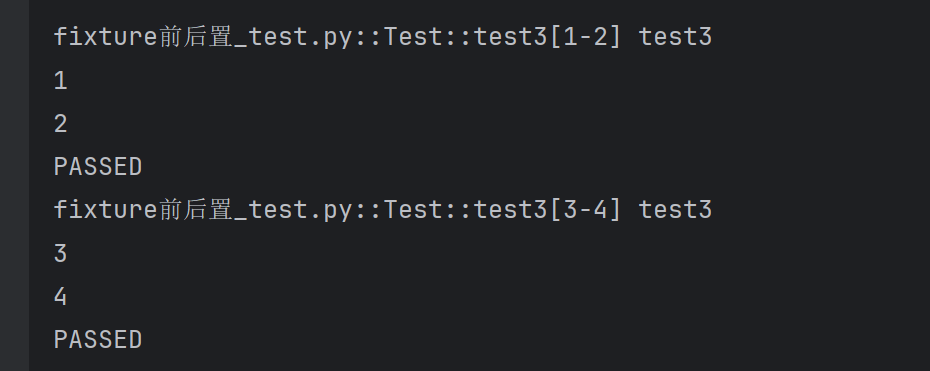
五、函数上下文管理(fixture)
fixture基本使用
被@pytest.fixture修饰的方法可以被其他测试方法当作参数使用(被修饰方法就是参数名):
@pytest.fixture
def fixture1(self):
print("fixture1——")
return "fd"
def test4(self,fixture1):
print("fixture1返回的参数",fixture1)
print("test4——")
@pytest.fixture的特性是如果test4方法把fixture1当作参数(方法签名中声明),那么方法执行前默认调用一次fixture1方法,并且test4方法可以使用fixture1方法的返回值
此外@pytest.fixture修饰的方法可以嵌套使用:
@pytest.fixture
def fixture1(self):
print("调用f1")
return "返回f1"
@pytest.fixture
def fixture2(self,fixture1):
print("调用f2")
return "返回f2"
@pytest.fixture
def fixture3(self,fixture2):
print("调用f3")
return "返回f3"
def test5(self,fixture3):
print("fixture3——",fixture3)
yield与fixture结合
yield关键字在python中常见的用法有三种: 1.节省内存的生成器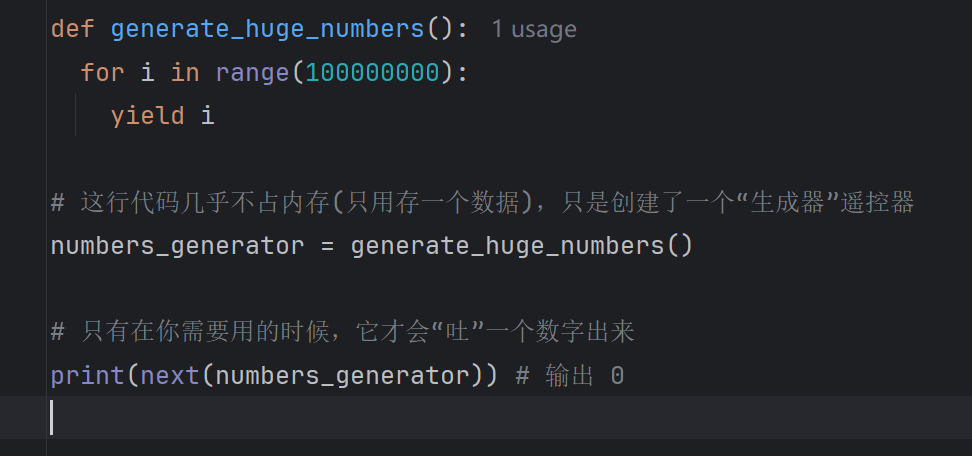 2. 异步编程 3. 配合@pytest.fixture实现前后置(重点)
fixture+yield可以灵活的进行前后置操作:
@pytest.fixture
def fixture4(self):
with open("haha.jpg","w") as f:
print("打开资源")
yield f
print("文件关闭")
def test6(self,fixture4):
print("文件对象:",fixture4)
fixture的参数
fixture可以不传任何参数,如上文演示便是。也可以传递参数,让测试用例的执行更加灵活
pytest.fixture(scope='', params='', autouse='', ids='', name='')
- scope: 限定fixture方法的作用范围
- funtion(默认):测试方法声明了fixture就会调用一次
- class: 同一个测试类中,只会调用一次
- module:同一个模块(一个.py文件)调用一次
- session:执行一次pytest命令调用一次
- autouse: 默认是False,如果设置True,每个测试方法都会调用一次该fixture方法
- params: 参数用于参数化fixture,支持列表传入。每个参数值都会使fixture执行一次,类似于for循环
- ids: 参数与 params 配合使用,为每个参数化实例指定可读的标识符(给参数取名字)
- name: 参数用于为fixture显式设置一个名称。如果使用了 name ,则在测试函数中需要使用这个 名称来引用 fixture (给fixture取名字)
与conftest.py文件配合
conftest.py是一个特殊的文件,我们在这里面可以配置fixture函数 当我们配置了一个fixture在conftest.py文件中:
import pytest
@pytest.fixture(scope="function")
def open_close_file():
with open(".\\哈哈.txt","w+") as f:
print("打开文件")
print()
print(f.read())
yield f
print()
print("关闭文件")
配置完后,别的模块就可以调用这个fixture: 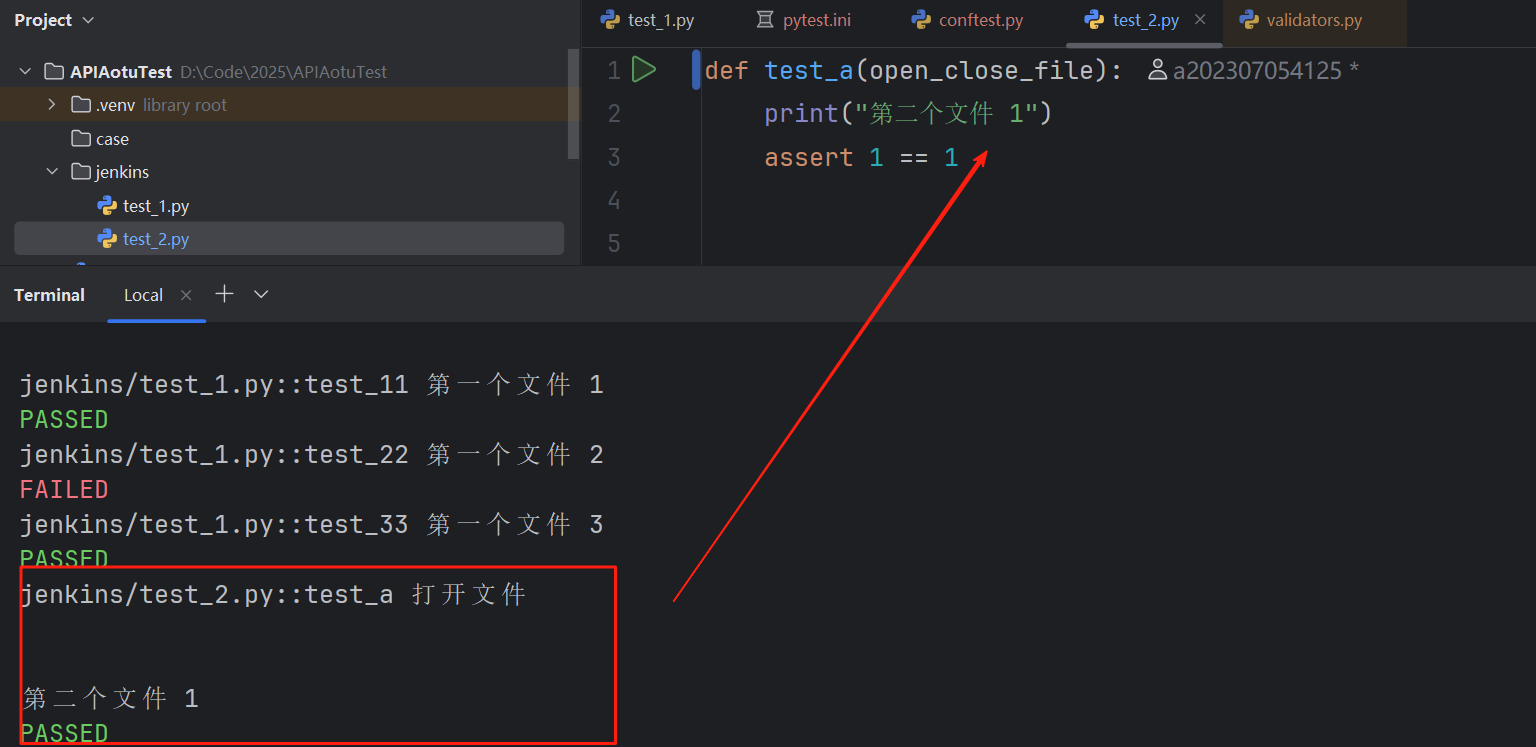
六、yml与JSON Schema
yml
简述: 在实际项目中yml文件用的应该是比较多的,它可以进行文件的配置,并且阅读比较直观。 在测试过程中,我们需要根据不同的测试需求去更改yml配置文件,python提供了yaml库来通过代码来进行自动配置。
用法: 使用前需要安装:
pip install pip install PyYAML==6.0.1
import yaml
# 追加写
def write_yml_a(filename,data):
with open(filename,mode='a+',encoding="utf-8") as f:
yaml.dump(data,f)
# 安全读
def read_yml(filename,key):
with open(filename,mode='r',encoding="utf-8") as f:
data=yaml.safe_load(f)
return data[key]
#示例
def test():
data=read_yml("test.yml","ss")
print(data)
print(data["arr"]['a'])
JSON Schema
JSON Schema用于校验/定义JSON数据格式。定义一个Schema类型的字符串,就可以知道一个JSON数据它的属性、类型、必传属性等等信息。
数据类型
好的,这是从图片内容转换成的 Markdown 表格。
| string | 字符串类型,用于文本数据。 |
| number | 数字类型,用于表示浮点数。 |
| integer | 整数类型,用于表示整数。 |
| boolean | 布尔类型,值为 true 或 false。 |
| object | 对象类型,用于嵌套的 JSON 对象。 |
| array | 数组类型,用于列表或集合。 |
| null | 空值类型。 |
示例
{
"type": "object",
"properties": {
"name": { "type": "string" },
"age": { "type": "integer" }
}
}
字符串特殊校验
pattern: 使用正则表达式来验证字符串是否符合特定的模式。
{
"type": "object",
"properties": {
"email": {
"type": "string"
},
"username": {
"type": "string",
"pattern": "\\\\S+"
}
}
}
数组约束
- minItems 和 maxItems:指定数组的最小和最大长度。
- uniqueItems:确保数组中的元素是唯一的。
- items:定义数组中每个元素的类型和约束。
代码块:
{
"type": "object",
"properties": {
"tags": {
"type": "array",
"items": { "type": "string" },
"minItems": 1,
"uniqueItems": true
}
}
}
对象约束
- minProperties 和 maxProperties:指定对象的最小和最大属性数量。
- additionalProperties:控制是否允许对象中存在未在 properties 中定义的额外属性,默认为True。
代码块:
{
"type": "object",
"properties": {
"name": { "type": "string" }
},
"minProperties": 1,
"additionalProperties": false
}
必需属性
通过 required 关键字,JSON Schema 可以指定哪些属性是必需的。如果 JSON 实例中缺少这些必需属性,验证将失败。
示例:
代码块:
{
"type": "object",
"properties": {
"name": { "type": "string" },
"email": { "type": "string" }
},
"required": ["name", "email"]
}
依赖关系
dependentRequired 可以定义属性之间的依赖关系。例如,如果某个属性存在,则必须存在另一个属性。
示例:
代码块:
{
"type": "object",
"properties": {
"creditCard": { "type": "string" },
"billingAddress": { "type": "string" }
},
"dependentRequired": {
"creditCard": ["billingAddress"]
}
}
代码示例
from jsonschema.validators import validate
if __name__ == "__main__":
json = {
"product_id": "451",
"product_name": "Wireless Mouse",
"price": 29.99,
"in_stock": True
}
schema = {
"$schema": "http://json-schema.org/draft-07/schema#",
"title": "Simple Product",
"description": "A basic schema for a product",
"type": "object",
"properties": {
"product_id": {
"description": "The unique identifier for the product.",
"type": "integer"
},
"product_name": {
"description": "The name of the product.",
"type": "string"
},
"price": {
"description": "The price of the product.",
"type": "number",
"minimum": 0
},
"in_stock": {
"description": "Indicates if the product is currently in stock.",
"type": "boolean"
}
},
"required": [
"product_id",
"product_name",
"price"
]
}
# 校验失败会抛出jsonschema.exceptions.ValidationError异常
validate(json, schema)
运行后报错: 
七、日志模块
logging 是 Python 标准库中的一个模块,它提供了灵活的日志记录功能。
logging
import logging
logging.basicConfig(level=logging.ERROR)
logger=logging.getLogger(__name__)
logger
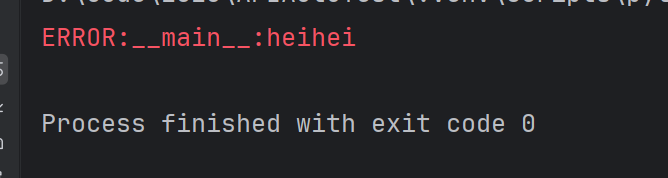
logger可以指定日志输出的级别并且输入日志
import logging
import sys
logging.basicConfig(level=logging.ERROR)
if __name__ == "__main__":
logger=logging.getLogger(__name__)
logger.setLevel(logging.ERROR)
logger.error("heihei")
FileHandel
handel是专门处理日志的输出位置和输出形式的。
import logging
logging.basicConfig(level=logging.ERROR)
if __name__ == "__main__":
logger=logging.getLogger(__name__)
# 指定输出到test.log,没有则创建
handle=logging.FileHandler(filename="test.log",encoding="utf-8")
# 指定日志输出格式
handle.setFormatter(logging.Formatter("%(asctime)s – %(name)s – %(levelname)s – %(message)s"))
logger.setLevel(logging.ERROR)
# handle可以添加多个
logger.addHandler(handle)
logger.error("heihei")
八、Allure
allure是一个流行的用于生成可视化测试报告的开源工具
安装
下载allure-pytest包
pip install allure-pytest==2.13.5
把allure安装的bin路径设置到环境变量
在控制台输入 allure –version,如果出现版本信息就OK了
如果还是不行,把allure的环境变量上移一点
使用
1、这个命令会自动执行pytest 然后生成报告到指定文件夹,如果没有则创建(生成的报告都是json文件)
pytest –alluredir=results_dir
2、直接在浏览器打开可视化的html文件(不会保存)
allure serve .\\allure-results\\
此外可以指定端口号
allure serve –port 8787 .\\allure-results\\
3、 生成json元数据放到\\allure-results\\ 中,然后生成allure-report用于保存可视化的html文件 并且清理之前在allure-report中的遗留数据
allure generate .\\allure-results\\ -o .\\allure-report –clean