QML anchors(锚定)详解(从入门到精通,附实战示例)
- 一、QML anchors详解
-
- 1、核心概念
- 2、常用锚定属性
- 3、重要注意事项
- 4、示例
- 二、代码示例
-
- 1、源码分享
- 2、运行展示
- 3、示例说明
一、QML anchors详解
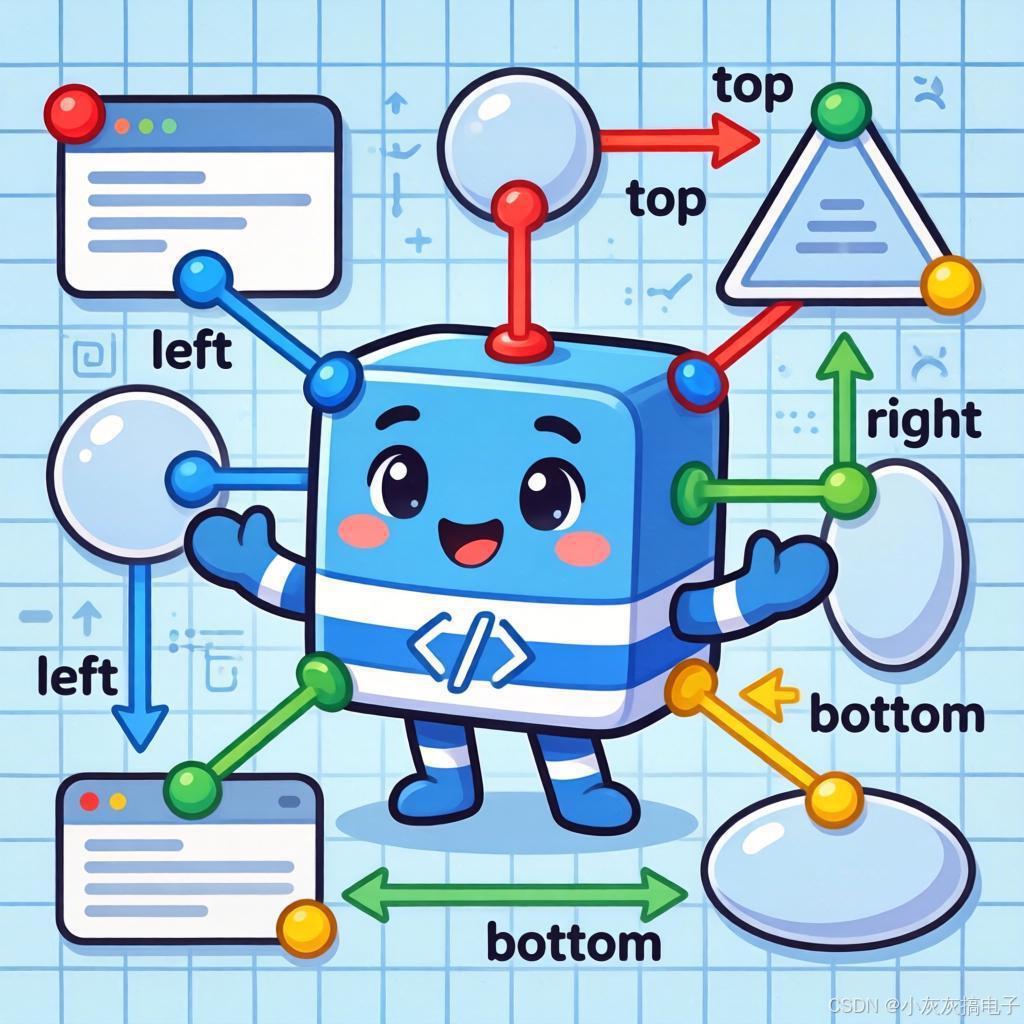
anchors 是 QML 中一个强大且核心的属性,它用于声明式地定位和调整 Item 及其派生类型(如 Rectangle、Image、Text 等)的大小。它允许你相对于另一个 Item(通常是父元素或同级元素)的边界或中心点来定义当前元素的位置和尺寸。
1、核心概念
锚点 (AnchorLine):
- anchors 提供了几个属性来表示元素的边缘或中心点,称为锚线。
- 可用的锚线包括:
- top: 元素的上边界
- bottom: 元素的下边界
- left: 元素的左边界
- right: 元素的右边界
- horizontalCenter: 元素的水平中心线
- verticalCenter: 元素的垂直中心线
- baseline: 文本元素的基线(主要用于 Text)
基准项 (Item):
- 锚定操作需要指定一个参照物,即相对于哪个元素的锚线进行定位。这个参照物称为基准项。
- 基准项通常通过 anchors 的属性(如 anchors.left)来隐式指定,或者显式地使用 anchors.leftMargin 等属性的目标项。
- 默认情况下,如果没有明确指定基准项,元素会锚定到其父元素 (parent) 的相应锚线。
- 你可以锚定到:
- 父元素 (parent)
- 同级元素(同一父元素下的其他子元素)
- 父元素链上的其他祖先元素(需要明确引用)
边距 (Margin):
- 在锚定两个锚线时,通常需要在它们之间留出空间。这就是边距的作用。
- anchors 提供了几种方式来设置边距:
- margins: 同时设置上、下、左、右四个方向的边距(如果所有边都锚定了)。
- topMargin, bottomMargin, leftMargin, rightMargin: 分别设置特定边的边距。
- horizontalCenterOffset, verticalCenterOffset: 当锚定到中心线时,设置相对于中心点的偏移量(正值表示向右/下偏移,负值表示向左/上偏移)。
- baselineOffset: 锚定到基线时的偏移量。
- Qt 6 引入了 insets 属性组 (anchors.topInset, anchors.leftInset 等),功能与 margins 类似,但语义上更偏向于元素“内边距”的概念。
2、常用锚定属性
-
锚定到边缘:
anchors.left: parent.left // 左边缘对齐父元素左边缘
anchors.right: parent.right // 右边缘对齐父元素右边缘
anchors.top: parent.top // 上边缘对齐父元素上边缘
anchors.bottom: parent.bottom // 下边缘对齐父元素下边缘可以组合使用:
anchors.left: parent.left
anchors.right: parent.right
anchors.top: parent.top
anchors.bottom: parent.bottom // 填满父元素 -
锚定到中心:
anchors.horizontalCenter: parent.horizontalCenter // 水平中心对齐
anchors.verticalCenter: parent.verticalCenter // 垂直中心对齐
anchors.centerIn: parent // 水平和垂直都居中的快捷方式 -
锚定到其他元素:
anchors.left: siblingItem.right // 左边缘锚定到同级元素siblingItem的右边缘
anchors.top: otherItem.bottom // 上边缘锚定到另一个元素otherItem的下边缘 -
快捷属性:
- anchors.fill: parent: 等价于同时设置 left, right, top, bottom 都锚定到 parent 的相应边缘,元素会填满父元素。
- anchors.centerIn: parent: 等价于同时设置 horizontalCenter 和 verticalCenter 都锚定到 parent 的中心。
-
设置边距:
anchors.margins: 10 // 所有锚定边(如果设置了)统一使用10像素边距
anchors.leftMargin: 15 // 单独设置左边缘边距为15像素
anchors.topMargin: 5 // 单独设置上边缘边距为5像素
anchors.horizontalCenterOffset: 20 // 水平中心点向右偏移20像素
3、重要注意事项
优先级:
- 显式设置的宽度 (width) 或高度 (height) 优先级高于通过锚定隐含计算的尺寸。
- 例如,如果你同时设置了 anchors.left: parent.left 和 anchors.right: parent.right,这隐含地设置了元素的宽度等于父元素宽度减去可能的边距。但是,如果你再显式设置了 width: 100,那么 width: 100 会生效,anchors.right 的设置可能会被忽略或导致冲突(取决于具体设置)。
- 类似地,显式设置的 x、y 坐标优先级高于锚定设置的位置。
组合风险:
- 避免冲突的组合。例如,同时设置 anchors.left: parent.left 和 anchors.right: parent.right 隐含设置了宽度。再设置 anchors.horizontalCenter: parent.horizontalCenter 就是冲突的,因为前两者已经固定了水平位置。Qt 会发出警告并可能只应用其中一个设置。
- 避免循环依赖。例如,元素 A 的 right 锚定到元素 B 的 left,同时元素 B 的 left 又锚定回元素 A 的 right。这会导致布局引擎无法确定最终位置。
性能考虑:
- anchors 系统在布局变化时(如父元素大小改变)会自动重新计算位置和大小,非常高效。
- 相对于使用 JavaScript 计算 x、y、width、height 并赋值,anchors 是更优的选择。
适用范围:
- anchors 属性只对 Item 及其派生类型有效。它不能用于非视觉元素(如 Timer、QtObject)。
与 Layout 的比较:
- Qt Quick 也提供了 Row, Column, Grid, Flow 等布局类型。这些布局类型内部也使用 anchors 来管理子项的位置。
- 使用 anchors 提供了最大的灵活性,你可以进行任意相对定位。而布局类型 (Layout) 提供了更高级别、更声明式的布局策略(如水平排列、垂直排列、网格),通常用于管理一组具有特定排列规则的子项。两者可以结合使用。
4、示例
import QtQuick
Rectangle {
id: root
width: 400
height: 300
color: "lightgray"
Rectangle {
id: blueRect
width: 100
height: 100
color: "blue"
anchors {
left: parent.left // 左对齐父元素左边缘
top: parent.top // 顶对齐父元素顶边缘
margins: 20 // 所有边距20像素 (实际是左20,上20)
}
}
Rectangle {
id: redRect
width: 150
height: 80
color: "red"
anchors {
top: blueRect.bottom // 顶边锚定在蓝色矩形的底边
left: parent.left // 左边锚定在父元素的左边
topMargin: 10 // 距离蓝色矩形底部10像素
leftMargin: 20 // 距离父元素左边20像素
}
}
Text {
id: centeredText
text: "Centered Text"
anchors.centerIn: parent // 文本水平和垂直居中于父元素
}
Rectangle {
id: greenRect
color: "green"
anchors {
left: blueRect.right // 左边锚定在蓝色矩形的右边
right: parent.right // 右边锚定在父元素的右边
top: parent.top // 顶边锚定在父元素的顶边
bottom: centeredText.top // 底边锚定在居中文本的顶边
leftMargin: 10 // 距离蓝色矩形10像素
rightMargin: 20 // 距离父元素右边20像素
topMargin: 20 // 距离父元素顶边20像素
bottomMargin: 10 // 距离文本10像素
}
}
}
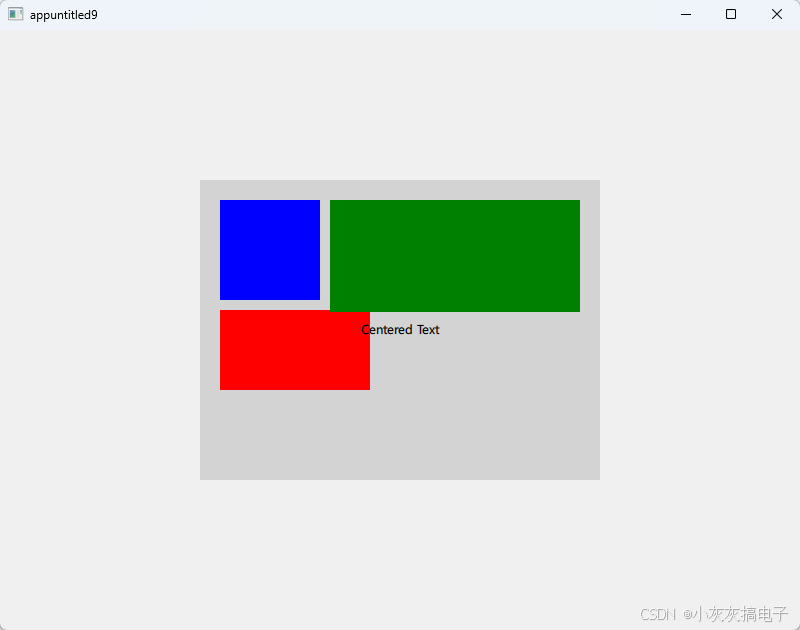
解释:
- blueRect: 固定在父元素左上角,距离左边和上边各 20 像素。
- redRect: 固定在 blueRect 下方 10 像素,距离父元素左边 20 像素。
- centeredText: 完全居中于父元素。
- greenRect: 其左边紧贴 blueRect 右边 (间隔 10 像素),右边紧贴父元素右边 (间隔 20 像素),顶边紧贴父元素顶边 (间隔 20 像素),底边紧贴 centeredText 顶边 (间隔 10 像素)。它的宽度和高度由这些锚定关系隐含决定。
二、代码示例
1、源码分享
import QtQuick
import QtQuick.Controls
ApplicationWindow {
id: mainWindow
width: 400
height: 300
visible: true
title: "Qt6 QML Anchors 示例"
Rectangle {
id: parentRect
anchors.fill: parent // 填充整个父窗口
color: "lightgray"
Rectangle {
id: topLeftRect
width: 100
height: 50
color: "red"
anchors {
top: parent.top // 顶部对齐父项顶部
left: parent.left // 左侧对齐父项左侧
topMargin: 20 // 顶部外边距
leftMargin: 20 // 左侧外边距
}
Text {
text: "左上"
anchors.centerIn: parent // 文本在矩形内居中
}
}
Rectangle {
id: centerRect
width: 120
height: 70
color: "blue"
anchors.centerIn: parent // 在父项内居中
Text {
text: "中心"
anchors.centerIn: parent
color: "white"
}
}
Rectangle {
id: bottomRightRect
width: 100
height: 50
color: "green"
anchors {
bottom: parent.bottom // 底部对齐父项底部
right: parent.right // 右侧对齐父项右侧
bottomMargin: 20
rightMargin: 20
}
Text {
text: "右下"
anchors.centerIn: parent
}
}
Button {
id: testButton
text: "测试按钮"
anchors {
horizontalCenter: parent.horizontalCenter // 水平居中于父项
bottom: centerRect.top // 底部对齐 centerRect 的顶部
bottomMargin: 10
}
}
}
}
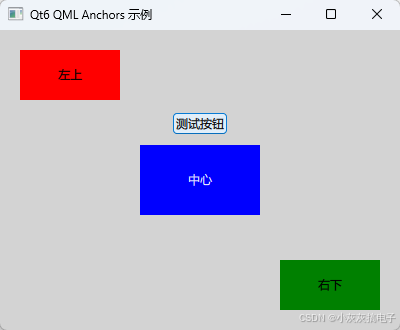
2、运行展示
3、示例说明