Rembg 简介
Rembg 是一个开源的 Python 工具库,专注于图像背景移除(Image Background Removal)。它通过预训练的深度学习模型自动分离图像中的前景(如人物、物体)与背景,生成透明背景(PNG)或指定背景的图片。
核心功能
- 背景移除:一键移除图像背景,输出透明 PNG。
- 批量处理:支持对多张图像进行批量背景移除。
- 模型选择:提供多种预训练模型(如 u2net、u2netp),平衡速度与精度。
- API 集成:可作为 Python 库直接调用,或通过命令行工具使用。
安装方法
通过 pip 安装:
pip install rembg
基本用法
Python 代码示例:
from rembg import remove
from PIL import Image
input_path = "input.jpg"
output_path = "output.png"
with open(input_path, "rb") as input_file:
with open(output_path, "wb") as output_file:
input_image = input_file.read()
output_image = remove(input_image)
output_file.write(output_image)
命令行示例:
rembg i input.jpg output.png
适用场景
- 电商产品图处理(去背景展示商品)。
- 摄影后期(人物/物体抠图)。
- 设计工作(快速生成透明素材)。
注意事项
- 处理高分辨率图像时可能消耗较多内存。
- 复杂背景(如毛发、透明物体)的精度可能受限,需手动调整。
Rembg 以轻量化和易用性著称,适合需要快速实现背景移除的场景。
安装部署(window和linux皆可以)
1、环境Python3.12.10
参考:https://blog.csdn.net/taogumo/article/details/156689009
2、依赖下载
pip install "rembg[cpu,cli]"
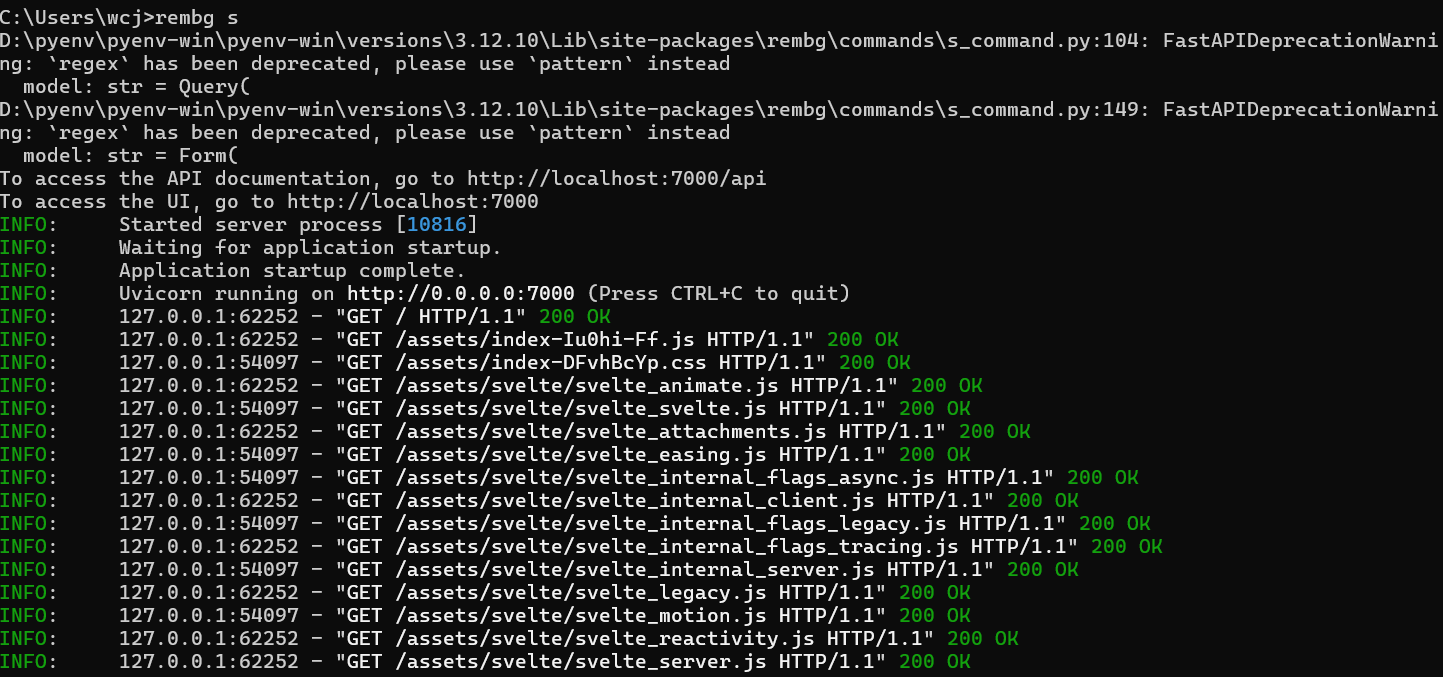
3、运行服务端进行测试
rembg s
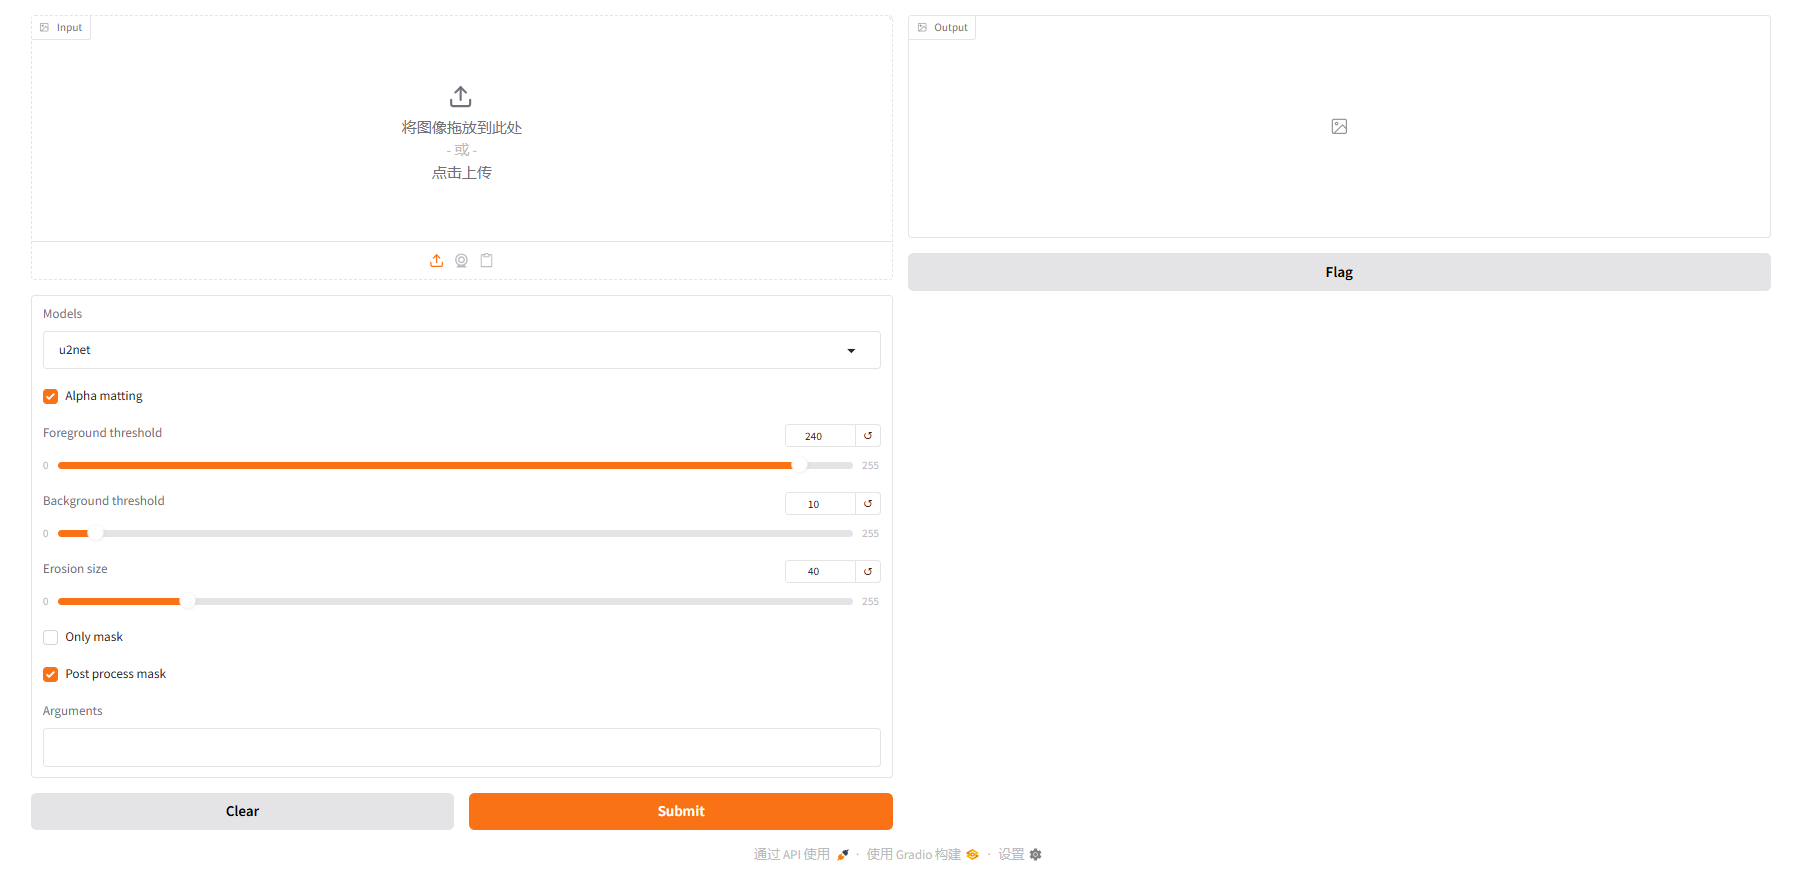
4、浏览网页
浏览器输入:http://localhost:7000/
5、代码编写
本地调用
import rembg
from PIL import Image
import datetime
import os
def remove_by_folder(folder_path):
for filename in os.listdir(folder_path):
if filename.endswith(".jpg") or filename.endswith(".png"):
image_path = os.path.join(folder_path, filename)
remove(image_path)
def remove(image_path):
# 首先加载图片
input_image = Image.open(image_path)
# 去除背景 – 现在传入的是图像对象
removed_bg_image = rembg.remove(input_image)
# 获取原文件名(不含扩展名)和扩展名
base_name = os.path.splitext(os.path.basename(image_path))[0]
extension = os.path.splitext(os.path.basename(image_path))[1]
extension = ".png"
timestamp = datetime.datetime.now().strftime("%Y%m%d%H%M%S%f")
output_filename = f"{base_name}_{timestamp}{extension}"
removed_bg_image.save(output_filename)
print(output_filename+"保存成功")
if __name__ == '__main__':
remove(r'D:\\data\\测试\\c81e728d9d4c2f6-1.jpg')
remove_by_folder(r'D:\\data\\测试')
remove_by_folder(r'D:\\data\\已选中图片_1769395541735')
https方式调用
import requests
from requests.exceptions import RequestException
# 配置项
IMG_PATH = r"C:\\Users\\wcj\\Pictures\\85a86885-4655-4a01-a533-56cc10f83c26._SL1500_.jpg"
OUTPUT_PATH = "output.png"
REMBG_API_URL = "http://localhost:7000/api/remove"
# 人像抠图核心参数(按之前推荐的最优值配置)
data = {
"model_name": "u2net", # 专门的人像分割模型,效果远好于u2net
# "return_mask": False,
# "foreground_threshold": 240, # 保留人像高光/发丝
# "background_threshold": 10, # 保留人像暗部细节
# "erosion_size": 20, # 轻微腐蚀去噪,不破坏边缘
# "post_process_mask": True # 平滑边缘,发丝更自然
}
try:
# 使用with语句安全打开文件,自动释放句柄
with open(IMG_PATH, "rb") as img_file:
files = {"file": img_file}
# 发送请求(设置超时,避免卡死)
response = requests.post(
REMBG_API_URL,
files=files,
data=data,
timeout=30 # 超时时间30秒
)
# 检查响应状态
response.raise_for_status() # 主动抛出HTTP错误(如404/500)
# 保存结果
with open(OUTPUT_PATH, "wb") as f:
f.write(response.content)
print(f"✅ 人像抠图成功!结果已保存至:{OUTPUT_PATH}")
except FileNotFoundError:
print(f"❌ 错误:找不到图片文件 {IMG_PATH},请检查路径是否正确")
except RequestException as e:
print(f"❌ 请求失败:{str(e)}")
print(" 请检查:1. rembg服务端是否启动 2. 接口地址是否正确 3. 网络是否正常")
except Exception as e:
print(f"❌ 未知错误:{str(e)}")


