YOLO26前端展示:HTML+JS实现检测结果可视化
最新 YOLO26 官方版训练与推理镜像 本镜像基于 YOLO26 官方代码库 构建,预装了完整的深度学习开发环境,集成了训练、推理及评估所需的所有依赖,开箱即用。
在完成模型推理后,如何将检测结果以更直观、可交互的方式呈现给用户?本文将带你使用纯 HTML + JavaScript 实现一个轻量级的前端页面,用于可视化 YOLO26 的目标检测结果。无需后端框架,不依赖复杂构建工具,只需几行代码即可部署查看。
1. 前端可视化需求分析
1.1 为什么需要前端展示?
虽然 YOLO26 的 detect.py 能自动生成带框的图片并保存到 runs/detect 目录下,但这些静态图像不利于:
- 多图批量浏览
- 检测信息(类别、置信度)的结构化展示
- 与用户的交互操作(如缩放、点击查看细节)
- 快速分享或嵌入网页应用
通过一个简单的 HTML 页面,我们可以把推理结果组织成“图像 + 标注数据”的形式,提升可读性和实用性。
1.2 技术选型:为何选择原生 HTML+JS?
- 零依赖:不需要 Node.js、Vue、React 等复杂生态
- 易部署:和 runs/detect 文件夹放在一起就能直接打开
- 跨平台兼容:任何浏览器均可运行
- 快速调试:修改 JS 即可见效,适合实验性项目
我们只需要:
- 一张原始图
- 一个 JSON 文件记录检测框和标签
- 一段 JS 解析并绘制标注
2. 准备检测结果数据
2.1 修改 detect.py 输出结构化数据
为了让前端能读取检测信息,我们需要让 detect.py 同时输出 JSON 格式的标注文件。
修改后的 detect.py 如下:
# -*- coding: utf-8 -*-
"""
@Auth :落花不写码
@File :detect.py
@IDE :PyCharm
@Motto :学习新思想,争做新青年
"""
from ultralytics import YOLO
import cv2
import json
import os
if __name__ == '__main__':
# 加载模型
model = YOLO(model=r'yolo26n.pt')
# 推理
results = model.predict(
source=r'./ultralytics/assets',
save=True,
show=False,
conf=0.25
)
# 存储所有结果
output_data = []
for r in results:
img_path = r.path
img_name = os.path.basename(img_path)
# 读取图像尺寸
h, w = r.orig_shape
detections = []
for box in r.boxes:
cls_id = int(box.cls[0])
label = model.names[cls_id]
conf = float(box.conf[0])
xyxy = box.xyxy[0].tolist() # [x1, y1, x2, y2]
detections.append({
"class": label,
"confidence": round(conf, 3),
"bbox": [round(x, 1) for x in xyxy]
})
output_data.append({
"image": img_name,
"width": w,
"height": h,
"detections": detections
})
# 保存为 JSON 文件
with open("runs/detect/predictions.json", "w", encoding="utf-8") as f:
json.dump(output_data, f, indent=2, ensure_ascii=False)
print(" 检测结果已保存为 runs/detect/predictions.json")
运行此脚本后,除了生成带框图像外,还会在 runs/detect/ 下创建 predictions.json,包含每张图的完整检测信息。
2.2 JSON 数据结构示例
[
{
"image": "zidane.jpg",
"width": 720,
"height": 480,
"detections": [
{
"class": "person",
"confidence": 0.998,
"bbox": [156.2, 178.3, 308.1, 402.5]
}
]
}
]
这个结构清晰明了,前端可以直接解析使用。
3. 构建前端展示页面
3.1 创建 index.html
在 runs/detect/ 目录下新建 index.html,内容如下:
<!DOCTYPE html>
<html lang="zh">
<head>
<meta charset="UTF-8" />
<title>YOLO26 检测结果可视化</title>
<style>
body {
font-family: -apple-system, BlinkMacSystemFont, 'Segoe UI', Roboto, sans-serif;
margin: 0;
padding: 20px;
background: #f5f5f5;
}
.container {
max-width: 1200px;
margin: 0 auto;
}
h1 {
text-align: center;
color: #333;
}
.gallery {
display: grid;
grid-template-columns: repeat(auto-fill, minmax(300px, 1fr));
gap: 20px;
margin-top: 20px;
}
.item {
border: 1px solid #ddd;
border-radius: 8px;
overflow: hidden;
background: white;
box-shadow: 0 2px 8px rgba(0,0,0,0.1);
}
.item img {
width: 100%;
height: 200px;
object-fit: cover;
cursor: pointer;
}
.info {
padding: 12px;
}
.info h3 {
margin: 0 0 8px 0;
font-size: 16px;
}
.labels {
font-size: 14px;
color: #555;
line-height: 1.5;
}
.label-item {
display: inline-block;
background: #e1f5fe;
color: #01579b;
padding: 2px 6px;
border-radius: 4px;
margin-right: 4px;
margin-bottom: 4px;
font-weight: 500;
}
.modal {
display: none;
position: fixed;
top: 0; left: 0;
width: 100%; height: 100%;
background: rgba(0,0,0,0.9);
z-index: 100;
justify-content: center;
align-items: center;
}
.modal-content {
position: relative;
max-width: 90vw;
max-height: 90vh;
}
.modal img {
max-width: 100%;
max-height: 80vh;
border: 2px solid white;
}
.close {
position: absolute;
top: 10px; right: 20px;
color: white;
font-size: 30px;
font-weight: bold;
cursor: pointer;
}
</style>
</head>
<body>
<div class="container">
<h1>📷 YOLO26 检测结果可视化</h1>
<div class="gallery" id="gallery"></div>
</div>
<!– 图片放大模态框 –>
<div class="modal" id="modal">
<div class="modal-content">
<span class="close" onclick="document.getElementById('modal').style.display='none'">×</span>
<img id="modal-img" src="" alt="放大图" />
</div>
</div>
<script>
// 加载 JSON 数据
fetch('predictions.json')
.then(res => res.json())
.then(data => {
const gallery = document.getElementById('gallery');
data.forEach(item => {
// 创建缩略图项
const div = document.createElement('div');
div.className = 'item';
const img = document.createElement('img');
img.src = item.image;
img.alt = item.image;
img.onclick = () => {
document.getElementById('modal-img').src = item.image;
document.getElementById('modal').style.display = 'flex';
};
const info = document.createElement('div');
info.className = 'info';
const title = document.createElement('h3');
title.textContent = item.image;
const labels = document.createElement('div');
labels.className = 'labels';
if (item.detections.length === 0) {
const span = document.createElement('span');
span.textContent = '未检测到目标';
span.style.color = '#999';
labels.appendChild(span);
} else {
item.detections.forEach(det => {
const tag = document.createElement('span');
tag.className = 'label-item';
tag.textContent = `${det.class} (${det.confidence})`;
labels.appendChild(tag);
});
}
info.appendChild(title);
info.appendChild(labels);
div.appendChild(img);
div.appendChild(info);
gallery.appendChild(div);
});
})
.catch(err => {
console.error("加载 predictions.json 失败:", err);
alert("无法加载检测结果,请检查 predictions.json 是否存在");
});
</script>
</body>
</html>
3.2 功能说明
| 缩略图网格 | 自动加载所有检测图片,按网格排列 |
| 类别标签展示 | 显示每个图像中检测出的对象及其置信度 |
| 点击放大 | 点击图片可在模态框中查看高清大图 |
| 响应式布局 | 支持手机、平板、桌面多端查看 |
| 错误提示 | 若 JSON 加载失败会弹窗提醒 |
4. 使用方法与效果演示
4.1 部署步骤
注意:如果双击打不开,可能是浏览器安全策略限制。建议使用 Python 快速启动本地服务器:
cd runs/detect
python -m http.server 8000
然后访问 http://localhost:8000
4.2 实际效果预览
假设你有以下几张测试图:
- zidane.jpg → 检测到 2 个 person
- bus.jpg → 检测到 bus, person, tie 等多个对象
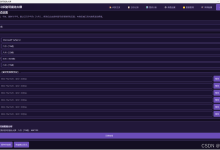
前端页面将显示:
- 每张图的缩略图卡片
- 下方列出所有检测类别和置信度,例如:person (0.998)、tie (0.876)
- 点击可查看原图
🖼 页面简洁美观,适合汇报、演示、内部评审等场景。
5. 扩展功能建议
5.1 添加边界框高亮显示(进阶)
可以在点击图片时,在大图上叠加绘制 bounding box,增强可视化效果。
只需在模态框中加入 <canvas> 层,并根据 bbox 坐标画矩形和文字。
5.2 支持视频帧序列展示
如果你对视频做了逐帧检测,可以把帧命名成 frame_0001.jpg, frame_0002.jpg 并按顺序展示,模拟播放效果。
5.3 增加筛选功能
添加搜索框,支持按类别过滤图片:
<input type="text" placeholder="搜索类别…" oninput="filterImages(this.value)">
配合 JS 实现动态隐藏/显示。
5.4 导出报告功能
增加按钮,一键导出当前所有检测结果为 PDF 或 Markdown 表格,便于归档。
6. 总结
6. 总结
本文介绍了一种极简高效的 YOLO26 检测结果前端可视化方案:
- 无需后端:仅用 HTML + JS 实现完整功能
- 自动集成:通过修改 detect.py 自动生成 JSON 数据
- 开箱即用:复制文件即可部署,适合本地调试和成果展示
- 易于扩展:支持添加标注高亮、筛选、导出等功能
这套方案特别适用于:
- 学术研究中的结果展示
- 项目中期/终期汇报
- 内部测试反馈收集
- 快速验证模型表现
比起手动截图贴 PPT,这种方式更加系统化、自动化,也更具专业感。
获取更多AI镜像
想探索更多AI镜像和应用场景?访问 CSDN星图镜像广场,提供丰富的预置镜像,覆盖大模型推理、图像生成、视频生成、模型微调等多个领域,支持一键部署。