GitNexus
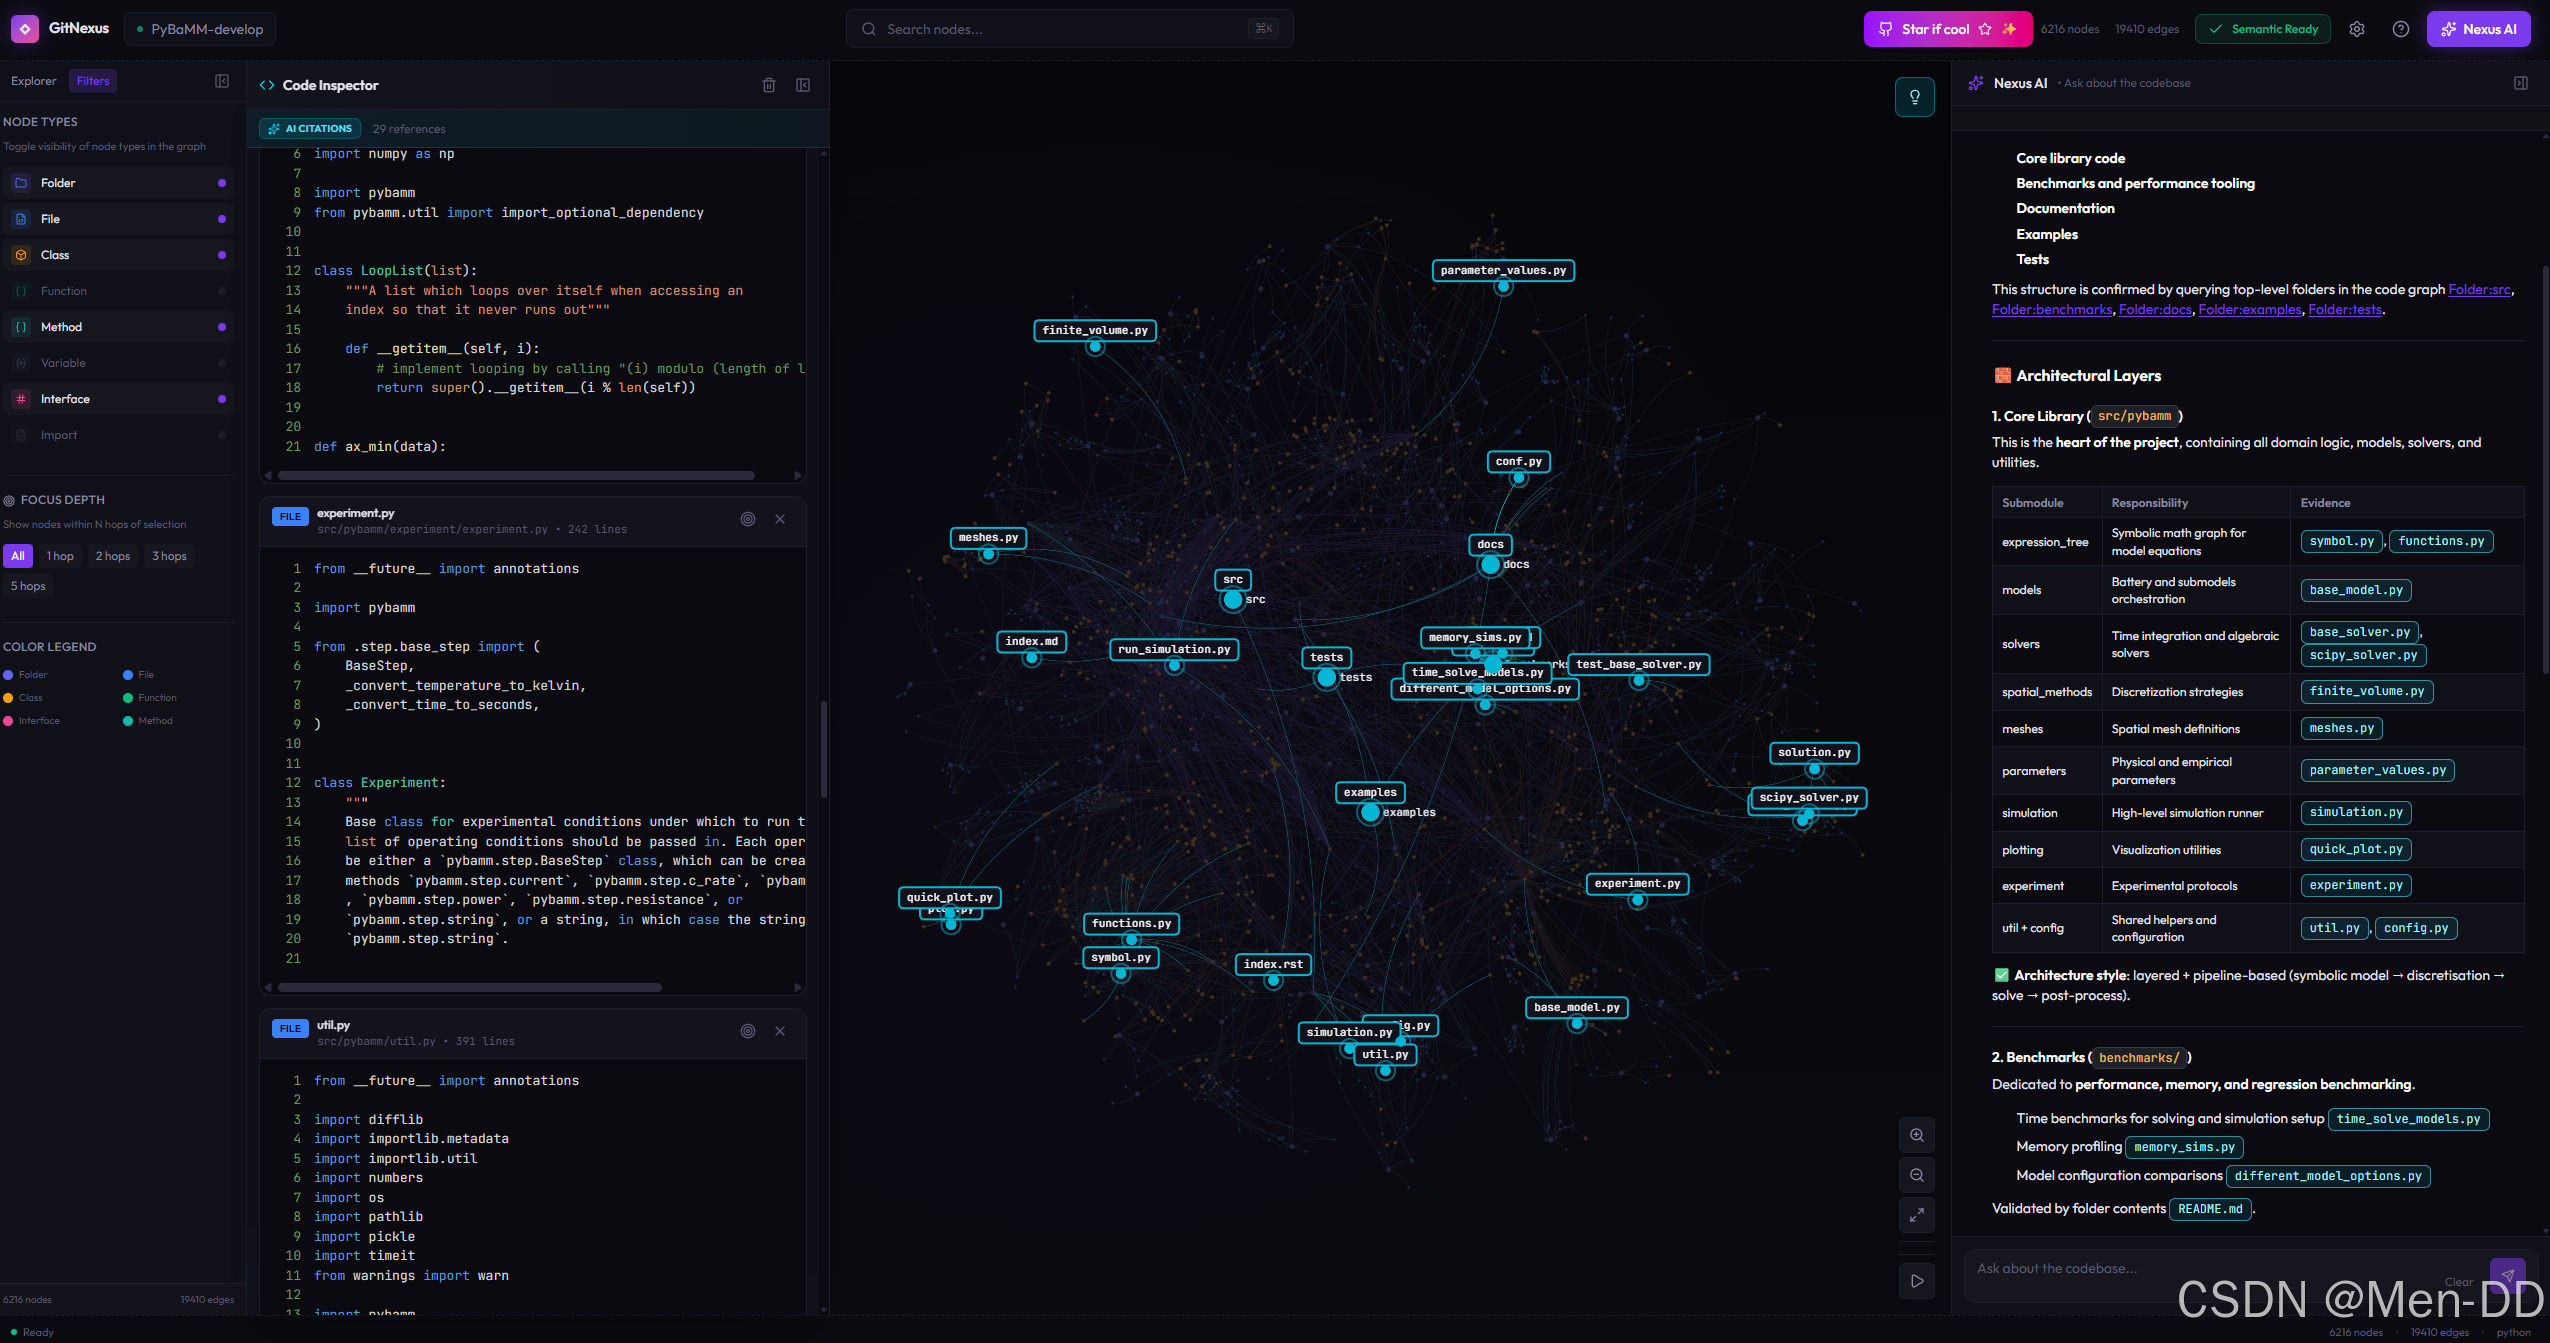
GitNexus 是一款能够将代码库转化为可查询知识图谱的智能工具。它的核心能力可以概括为三点:
解析 —— 基于 Tree-sitter 深度解析代码,提取函数、类、变量之间的调用与依赖关系
建图 —— 将代码结构存入 KuzuDB 图数据库,构建完整的代码知识图谱
适配 —— 通过 MCP 协议与 Claude 等 AI 智能体无缝对接,提供结构化代码上下文
github:
https://github.com/abhigyanpatwari/GitNexus
install:
npm install -g gitnexus
analyze:
npx gitnexus analyze
config mcp:
npx gitnexus setup
or
claude mcp add gitnexus – npx -y gitnexus@latest mcp
gitnexus serve Web UI
➜ ~ npx gitnexus serve
MCP HTTP endpoints mounted at /api/mcp
GitNexus server running on http://127.0.0.1:4747
为 GitNexus Web UI 提供索引数据接口
local Web UI Service
npm install
npm run dev
GitNexus Web UI 服务
Or
https://gitnexus.vercel.app/
➜ baili-web git:(feature/20260323_dataMasking)
export http_proxy="http://127.0.0.1:7897"
export https_proxy="http://127.0.0.1:7897"
export all_proxy="socks5://127.0.0.1:7897"
➜ baili-web git:(feature/20260323_dataMasking) npm install -g gitnexus
npm warn deprecated boolean@3.2.0: Package no longer supported. Contact Support at https://www.npmjs.com/support for more info.
npm warn deprecated glob@11.1.0: Old versions of glob are not supported, and contain widely publicized security vulnerabilities, which have been fixed in the current version. Please update. Support for old versions may be purchased (at exorbitant rates) by contacting i@izs.me
added 292 packages in 10s
73 packages are looking for funding
run `npm fund` for details
➜ baili-web git:(feature/20260323_dataMasking) npx gitnexus analyze
GitNexus Analyzer
Skipped 1 large files (>512KB, likely generated/vendored)
████████████████████████████████████████ 100% | Done
Repository indexed successfully (38.6s)
76,242 nodes | 201,151 edges | 1220 clusters | 300 flows
LadybugDB 10.3s | FTS 9.7s | Embeddings off (use –embeddings to enable)
/Users/edy/Workspace/gf/baili-web
Context: AGENTS.md (created), CLAUDE.md (appended), .claude/skills/gitnexus/ (6 skills)
➜ baili-web git:(feature/20260323_dataMasking) ✗ git status
On branch feature/20260323_dataMasking
Changes not staged for commit:
(use "git add <file>…" to update what will be committed)
(use "git restore <file>…" to discard changes in working directory)
modified: .gitignore
Untracked files:
(use "git add <file>…" to include in what will be committed)
AGENTS.md
no changes added to commit (use "git add" and/or "git commit -a")
➜ baili-web git:(feature/20260323_dataMasking) ✗ vim .gitignore
➜ baili-web git:(feature/20260323_dataMasking) ✗ vim .gitignore
➜ baili-web git:(feature/20260323_dataMasking) ✗
➜ baili-web git:(feature/20260323_dataMasking) ✗
➜ baili-web git:(feature/20260323_dataMasking) ✗ git diff
➜ baili-web git:(feature/20260323_dataMasking) ✗
➜ baili-web git:(feature/20260323_dataMasking) ✗ ls ~/.gitnexus
registry.json
➜ baili-web git:(feature/20260323_dataMasking) ✗ cat ~/.gitnexus/registry.json
[
{
"name": "baili-web",
"path": "/Users/edy/Workspace/gf/baili-web",
"storagePath": "/Users/edy/Workspace/gf/baili-web/.gitnexus",
"indexedAt": "2026-03-23T05:45:14.974Z",
"lastCommit": "xxxxxxxxx",
"stats": {
"files": 4563,
"nodes": 76242,
"edges": 201151,
"communities": 1220,
"processes": 300,
"embeddings": 0
}
}
]%
➜ baili-web git:(feature/20260323_dataMasking) ✗ npx gitnexus setup
GitNexus Setup
==============
Claude Code detected. Run this command to add GitNexus MCP:
claude mcp add gitnexus — npx -y gitnexus mcp
Configured:
+ Cursor
+ Claude Code (MCP manual step printed)
+ Claude Code skills (7 skills → ~/.claude/skills/)
+ Claude Code hooks (PreToolUse, PostToolUse)
+ Cursor skills (7 skills → ~/.cursor/skills/)
Skipped:
– OpenCode (not installed)
Summary:
MCP configured for: Cursor, Claude Code (MCP manual step printed), Claude Code hooks (PreToolUse, PostToolUse)
Skills installed to: Claude Code skills (7 skills → ~/.claude/skills/), Cursor skills (7 skills → ~/.cursor/skills/)
Next steps:
1. cd into any git repo
2. Run: gitnexus analyze
3. Open the repo in your editor — MCP is ready!
➜ baili-web git:(feature/20260323_dataMasking) ✗ claude mcp add gitnexus — npx -y gitnexus mcp
Added stdio MCP server gitnexus with command: npx -y gitnexus mcp to local config
File modified: /Users/edy/.claude.json [project: /Users/edy/Workspace/gf/baili-web]
➜ baili-web git:(feature/20260323_dataMasking) ✗
CLI-Anything
https://github.com/HKUDS/CLI-Anything
步骤 1:安装 CLI-Anything Skill
克隆 CLI-Anything 仓库
git clone https://github.com/HKUDS/CLI-Anything.git
安装 Skill 到 OpenClaw 全局目录
mkdir -p ~/.openclaw/skills/cli-anything
cp CLI-Anything/openclaw-skill/SKILL.md ~/.openclaw/skills/cli-anything/SKILL.md
验证安装: 重启 OpenClaw 或在该会话中:
@cli-anything 检查是否可用
步骤 2:准备项目认证模块
在生成 CLI 之前,需要先创建一个认证模块来处理 Token 管理。
步骤 3:在 OpenClaw 中调用 CLI-Anything
@cli-anything 为 ./your-backend-project 构建一个 CLI,要求:
步骤 4:生成的 CLI 结构示例
CLI-Anything 会生成类似以下结构:
your-backend-project/
└── agent-harness/
├── setup.py
└── cli_anything/
└── your_backend/
├── init.py
├── cli.py # 主 CLI 入口
├── core.py # 核心业务逻辑
├── auth.py # 认证模块(步骤 2 创建的)
├── utils/
│ └── repl_skin.py # REPL 界面
└── tests/
└── test_core.py
步骤 5:生成的 CLI 命令示例
生成的 CLI 会包含以下命令:
1. 登录获取 Token
cli-anything-your-backend auth login
–username “your-username”
–password “your-password”
-o login-result.json
2. 使用 Token 调用 API(自动从登录结果读取)
cli-anything-your-backend
–project login-result.json
api list-users
–json
3. 直接带 Token 调用(不提供 –project 时)
cli-anything-your-backend
–token “your-existing-token”
api get-user –id 123
–json
4. 检查 Token 状态
cli-anything-your-backend auth check-token –project login-result.json
5. 刷新 Token
cli-anything-your-backend auth refresh –project login-result.json
步骤 6:完整的 CLI 实现模板
如果需要手动创建或参考,以下是完整的 CLI 模板:
步骤 7:在 OpenClaw 中使用
安装生成的 CLI
cd your-backend-project/agent-harness
pip install -e .
验证安装
cli-anything-your-backend –help
1. 首次登录
cli-anything-your-backend auth login
–username “admin”
–password “secret123”
–base-url “https://api.yourcompany.com”
-o ~/.cli-your-backend-state.json
2. 后续使用(自动读取 Token)
cli-anything-your-backend
–project ~/.cli-your-backend-state.json
api list-users
–json
3. 或者用环境变量
export CLI_TOKEN=$(cat ~/.cli-your-backend-state.json | jq -r .token)
cli-anything-your-backend api list-users –json
步骤 8:OpenClaw Skill 配置(可选)
在 ~/.openclaw/skills/cli-anything/SKILL.md 中添加认证说明:
认证流程
安全提示
- 不要将包含 Token 的状态文件提交到版本控制
- 定期刷新 Token
- 使用环境变量 CLI_TOKEN 避免命令行暴露
OMO: Oh-My-Openagent + Claude
安装
npm install -g bun
bunx oh-my-opencode install
cladue 使用 oh-my-openagent 开启 完全体
✅ 方法1:加强 prompt(最简单)
ultrawork:
你必须使用多agent协作模式完成任务。
不要询问我,自动完成所有步骤。
任务:设计并实现一个完整的登录系统(Spring Boot + JWT + Redis)
✅ 方法2:开启“强制模式”
ulw: full-auto no-confirm
实现一个完整登录系统
✅ 方法3:加复杂度(非常有效)
ulw:
设计 + 实现 + 测试 + 文档 + 安全审计
一个多租户登录系统
场景
场景1:做设计(你刚才这种)
ulw: 设计系统
场景2:要“自动开发”
必须加强:
ultrawork + no-confirm + full-system
场景3:要“多 agent”
必须明确说:
使用多agent协作完成
OMO: oh-my-codex + Codex
安装
pip install oh-my-codex
codex 使用 oh-my-codex 开启 完全体
pyenv global 3.11.9
用例1:最简单(验证能不能干活)
在 omx> 里输入:
帮我写一个 Python 脚本,实现快速排序,并附带测试用例
用例2:工程能力(推荐)
ulw:
创建一个 Spring Boot 登录系统,包含 JWT + Redis + 用户表设计 + API
👉 这会触发:
多 agent(如果 full 模式开了)
架构 + 代码 + 文档
用例3:真正 Codex 强项(你适合)
autopilot:
扫描当前项目,分析结构,并给出优化建议
👉 适合你这种技术主管
四、强烈建议你做的优化(很关键)
✅ 1. 开启完整 Agent 能力
python -m pip install “oh-my-codex[full]”
👉 解锁:
多 agent orchestration
高级技能
更强自动化
✅ 2. 提高推理能力(默认太弱)
在 omx 里输入:
/set reasoning high
✅ 3. 打开 HUD(强烈推荐)
hud full
👉 你会看到:
token 使用
agent 行为
执行进度
🚀 二、在 Codex 里用 oh-my-codex 的 3 种方式
🥇 方式1:直接用 omx(你现在就在用)
omx
👉 这其实已经是:
✅ “带增强能力的 Codex CLI”
在里面输入任务👇
帮我分析当前项目结构
👉 实际执行:
Codex 读取代码
omx 负责 orchestration(调度)
🥇 方式2:命令行直跑(推荐)
不用进交互界面,直接:
omx “帮我写一个登录系统”
👉 等价于:
codex “任务”
但多了:
自动规划
agent调度
skills
🥇 方式3:在项目中使用(最重要)
👉 正确姿势👇
cd 你的项目
omx
然后:
autopilot:
分析当前项目并优化结构
🔥 三、核心玩法(重点)
你刚才看到 help 里有👇
autopilot / ulw / plan / eco / tdd / review / debug
👉 这就是 oh-my-codex 的精髓
🧠 模式解释
模式作用
autopilot自动执行(默认)
ulw多 agent 并行(最强)
plan只规划
tdd测试驱动
review代码审查
debug调试
🚀 四、你现在最该用的 4 个命令
🥇 1. 自动开发
autopilot:
实现一个用户登录系统(Spring Boot)
🥇 2. 多 Agent(最强)
ulw:
实现一个完整微服务系统
👉 会:
多 agent 并行
自动拆任务
🥇 3. 只做设计
plan:
设计一个权限系统架构
🥇 4. 代码审查
review:
帮我检查当前代码问题
🔥 六、进阶玩法(你这个级别建议直接用)
✅ 1. 初始化项目能力
omx setup
👉 会:
创建 .omx/
安装 skills
生成 AGENTS.md
✅ 2. 多 worker(真正高级玩法)
omx team start 3 “实现登录系统”
👉 相当于:
3 个 Codex 同时干活
✅ 3. 极限模式(⚠️危险)
omx –xhigh –madmax
👉 效果:
超强推理
无审批执行
OpenSpec
安装
npm install -g @fission-ai/openspec@latest
openspec –version
cd your-project
openspec init
使用
OpenSpec 1.0之后,默认启用coreworkflowprofile,包含4个核心命令:
| /opsx:explore | 探索模式,只讨论不产出文档 | 思路不清晰,先聊聊 |
| /opsx:propose | 一次性生成所有规划文档 | 思路清晰,直接开干 |
| /opsx:apply | 按tasks.md逐项实施代码 | 规划做完,开始写代码 |
| /opsx:archive | 归档完成的变更 | 代码写完,合并规范 |
# 查看当前配置
openspec config list
# 切换到自定义模式(启用扩展命令)
openspec config profile custom
# 应用变更
openspec update
Superpowers
Superpowers内置了一套完整的工作流,AI会自动按顺序走:
| 1 | brainstorming | 头脑风暴,问清楚需求(苏格拉底式提问) |
| 2 | using-git-worktrees | 创建隔离的Git工作空间 |
| 3 | writing-plans | 拆解成2-5分钟的小任务 |
| 4 | subagent-driven-development | 派子智能体执行,两阶段审查 |
| 5 | test-driven-development | 强制TDD(不写测试就删代码) |
| 6 | requesting-code-review | 代码审查,关键问题阻塞进度 |
| 7 | finishing-a-development-branch | 完成分支,提供合并选项 |