Spring Boot + Spring AI 实战:从零构建企业级 AI 应用
摘要
随着大模型技术的快速发展,AI 应用开发已经从 Python 专属扩展到多语言生态。Spring AI 作为 Spring 官方推出的 AI 工程化框架,让 Java 开发者能够以熟悉的 Spring 编程模型快速构建企业级 AI 应用。本文将从零开始,详细介绍如何使用 Spring Boot 3.5 和 Spring AI 1.0 构建一个完整的 AI 应用,涵盖 ChatClient API、Tool Calling、RAG 检索增强、向量数据库集成等核心功能。通过本文,你将掌握 Spring AI 的核心抽象、最佳实践以及生产环境部署策略。
关键词:Spring AI、Spring Boot、大模型、Tool Calling、RAG、向量数据库
一、为什么选择 Spring AI?
1.1 Java AI 开发的痛点
在 Spring AI 出现之前,Java 开发者想要集成大模型能力,通常面临以下选择:
这些方案都存在明显缺陷:代码重复、缺乏统一抽象、难以测试、与 Spring 生态割裂。
1.2 Spring AI 的核心优势
Spring AI 项目于 2024 年正式启动,2026 年发布 1.0 正式版本,其设计哲学非常"Spring":
- 可移植性(Portability):统一的 API 抽象,轻松切换 AI 提供商(OpenAI、Anthropic、Azure、Ollama 等)
- 模块化设计(Modularity):按需引入依赖,避免臃肿
- POJO 驱动:使用简单的 Java 对象作为构建块,无需继承复杂基类
- Spring Boot 自动配置:开箱即用,最少配置即可启动
更重要的是,Spring AI 不是 LangChain 的简单移植,而是针对 Java 语言特性和企业级需求重新设计。它解决了 AI 集成的核心挑战:将企业数据与 API 连接到 AI 模型。
1.3 适用场景
Spring AI 适合以下场景:
- ✅ 企业已有 Spring Boot 技术栈,希望快速集成 AI 能力
- ✅ 需要生产级别的稳定性、可观测性、事务支持
- ✅ 多模型提供商切换需求(避免供应商锁定)
- ✅ 复杂业务逻辑与 AI 模型深度集成
如果你只是做快速原型验证,可能 Python + LangChain 更灵活;但如果你要构建生产级企业应用,Spring AI 是更优选择。
二、快速开始:第一个 Spring AI 应用
2.1 项目初始化
使用 Spring Initializr 快速创建项目,访问 start.spring.io,配置如下:
Project: Maven
Language: Java
Spring Boot: 3.5.x
Packaging: Jar
Java: 21
Dependencies:
– Spring Web
– Spring AI OpenAI (或其他模型提供商)
生成的 pom.xml 核心依赖:
<?xml version="1.0" encoding="UTF-8"?>
<project xmlns="http://maven.apache.org/POM/4.0.0"
xmlns:xsi="http://www.w3.org/2001/XMLSchema-instance"
xsi:schemaLocation="http://maven.apache.org/POM/4.0.0
https://maven.apache.org/xsd/maven-4.0.0.xsd">
<modelVersion>4.0.0</modelVersion>
<parent>
<groupId>org.springframework.boot</groupId>
<artifactId>spring-boot-starter-parent</artifactId>
<version>3.5.0</version>
<relativePath/>
</parent>
<groupId>com.example</groupId>
<artifactId>spring-ai-demo</artifactId>
<version>0.0.1-SNAPSHOT</version>
<name>spring-ai-demo</name>
<properties>
<java.version>21</java.version>
<spring-ai.version>1.0.0</spring-ai.version>
</properties>
<dependencies>
<!– Spring Boot Web –>
<dependency>
<groupId>org.springframework.boot</groupId>
<artifactId>spring-boot-starter-web</artifactId>
</dependency>
<!– Spring AI OpenAI Starter –>
<dependency>
<groupId>org.springframework.ai</groupId>
<artifactId>spring-ai-starter-model-openai</artifactId>
<version>${spring-ai.version}</version>
</dependency>
<!– Lombok (可选) –>
<dependency>
<groupId>org.projectlombok</groupId>
<artifactId>lombok</artifactId>
<optional>true</optional>
</dependency>
</dependencies>
<build>
<plugins>
<plugin>
<groupId>org.springframework.boot</groupId>
<artifactId>spring-boot-maven-plugin</artifactId>
</plugin>
</plugins>
</build>
</project>
2.2 配置 API Key
在 application.properties 中添加:
# OpenAI API 配置
spring.ai.openai.api-key=${OPENAI_API_KEY:your-api-key-here}
spring.ai.openai.chat.options.model=gpt-4o
spring.ai.openai.chat.options.temperature=0.7
# 或者使用 Azure OpenAI
# spring.ai.azure.openai.api-key=${AZURE_OPENAI_API_KEY}
# spring.ai.azure.openai.endpoint=${AZURE_OPENAI_ENDPOINT}
# spring.ai.azure.openai.chat.options.deployment-name=gpt-4o
# 或者使用本地 Ollama(免费)
# spring.ai.ollama.base-url=http://localhost:11434
# spring.ai.ollama.chat.options.model=llama3.1
安全提示:生产环境务必使用环境变量或配置中心管理 API Key,不要硬编码在代码库中。
2.3 第一个 ChatClient
创建主应用类:
package com.example.springaidemo;
import org.springframework.ai.chat.client.ChatClient;
import org.springframework.boot.CommandLineRunner;
import org.springframework.boot.SpringApplication;
import org.springframework.boot.autoconfigure.SpringBootApplication;
import org.springframework.context.annotation.Bean;
@SpringBootApplication
public class SpringAiDemoApplication {
public static void main(String[] args) {
SpringApplication.run(SpringAiDemoApplication.class, args);
}
@Bean
public CommandLineRunner runner(ChatClient.Builder builder) {
return args -> {
ChatClient chatClient = builder.build();
// 简单对话
String response = chatClient.prompt("用一句话解释什么是 Spring AI")
.call()
.content();
System.out.println("=== Spring AI 解释 ===");
System.out.println(response);
// 流式输出
System.out.println("\\n=== 流式输出示例 ===");
chatClient.prompt("写一首关于编程的短诗")
.call()
.contentStream()
.doOnNext(content -> System.out.print(content))
.doOnComplete(() -> System.out.println())
.subscribe();
// 等待流完成(仅示例,生产环境不要阻塞)
Thread.sleep(5000);
};
}
}
运行应用:
export OPENAI_API_KEY=sk-xxx
./mvnw spring-boot:run
输出示例:
=== Spring AI 解释 ===
Spring AI 是一个用于构建人工智能应用程序的 Spring 框架扩展,它提供了统一的 API 来集成各种 AI 模型和服务,让 Java 开发者能够轻松地将 AI 能力融入企业应用中。
=== 流式输出示例 ===
代码行间舞,
逻辑编织梦。
Bug 散尽见明月,
运行如春风。
2.4 创建 REST API
实际项目中,我们通常会暴露 REST API 供前端调用。创建一个简单的聊天接口:
package com.example.springaidemo.controller;
import org.springframework.ai.chat.client.ChatClient;
import org.springframework.web.bind.annotation.*;
@RestController
@RequestMapping("/api/chat")
public class ChatController {
private final ChatClient chatClient;
public ChatController(ChatClient.Builder builder) {
this.chatClient = builder.build();
}
@PostMapping
public ChatResponse chat(@RequestBody ChatRequest request) {
String response = chatClient.prompt(request.message())
.call()
.content();
return new ChatResponse(response);
}
// 流式接口(Server-Sent Events)
@PostMapping(value = "/stream", produces = "text/event-stream")
public Flux<String> chatStream(@RequestBody ChatRequest request) {
return chatClient.prompt(request.message())
.call()
.contentStream();
}
public record ChatRequest(String message) {}
public record ChatResponse(String content) {}
}
测试接口:
curl -X POST http://localhost:8080/api/chat \\
-H "Content-Type: application/json" \\
-d '{"message": "Java 21 有哪些新特性?"}'
三、Tool Calling:让 AI 调用你的代码
3.1 什么是 Tool Calling?
Tool Calling(工具调用,也称 Function Calling)是 Spring AI 的核心功能之一。它允许 AI 模型在需要时请求执行客户端定义的工具函数,从而:
- 获取实时信息:AI 模型的知识有截止日期,无法获取实时数据(天气、股价、新闻等)
- 执行业务操作:创建订单、发送邮件、更新数据库等
- 扩展模型能力:将 AI 与现有系统集成
关键理解:模型本身不执行工具,它只是"请求"调用工具。实际执行由你的应用程序完成,这确保了安全性——模型永远无法直接访问你的 API 或数据库。
3.2 定义工具
使用 @Tool 注解定义工具方法。工具描述(description)至关重要,它帮助模型理解何时以及如何调用该工具。
package com.example.springaidemo.tools;
import org.springframework.ai.tool.annotation.Tool;
import org.springframework.ai.tool.annotation.ToolParam;
import org.springframework.stereotype.Component;
import java.time.LocalDateTime;
import java.time.format.DateTimeFormatter;
@Component
public class DateTimeTools {
@Tool(description = "获取当前日期和时间,格式为 yyyy-MM-dd HH:mm:ss")
public String getCurrentDateTime() {
return LocalDateTime.now()
.format(DateTimeFormatter.ofPattern("yyyy-MM-dd HH:mm:ss"));
}
@Tool(description = "计算两个数的和,用于数学运算")
public double add(@ToolParam(description = "第一个数字") double a,
@ToolParam(description = "第二个数字") double b) {
return a + b;
}
@Tool(description = "根据城市名称查询天气信息(模拟实现)")
public String getWeather(@ToolParam(description = "城市名称,如'北京'、'上海'") String city) {
// 实际项目中调用天气 API
String[] conditions = {"晴", "多云", "小雨", "雷阵雨"};
int temp = (int) (Math.random() * 15) + 15; // 15-30 度
return String.format("%s今天天气:%s,气温:%d°C,空气质量:良",
city, conditions[(int)(Math.random() * 4)], temp);
}
}
3.3 注册工具到 ChatClient
package com.example.springaidemo.config;
import com.example.springaidemo.tools.DateTimeTools;
import org.springframework.ai.chat.client.ChatClient;
import org.springframework.ai.tool.ToolCallbackProvider;
import org.springframework.ai.tool.method.MethodToolCallbackProvider;
import org.springframework.context.annotation.Bean;
import org.springframework.context.annotation.Configuration;
@Configuration
public class AiConfig {
@Bean
public ToolCallbackProvider toolCallbackProvider(DateTimeTools dateTimeTools) {
// 从 @Tool 注解的方法自动注册工具
return MethodToolCallbackProvider.builder()
.toolObjects(dateTimeTools)
.build();
}
@Bean
public ChatClient chatClient(ChatClient.Builder builder,
ToolCallbackProvider toolCallbackProvider) {
return builder
.defaultTools(toolCallbackProvider)
.build();
}
}
3.4 测试工具调用
现在 AI 可以调用你定义的工具了:
@RestController
@RequestMapping("/api/assistant")
public class AssistantController {
private final ChatClient chatClient;
public AssistantController(ChatClient chatClient) {
this.chatClient = chatClient;
}
@PostMapping("/ask")
public String ask(@RequestBody String question) {
return chatClient.prompt(question)
.call()
.content();
}
}
测试问题:
# 问题 1:询问时间(会调用 getCurrentDateTime 工具)
curl -X POST http://localhost:8080/api/assistant/ask \\
-H "Content-Type: text/plain" \\
-d "现在几点了?"
# 问题 2:数学计算(会调用 add 工具)
curl -X POST http://localhost:8080/api/assistant/ask \\
-H "Content-Type: text/plain" \\
-d "3.14 加上 2.86 等于多少?"
# 问题 3:天气查询(会调用 getWeather 工具)
curl -X POST http://localhost:8080/api/assistant/ask \\
-H "Content-Type: text/plain" \\
-d "北京今天天气怎么样?"
AI 的回复示例:
现在是 2026-04-09 14:35:22。
3.14 加上 2.86 等于 6.0。
北京今天天气:多云,气温:23°C,空气质量:良。适合外出活动。
3.5 实战:数据库查询工具
真实场景中,工具常用于查询数据库:
@Component
public class DatabaseTools {
private final JdbcTemplate jdbcTemplate;
public DatabaseTools(JdbcTemplate jdbcTemplate) {
this.jdbcTemplate = jdbcTemplate;
}
@Tool(description = "根据用户 ID 查询用户信息,返回姓名、邮箱和注册时间")
public String getUserById(@ToolParam(description = "用户 ID") Long userId) {
String sql = "SELECT name, email, created_at FROM users WHERE id = ?";
try {
return jdbcTemplate.queryForObject(sql, (rs, rowNum) -> {
return String.format(
"姓名:%s,邮箱:%s,注册时间:%s",
rs.getString("name"),
rs.getString("email"),
rs.getTimestamp("created_at")
);
}, userId);
} catch (EmptyResultDataAccessException e) {
return "未找到该用户";
}
}
@Tool(description = "查询订单总数和总金额统计信息")
public String getOrderStatistics() {
String sql = "SELECT COUNT(*) as count, SUM(amount) as total FROM orders";
return jdbcTemplate.queryForObject(sql, (rs, rowNum) -> {
return String.format(
"总订单数:%d 单,总销售额:%.2f 元",
rs.getLong("count"),
rs.getDouble("total")
);
});
}
}
安全警告:工具调用必须严格验证参数,防止 SQL 注入、越权访问等安全问题。永远不要直接将用户输入拼接到 SQL 中。
四、RAG 检索增强生成:让 AI 懂你的数据
4.1 RAG 原理
RAG(Retrieval-Augmented Generation,检索增强生成)解决的核心问题是:如何让 AI 模型理解你的私有数据。
传统 Fine-tuning 的局限:
- ❌ 成本高:每次数据更新都要重新训练
- ❌ 幻觉问题:模型可能编造不存在的信息
- ❌ 知识截止:无法获取训练数据之后的信息
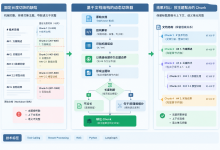
RAG 的工作流程:
4.2 集成向量数据库
Spring AI 支持主流向量数据库:PostgreSQL/PGVector、Chroma、Milvus、Pinecone、Redis、Weaviate 等。这里以 PGVector 为例(生产推荐,开源且支持事务)。
添加依赖:
<dependency>
<groupId>org.springframework.ai</groupId>
<artifactId>spring-ai-starter-vector-store-pgvector</artifactId>
<version>${spring-ai.version}</version>
</dependency>
<dependency>
<groupId>org.postgresql</groupId>
<artifactId>postgresql</artifactId>
</dependency>
配置数据库:
# PostgreSQL 配置
spring.datasource.url=jdbc:postgresql://localhost:5432/aidb
spring.datasource.username=postgres
spring.datasource.password=postgres
# PGVector 配置
spring.ai.vectorstore.pgvector.index-type=HNSW
spring.ai.vectorstore.pgvector.distance-type=COSINE_DISTANCE
spring.ai.vectorstore.pgvector.dimensions=1536 # OpenAI embedding 维度
安装 PGVector 扩展:
CREATE EXTENSION IF NOT EXISTS vector;
4.3 文档加载与向量化
创建文档加载服务:
package com.example.springaidemo.service;
import org.springframework.ai.document.Document;
import org.springframework.ai.embedding.EmbeddingModel;
import org.springframework.ai.vectorstore.VectorStore;
import org.springframework.ai.vectorstore.pgvector.PgVectorStore;
import org.springframework.stereotype.Service;
import org.springframework.web.multipart.MultipartFile;
import java.io.IOException;
import java.nio.charset.StandardCharsets;
import java.util.List;
@Service
public class DocumentService {
private final VectorStore vectorStore;
private final EmbeddingModel embeddingModel;
public DocumentService(VectorStore vectorStore, EmbeddingModel embeddingModel) {
this.vectorStore = vectorStore;
this.embeddingModel = embeddingModel;
}
/**
* 上传文档并向量化
*/
public void uploadDocument(MultipartFile file) throws IOException {
String content = new String(file.getBytes(), StandardCharsets.UTF_8);
// 文档分块(简单按段落分割,生产环境可用更智能的分割策略)
List<String> chunks = splitDocument(content);
// 创建 Document 对象
List<Document> documents = chunks.stream()
.map(chunk -> new Document(chunk))
.toList();
// 生成嵌入并存入向量数据库
vectorStore.add(documents);
}
/**
* 简单的文档分割(按段落)
*/
private List<String> splitDocument(String content) {
return List.of(content.split("\\\\n\\\\n+"));
}
/**
* 检索相关文档
*/
public List<Document> searchDocuments(String query, int topK) {
return vectorStore.similaritySearch(query, topK);
}
}
4.4 构建 RAG 聊天接口
@RestController
@RequestMapping("/api/rag")
public class RagController {
private final ChatClient chatClient;
private final DocumentService documentService;
public RagController(ChatClient.Builder builder,
DocumentService documentService) {
this.documentService = documentService;
// 配置 RAG 检索器
this.chatClient = builder
.defaultSystem("""
你是一个专业的助手。请根据以下参考资料回答问题。
如果资料中没有相关信息,请如实告知,不要编造。
参考资料:
{documents}
""")
.build();
}
@PostMapping("/chat")
public String chat(@RequestBody ChatRequest request) {
// 检索相关文档
List<Document> docs = documentService.searchDocuments(request.question(), 3);
String context = docs.stream()
.map(Document::getContent)
.collect(Collectors.joining("\\n\\n—\\n\\n"));
// 带上下文的问答
return chatClient.prompt(request.question())
.system(system -> system.param("documents", context))
.call()
.content();
}
public record ChatRequest(String question) {}
}
4.5 实战:企业知识库问答
假设你有一份员工手册 PDF,上传后员工可以自然语言提问:
# 上传文档
curl -X POST http://localhost:8080/api/rag/upload \\
-F "file=@employee-handbook.pdf"
# 提问
curl -X POST http://localhost:8080/api/rag/chat \\
-H "Content-Type: application/json" \\
-d '{"question": "年假怎么计算?"}'
AI 会基于你上传的手册内容回答,而不是编造通用答案。
五、高级特性与最佳实践
5.1 结构化输出
AI 模型通常输出自由文本,但业务场景常需要结构化数据(JSON、对象)。Spring AI 提供 BeanOutputConverter:
@RestController
@RequestMapping("/api/structured")
public class StructuredOutputController {
private final ChatClient chatClient;
public StructuredOutputController(ChatClient.Builder builder) {
this.chatClient = builder.build();
}
public record ProductInfo(String name, double price, String category, String description) {}
@PostMapping("/extract")
public ProductInfo extractProductInfo(@RequestBody String text) {
BeanOutputConverter<ProductInfo> converter =
new BeanOutputConverter<>(ProductInfo.class);
return chatClient.prompt("""
从以下文本中提取商品信息:
%s
""".formatted(text))
.system(system -> system.param("format", converter.getFormat()))
.call()
.entity(ProductInfo.class);
}
}
5.2 对话记忆(Chat Memory)
实现多轮对话需要记忆上下文:
@Configuration
public class ChatMemoryConfig {
@Bean
public ChatMemory chatMemory() {
// 使用 InMemoryChatMemory(生产环境可用 RedisChatMemory)
return new InMemoryChatMemory();
}
@Bean
public ChatClient chatClientWithMemory(ChatClient.Builder builder,
ChatMemory chatMemory) {
return builder
.defaultAdvisors(new ChatMemoryAdvisor(chatMemory))
.build();
}
}
5.3 可观测性(Observability)
Spring AI 集成 Micrometer,支持链路追踪:
# 启用 AI 相关指标
management.metrics.enable.spring.ai=true
# 配置 Prometheus
management.endpoints.web.exposure.include=prometheus
关键指标:
- spring.ai.chat.client.call.duration:ChatClient 调用耗时
- spring.ai.chat.model.call.duration:模型 API 调用耗时
- spring.ai.embedding.call.duration:Embedding 生成耗时
5.4 生产环境最佳实践
5.4.1 重试与降级
@Configuration
public class RetryConfig {
@Bean
public RetryTemplate retryTemplate() {
return RetryTemplate.builder()
.maxAttempts(3)
.exponentialBackoff(1000, 2.0, 5000)
.retryOn(AIResourceAccessException.class)
.build();
}
@Bean
public ChatClient resilientChatClient(ChatClient.Builder builder,
RetryTemplate retryTemplate) {
return builder
.defaultCallOptions(CallOptions.builder()
.retryTemplate(retryTemplate)
.build())
.build();
}
}
5.4.2 限流与成本控制
@Component
public class RateLimitInterceptor implements ClientInterceptor {
private final RateLimiter rateLimiter = RateLimiter.create(10); // 每秒 10 次
@Override
public <T> T intercept(Chain<T> chain) {
rateLimiter.acquirePermission();
return chain.proceed();
}
}
5.4.3 敏感信息过滤
@Tool(description = "处理用户反馈")
public String processFeedback(@ToolParam String feedback) {
// 过滤敏感词
String sanitized = feedback.replaceAll("\\\\b(密码 | 身份证 | 银行卡)\\\\b", "***");
// 记录日志
log.info("处理反馈:{}", sanitized);
return "反馈已提交,感谢您的意见!";
}
六、完整示例项目架构
spring-ai-demo/
├── src/main/java/com/example/springaidemo/
│ ├── SpringAiDemoApplication.java
│ ├── config/
│ │ ├── AiConfig.java # AI 配置
│ │ ├── RetryConfig.java # 重试配置
│ │ └── SecurityConfig.java # 安全配置
│ ├── controller/
│ │ ├── ChatController.java # 聊天接口
│ │ ├── RagController.java # RAG 接口
│ │ └── AssistantController.java # 助手接口
│ ├── service/
│ │ ├── DocumentService.java # 文档服务
│ │ └── ChatService.java # 聊天服务
│ ├── tools/
│ │ ├── DateTimeTools.java # 时间工具
│ │ └── DatabaseTools.java # 数据库工具
│ └── dto/
│ ├── ChatRequest.java
│ └── ChatResponse.java
├── src/main/resources/
│ ├── application.properties
│ └── templates/
└── pom.xml
七、性能优化与成本考量
7.1 响应时间优化
- 流式输出:首字延迟可降至 200ms 以内
- 缓存常见问答:使用 Spring Cache 缓存高频问题答案
- 异步处理:耗时操作(文档向量化)使用异步队列
7.2 成本控制
| 使用小模型处理简单任务 | 成本降低 60-80% |
| 缓存重复问题答案 | 减少 30-50% API 调用 |
| 本地部署 Ollama 用于开发 | 开发环境零成本 |
| 合理设置 token 限制 | 避免意外高额账单 |
7.3 监控告警
@Component
public class CostMonitor {
private final AtomicInteger tokenCount = new AtomicInteger(0);
private static final int DAILY_LIMIT = 100000; // 每日 token 限额
public void recordTokenUsage(int tokens) {
int current = tokenCount.addAndGet(tokens);
if (current > DAILY_LIMIT * 0.8) {
log.warn("⚠️ Token 使用已达 80%,当前:{}", current);
// 发送告警通知
}
if (current > DAILY_LIMIT) {
log.error("❌ Token 使用已超限额!");
// 触发熔断
}
}
}
八、总结与展望
8.1 Spring AI 核心优势回顾
8.2 适用场景判断
选择 Spring AI 如果:
- ✅ 企业已有 Spring 技术栈
- ✅ 需要生产级稳定性和可维护性
- ✅ 复杂业务逻辑与 AI 深度集成
考虑其他方案如果:
- ❌ 快速原型验证,追求极致开发速度
- ❌ 纯 AI 算法研究,不需要业务集成
- ❌ 团队只有 Python 经验
8.3 未来展望
Spring AI roadmap 包括:
- 更强大的 Agent 框架
- 多模态支持(图像、音频)
- 本地模型优化(ONNX、OpenVINO)
- 更丰富的向量数据库支持
参考资源
- 官方文档:https://docs.spring.io/spring-ai/reference/
- GitHub 仓库:https://github.com/spring-projects/spring-ai
- Spring Initializr:https://start.spring.io
- Awesome Spring AI:https://github.com/spring-ai-community/awesome-spring-ai
- PGVector:https://github.com/pgvector/pgvector
- Ollama:https://ollama.ai
版权声明:本文内容为原创,基于公开资料独立撰写。文中示例代码可自由使用于学习和个人项目。转载或引用请注明出处。
作者:超人不会飞 完成时间:2026-04-09
附录:完整代码示例
A.1 application.properties 完整配置
# ==================== 应用配置 ====================
server.port=8080
spring.application.name=spring-ai-demo
# ==================== OpenAI 配置 ====================
spring.ai.openai.api-key=${OPENAI_API_KEY:your-api-key}
spring.ai.openai.chat.options.model=gpt-4o
spring.ai.openai.chat.options.temperature=0.7
spring.ai.openai.chat.options.max-tokens=2000
# ==================== Azure OpenAI 配置(备选) ====================
# spring.ai.azure.openai.api-key=${AZURE_OPENAI_API_KEY}
# spring.ai.azure.openai.endpoint=${AZURE_OPENAI_ENDPOINT}
# spring.ai.azure.openai.chat.options.deployment-name=gpt-4o
# ==================== Ollama 本地模型(开发环境) ====================
# spring.ai.ollama.base-url=http://localhost:11434
# spring.ai.ollama.chat.options.model=llama3.1
# ==================== PostgreSQL 配置 ====================
spring.datasource.url=jdbc:postgresql://localhost:5432/aidb
spring.datasource.username=postgres
spring.datasource.password=postgres
spring.datasource.driver-class-name=org.postgresql.Driver
# ==================== PGVector 配置 ====================
spring.ai.vectorstore.pgvector.index-type=HNSW
spring.ai.vectorstore.pgvector.distance-type=COSINE_DISTANCE
spring.ai.vectorstore.pgvector.dimensions=1536
# ==================== 日志配置 ====================
logging.level.org.springframework.ai=DEBUG
logging.level.com.example.springaidemo=INFO
# ==================== Actuator 监控 ====================
management.endpoints.web.exposure.include=health,info,prometheus
management.metrics.enable.spring.ai=true
A.2 Docker Compose 快速启动
version: '3.8'
services:
postgres:
image: pgvector/pgvector:pg16
environment:
POSTGRES_DB: aidb
POSTGRES_USER: postgres
POSTGRES_PASSWORD: postgres
ports:
– "5432:5432"
volumes:
– postgres_data:/var/lib/postgresql/data
app:
build: .
environment:
– OPENAI_API_KEY=${OPENAI_API_KEY}
– SPRING_DATASOURCE_URL=jdbc:postgresql://postgres:5432/aidb
ports:
– "8080:8080"
depends_on:
– postgres
volumes:
postgres_data: