【HarmonyOS】沉浸式光感打字机效果实战:状态管理V2 + Timer 打造炫酷交互
适用版本:HarmonyOS NEXT / API 23+
开发语言:ArkTS
状态管理:V2(@ComponentV2 + @ObservedV2 + @Trace + @Local)
开发工具:DevEco Studio 6.1+
本文将手把手带你开发一个 沉浸式光感打字机效果 应用。深邃的星空背景搭配霓虹光感文字,字符逐帧浮现,配合打字机图片与进度指示器,呈现出极具视觉冲击力的交互体验。全文使用 状态管理V2 体系,代码现代、简洁、易维护。
一、效果预览与项目概述
1.1 实现效果
本案例包含两个页面:
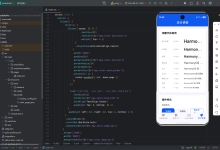
| 入口页(Index) | 深色星空背景 + 打字机图片展示 + 光感按钮,点击跳转至打字机页 |
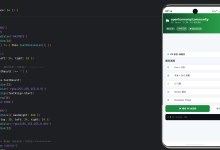
| 打字机页(TypewriterPage) | 沉浸式深色界面,文字逐字浮现并带有霓虹光晕,光标闪烁,实时进度条 |
1.2 技术架构
┌─────────────────────────────────────────────┐
│ 页面层 │
│ Index.ets ──(router)──> TypewriterPage │
├─────────────────────────────────────────────┤
│ 状态管理层 │
│ @ComponentV2 + @ObservedV2 + @Trace │
│ @Local (组件内部状态) │
├─────────────────────────────────────────────┤
│ 业务逻辑层 │
│ Timer (setInterval/clearInterval/clearTimeout) │
│ rawfile 文本读取 + TextDecoder 解码 │
├─────────────────────────────────────────────┤
│ UI 渲染层 │
│ Text + Span 流式布局 + shadow 光晕 │
│ gradient 渐变 + expandSafeArea 全屏 │
│ scrollEdge 自动滚动 + 光标闪烁 │
└─────────────────────────────────────────────┘
1.3 核心技术点
| @ComponentV2 | 声明V2组件,支持更优雅的状态管理 |
| @ObservedV2 + @Trace | 深度可观察对象,属性级精准刷新 |
| @Local | 组件内部响应式状态 |
| setInterval | 控制逐字显示的定时器 |
| clearTimeout | 清除延迟启动的 setTimeout |
| shadow | 实现霓虹光晕效果 |
| linearGradient / radialGradient | 营造沉浸式光感氛围 |
| Text + Span | 流式文本布局,天然从左上角开始 |
| scrollEdge | 自动滚动到新字符位置 |
| expandSafeArea | 全屏沉浸式布局 |
| util.TextDecoder | 解码 rawfile 中的 UTF-8 文本 |
二、项目搭建步骤
2.1 创建项目
使用 DevEco Studio 创建一个新的 Empty Ability 项目:
- Project name: TypewriterSample
- Compile SDK: 6.0.1(23)
- Model Version: 6.1.0
2.2 项目结构
entry/src/main/
├── ets/
│ ├── entryability/
│ │ └── EntryAbility.ets
│ └── pages/
│ ├── Index.ets # 入口页
│ └── TypewriterPage.ets # 打字机效果页
├── resources/
│ ├── base/
│ │ ├── element/
│ │ │ ├── color.json # 光感主题色
│ │ │ └── string.json # 文本资源
│ │ ├── media/
│ │ │ └── typewriter_banner.png # 打字机图片
│ │ └── profile/
│ │ └── main_pages.json # 路由配置
│ └── rawfile/
│ └── typewriter_text.txt # 打字机文本内容
└── module.json5
2.3 配置路由
在 main_pages.json 中注册页面路由:
{
"src": [
"pages/Index",
"pages/TypewriterPage"
]
}
2.4 准备文本资源
在 resources/rawfile/ 下创建 typewriter_text.txt,写入展示文本(本案例使用"星空与梦想"主题):
仰望星空,每一颗星辰都是远古梦想的信使。在无垠的宇宙面前,我们渺小却充满力量…
2.5 配置主题色
在 resources/base/element/color.json 中定义光感主题色:
{
"color": [
{ "name": "bg_dark", "value": "#0A0E27" },
{ "name": "glow_cyan", "value": "#00E5FF" },
{ "name": "glow_purple", "value": "#BB86FC" },
{ "name": "glow_blue", "value": "#4FC3F7" },
{ "name": "text_primary", "value": "#E0E0E0" },
{ "name": "text_secondary", "value": "#9E9E9E" },
{ "name": "card_bg", "value": "#1A1F3A" }
]
}
三、核心代码讲解
3.1 数据模型:可观察的字符对象
每个字符需要一个独立的可观察对象,当 visible 属性变为 true 时触发 UI 精准刷新。
@ObservedV2
class CharItem {
@Trace char: string = '';
@Trace visible: boolean = false;
@Trace isHighlight: boolean = false;
@Trace glowColor: string = '#00E5FF';
constructor(char: string, isHighlight: boolean, glowColor: string) {
this.char = char;
this.isHighlight = isHighlight;
this.glowColor = glowColor;
}
}
为什么使用 @ObservedV2 + @Trace?
- @Trace 让每个属性的变化都能被框架精准捕获。
- 当 visible 从 false 变为 true 时,只有该字符对应的 UI 节点会刷新,不会引发整个列表的重渲染。
- 相比 V1 的 @Observed + @ObjectLink,V2 方案代码更简洁,响应更精准。
3.2 文本加载与字符列表构建
private loadTextFromRawfile(): void {
const context = this.getUIContext().getHostContext() as Context;
const rawContent = context.resourceManager.getRawFileContentSync('typewriter_text.txt');
const decoder = util.TextDecoder.create('utf-8');
this.fullText = decoder.decodeToString(rawContent);
}
private buildCharList(): void {
const colors: string[] = [this.glowCyan, this.glowPurple, this.glowBlue, this.glowPink];
const list: CharItem[] = [];
for (let i = 0; i < this.fullText.length; i++) {
const isHighlight: boolean = (i % 12 === 0) || (i % 19 === 0);
const glowColor: string = isHighlight ? colors[i % colors.length] : this.textPrimary;
list.push(new CharItem(this.fullText.charAt(i), isHighlight, glowColor));
}
this.charList = list;
this.totalChars = this.fullText.length;
}
设计思路:
3.3 打字机效果核心:Timer 驱动逐字显示
private typingTimerId: number = –1;
private restartTimerId: number = –1; // 跟踪延迟启动定时器
private startTyping(): void {
if (this.isTyping) return; // 防止重复创建定时器
this.resetState();
this.isTyping = true;
this.typingTimerId = setInterval(() => {
if (this.currentIndex < this.charList.length) {
this.charList[this.currentIndex].visible = true; // 显示下一个字符
this.currentIndex++;
this.progress = Math.round((this.currentIndex / this.totalChars) * 100);
// 自动滚动到底部(Scroll 使用 scrollEdge,不是 scrollToIndex)
this.scroller.scrollEdge(Edge.Bottom);
} else {
this.isTyping = false;
this.isComplete = true;
clearInterval(this.typingTimerId);
this.typingTimerId = –1;
}
}, this.typingSpeed); // 默认 40ms/字符
}
private restartTyping(): void {
this.resetState();
// ✅ 正确:跟踪 setTimeout ID,确保页面销毁时可以清除
this.restartTimerId = setTimeout(() => {
this.restartTimerId = –1;
this.startTyping();
}, 100);
}
逐字显示的实现原理:
3.4 光感效果实现
光感效果是本案例的视觉亮点,通过三层叠加实现:
第一层:字符光晕(shadow)
Span(item.char)
.fontSize(item.isHighlight ? 18 : 16)
.fontColor(item.glowColor)
.shadow(item.isHighlight ? {
radius: 16,
color: item.glowColor + '88', // 半透明光晕
offsetX: 0,
offsetY: 0
} : {
radius: 4,
color: '#2200E5FF', // 普通字符微弱光感
offsetX: 0,
offsetY: 0
})
第二层:渐变背景光
// 顶部光晕装饰
Column()
.radialGradient({
center: ['50%', '0%'],
radius: 200,
colors: [['#1A00E5FF', 0.0], ['#00000000', 1.0]]
})
.hitTestBehavior(HitTestMode.None) // 不拦截触摸事件
第三层:进度条渐变光效
Row()
.width(`${this.progress}%`)
.height(4)
.borderRadius(2)
.linearGradient({
angle: 90,
colors: [[this.glowCyan, 0.0], [this.glowPurple, 1.0]]
})
.shadow({
radius: 8,
color: '#4400E5FF',
offsetX: 0,
offsetY: 0
})
3.5 Text + Span 流式布局
本案例使用 Text + Span 流式布局而非 Flex + 独立 Text 组件,原因如下:
Scroll(this.scroller) {
Text('') {
ForEach(this.charList, (item: CharItem, index: number) => {
if (item.visible) {
Span(item.char)
.fontSize(item.isHighlight ? 18 : 16)
.fontColor(item.glowColor)
.fontWeight(item.isHighlight ? FontWeight.Bold : FontWeight.Normal)
.shadow(…)
}
}, (item: CharItem, index: number) => `char_${index}_${item.visible}`)
// 光标
if (this.isTyping || (!this.isComplete && this.cursorVisible)) {
Span('|')
.fontSize(18)
.fontColor(this.glowCyan)
.backgroundColor(this.cursorVisible ? '#00E5FF' : '#00000000')
}
}
.width('100%')
.align(Alignment.TopStart) // ✅ 关键:确保文本从左上角开始
.textAlign(TextAlign.Start) // 左对齐
.lineHeight(28) // 统一行高
}
为什么选择 Text + Span 而非 Flex?
| 起始位置 | 默认垂直居中,需额外设置 | 天然从左上角开始 |
| 自动换行 | 需 FlexWrap.Wrap | 原生流式换行 |
| 在 Scroll 中的行为 | 内容垂直居中,需 align | 自然从顶部开始 |
| 代码复杂度 | 每个字符独立 Text 组件 | Span 内联更轻量 |
| 滚动适配 | 需额外处理 | scrollEdge 天然支持 |
⚠️ 重要提醒:如果忘记添加 .align(Alignment.TopStart),文本会在 Text 框中垂直居中显示,造成“从中间开始打字”的视觉效果。
3.6 光标闪烁效果
通过独立的定时器控制光标显隐,使用 Span + backgroundColor 实现光标闪烁:
private startCursorBlink(): void {
this.cursorTimerId = setInterval(() => {
this.cursorVisible = !this.cursorVisible;
}, 500);
}
// 在 build 中渲染光标(Span 融入 Text 流式布局)
if (this.isTyping || (!this.isComplete && this.cursorVisible)) {
Span('|')
.fontSize(18)
.fontColor(this.glowCyan)
.backgroundColor(this.cursorVisible ? '#00E5FF' : '#00000000')
}
为什么用 backgroundColor 而不是 opacity?
- Span 是内联元素,opacity 会影响后续文本的显示。
- backgroundColor 切换在透明和青色之间,视觉上更像真实光标。
3.7 生命周期管理
定时器必须在页面销毁时清除,避免内存泄漏。特别注意 setTimeout 也需要跟踪和清除:
private typingTimerId: number = –1;
private cursorTimerId: number = –1;
private restartTimerId: number = –1; // ✅ 跟踪延迟启动的 setTimeout
aboutToAppear(): void {
this.loadTextFromRawfile();
this.buildCharList();
this.startCursorBlink();
}
aboutToDisappear(): void {
this.stopAllTimers(); // 清除所有定时器
}
private stopAllTimers(): void {
if (this.typingTimerId !== –1) {
clearInterval(this.typingTimerId);
this.typingTimerId = –1;
}
if (this.cursorTimerId !== –1) {
clearInterval(this.cursorTimerId);
this.cursorTimerId = –1;
}
// ✅ 清除 setTimeout
if (this.restartTimerId !== –1) {
clearTimeout(this.restartTimerId);
this.restartTimerId = –1;
}
}
四、入口页设计
入口页作为应用的门面,同样采用深色光感风格:
@Entry
@ComponentV2
struct Index {
@Local glowOpacity: number = 0.3;
private glowTimerId: number = –1;
aboutToAppear(): void {
// 光感呼吸动画
this.glowTimerId = setInterval(() => {
// 周期性调节透明度,产生呼吸灯效果
}, 50);
}
build() {
Stack() {
// 深色渐变背景
Column()
.linearGradient({
angle: 135,
colors: [['#0A0E27', 0.0], ['#1A1F3A', 0.5], ['#0D1235', 1.0]]
})
Column() {
// 打字机图片
Image($r('app.media.typewriter_banner'))
.borderRadius(20)
.shadow({ radius: 30, color: '#4400E5FF' })
// 标题(带光晕)
Text('星光打字机')
.fontColor('#00E5FF')
.shadow({ radius: 24, color: '#8800E5FF' })
// 渐变按钮
Button('进入沉浸式打字机')
.linearGradient({
angle: 90,
colors: [['#00E5FF', 0.0], ['#BB86FC', 1.0]]
})
.onClick(() => {
router.pushUrl({ url: 'pages/TypewriterPage' });
})
}
}
}
}
五、完整组件结构一览
| Index | @Entry + @ComponentV2 | 入口页,呼吸灯光效 + 导航跳转 |
| TypewriterPage | @Entry + @ComponentV2 | 打字机主页面,全部交互逻辑 |
| CharItem | @ObservedV2 | 字符数据模型,@Trace 精准刷新 |
@Builder 方法拆分:
| HeaderSection() | 顶部标题(光感标题 + 副标题) |
| BannerSection() | 打字机图片横幅 |
| ControlPanel() | 控制面板(状态灯 + 按钮) |
| TypewriterContent() | 核心打字内容展示区 |
| ProgressSection() | 底部渐变进度条 |
| GlowOverlay() | 光感装饰覆盖层 |
六、关键设计决策解析
6.1 为什么选择状态管理 V2?
| 属性级刷新 | 需要 @Observed + @ObjectLink | @Trace 自动追踪 |
| 代码复杂度 | 需要子组件配合 @ObjectLink | 直接在数组中修改属性即可 |
| 响应精度 | 整个对象或一级属性 | 精确到 @Trace 装饰的属性 |
本案例中,CharItem 的 visible 属性频繁变化,使用 @Trace 可以确保只刷新变化的字符,极大提升渲染性能。
6.2 为什么用 Text + Span 而非 Flex?
使用 Text('') + Span 流式布局渲染每个字符,优势如下:
- 文本天然从左上角开始,无需额外对齐设置。
- 自动换行,无需 FlexWrap.Wrap。
- 在 Scroll 中不会出现垂直居中问题。
- Span 是内联元素,比独立 Text 组件更轻量。
- scrollEdge(Edge.Bottom) 自动滚动天然支持。
⚠️ 必须添加 .align(Alignment.TopStart) 确保文本从左上角开始,否则文本会垂直居中。
6.3 光感色彩的选取
| 霓虹青 | #00E5FF | 主色调,标题、光标、按钮 |
| 星光紫 | #BB86FC | 辅助色,完成状态、渐变终点 |
| 天空蓝 | #4FC3F7 | 高亮字符色 |
| 梦幻粉 | #FF6EC7 | 高亮字符色 |
| 深空底 | #0A0E27 | 全局背景 |
| 暗卡片 | #1A1F3A | 内容卡片背景 |
七、总结与扩展
7.1 核心收获
7.2 可扩展方向
| 多文本切换 | 在 rawfile 中放置多个文本文件,支持用户选择 |
| 速度调节 | 动态改变 typingSpeed,重建定时器 |
| 音效反馈 | 每显示一个字符播放打字音效 |
| 富文本支持 | 为 CharItem 增加 fontSize、fontWeight 等属性 |
| 段落标题 | 识别换行符,自动插入段落分隔样式 |
| 保存/分享 | 将打字结果截图保存或分享到社交平台 |
📌 本文是 Timer 定时器使用指南的配套实战文章,建议先阅读《Timer(定时器)完全使用指南》了解定时器基础知识。