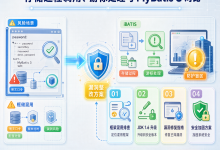
SSM 集成 — 从"为什么"到"怎么做"全讲透
第一部分:先搞懂"为什么要集成"
没有 SSM 集成之前,三大框架各自为战:
SpringMVC → 只负责 Web 层(接收请求、返回响应)
MyBatis → 只负责持久层(操作数据库)
Spring → 只负责"管理对象"(IoC 容器)
问题来了:
- SpringMVC 的 Controller 里要调用 Service,Service 谁来 new?
- Service 里要调用 Mapper,Mapper 谁来 new?
- Mapper 需要 SqlSessionFactory,SqlSessionFactory 谁来 new?
- 数据库连接池(数据源)谁来管理?
- 事务谁来控制?
答案全是 Spring。 Spring 就像一个"大管家",所有组件都由它创建、由它注入、由它管理。
SSM 集成的本质就一句话:
让 Spring 这个"大管家"接管一切:数据源归它管、Mapper 归它管、Service 归它管、Controller 归它管、事务归它管。SpringMVC 和 MyBatis 只管干自己的活,需要什么组件找 Spring 要就行了。
第二部分:整体架构脑图
浏览器请求
│
▼
web.xml ──────────────────────────────────────────────
│ │
│ 1. ContextLoaderListener(服务器启动时触发) │
│ └─ 加载 applicationContext.xml │
│ └─ 创建 Spring 容器(父容器) │
│ │
│ 2. DispatcherServlet(接收所有请求) │
│ └─ 加载 springmvc-servlet.xml │
│ └─ 创建 SpringMVC 容器(子容器) │
└──────────────────────────────────────────────────│
▼
Spring 容器(大管家/父容器)
┌─────────────────────┐
│ 数据源(Druid) │
│ SqlSessionFactory │
│ Mapper 接口代理 │
│ 事务管理器 │
│ Service 组件 │
└─────────────────────┘
│
▼
SpringMVC 容器(子容器)
┌─────────────────────┐
│ DispatcherServlet │
│ Controller 组件 │
└─────────────────────┘
│
请求路径 /get此处写实体类名By此处写实体类名no/10 │
▼
@RestController
Controller 层
│ @Autowired
▼
@Service
Service 层
│ @Autowired
▼
@Mapper
Mapper 接口 ──── XML 映射文件
│
▼
MySQL 数据库
三个容器各管一摊:
- Spring 容器(applicationContext.xml)→ 管数据源、MyBatis、事务、Service
- SpringMVC 容器(springmvc-servlet.xml)→ 管 Controller、视图解析
- web.xml → 粘合层,把上面两个容器串起来
第三部分:集成步骤逐条拆解(每一步都告诉你"为什么")
步骤 0:创建 Maven 工程 + 引入依赖
不用死记每个依赖,按"角色"分类记:
Spring核心 3 件套:spring-context、spring-webmvc、spring-jdbc
(容器) (MVC) (事务+JdbcTemplate)
AOP 1 个: aspectjweaver(事务切面需要)
JSON 1 个: jackson-databind(Controller 返回 JSON 需要)
MyBatis 2 个: mybatis、mybatis-spring
(原生) (Spring 整合 MyBatis 的桥)
数据库 2 个: druid(连接池)、mysql-connector-j(MySQL 驱动)
Servlet 1 个: jakarta.servlet-api(Spring 6.x 需要 Jakarta,不是 javax)
日志 1 个: logback-classic
测试 2 个: spring-test、junit-jupiter
为什么是这些依赖:
- spring-context 是 Spring 的核心,IoC 容器就在这
- spring-webmvc 是 SpringMVC,DispatcherServlet 在这
- spring-jdbc 自带事务管理器和 JdbcTemplate
- mybatis-spring 是桥梁,让 Spring 能管理 MyBatis 的 SqlSessionFactory 和 Mapper
- Druid 是目前最流行的连接池
- jackson 让 Controller 能把 Java 对象自动转成 JSON 返回
步骤 1:web.xml 配置 ContextLoaderListener
<listener>
<listener-class>org.springframework.web.context.ContextLoaderListener</listener-class>
</listener>
<context-param>
<param-name>contextConfigLocation</param-name>
<param-value>classpath:applicationContext.xml</param-value>
</context-param>
为什么需要这步:
- 普通的 Java 项目:new ClassPathXmlApplicationContext("applicationContext.xml") 手动创建容器
- Web 项目:不能每次请求都创建容器,必须在服务器启动时一次性创建
- ContextLoaderListener 实现 ServletContextListener,Tomcat 启动时会自动调用它
- 它做的事就是:读取 applicationContext.xml,创建 Spring 容器,把容器存到 ServletContext 里
一句话:让 Spring 容器随 Tomcat 启动而创建,随 Tomcat 关闭而销毁。
步骤 2:创建 applicationContext.xml(Spring 容器骨架)
<beans xmlns="…"
xmlns:context="…" <!– 用于扫描注解:@Service、@Autowired 等 —>
xmlns:tx="…" <!– 用于事务注解:@Transactional –>
xmlns:aop="…" <!– 用于 AOP:事务切面需要 –>
…>
</beans>
四个命名空间各管什么:
- context → 扫描注解、加载 properties 文件
- tx → @Transactional 注解驱动事务
- aop → 事务底层就是 AOP,没有 AOP 事务不生效
- 默认的 beans → 最基本的 <bean> 标签
步骤 3:集成 MyBatis(核心重头戏)
这一步是整个集成最复杂的部分,分成 5 个小步骤,顺序不能乱:
1. 引入 db.properties(数据库连接信息)
↓
2. 配置 Druid 数据源(连接池)
↓
3. 配置 SqlSessionFactory(MyBatis 核心工厂)+ 别名
↓
4. 配置 MapperScannerConfigurer(自动扫描 Mapper 接口)
↓
5. 配置事务管理器 + 开启注解事务
为什么要按这个顺序:后面的依赖前面的。
- SqlSessionFactory 需要 DataSource(2 是 3 的前提)
- MapperScanner 需要 SqlSessionFactory(3 是 4 的前提)
- 事务管理器需要 DataSource(2 是 5 的前提)
逐条解释:
1. db.properties:
jdbc.driver=com.mysql.cj.jdbc.Driver
jdbc.url=jdbc:mysql://localhost:3306/此处写数据库名
jdbc.username=root
jdbc.password=root
把数据库配置抽出来,方便改环境。
2. 数据源 DruidDataSource:
<bean id="dataSource" class="com.alibaba.druid.pool.DruidDataSource">
<property name="driverClassName" value="${jdbc.driver}"/>
<property name="url" value="${jdbc.url}"/>
…
</bean>
Druid 连接池管理数据库连接——连接复用,不用每次都创建/销毁,性能提升巨大。
3. SqlSessionFactoryBean:
<bean id="sqlSessionFactory" class="org.mybatis.spring.SqlSessionFactoryBean">
<property name="dataSource" ref="dataSource"/>
<property name="typeAliasesPackage" value="此处写pojo包名"/>
</bean>
- SqlSessionFactory → MyBatis 的核心,所有 SQL 操作都通过它
- typeAliasesPackage → 给实体类起别名,映射文件中 resultType="此处写实体类名" 不用写全类名
4. MapperScannerConfigurer(理解 SSM 集成的关键):
<bean class="org.mybatis.spring.mapper.MapperScannerConfigurer">
<property name="basePackage" value="此处写mapper包名"/>
<property name="sqlSessionFactoryBeanName" value="sqlSessionFactory"/>
</bean>
- 它会扫描 此处写mapper包名 包下所有带 @Mapper 注解的接口
- 自动为每个接口生成代理对象,注入到 Spring 容器中
- 之后你在 Service 里 @Autowired private 此处写Mapper接口名 deptMapper 就能直接拿到代理对象
- 没有这个,MyBatis 的 Mapper 接口就是一堆没用的接口,Spring 不会管它们
5. 事务管理器:
<bean id="transactionManager" class="org.springframework.jdbc.datasource.DataSourceTransactionManager">
<property name="dataSource" ref="dataSource"/>
</bean>
<tx:annotation-driven transaction-manager="transactionManager"/>
- DataSourceTransactionManager → Spring 提供的事务管理器,基于数据源
- <tx:annotation-driven> → 开启 @Transactional 注解,Service 层加一个注解就能自动管理事务
同时还要写两个文件:
Mapper 接口(Java):
@Mapper // 告诉 Spring:这是个 Mapper,请 MapperScanner 扫描我
public interface 此处写Mapper接口名 {
public 此处写实体类名 get此处写实体类名ById(Integer 此处写列名);
}
映射文件(XML):
<mapper namespace="此处写接口全类名"> <!– namespace = 接口全类名 –>
<select id="get此处写实体类名ById" parameterType="int" resultType="此处写实体类名">
select * from 此处写表名 where 此处写列名=#{此处写列名}
</select>
</mapper>
注意:
- namespace = Mapper 接口的全限定类名(必须一致)
- id = 接口中的方法名(必须一致)
- resultType = 实体类别名(SqlSessionFactory 中配了别名才能简写)
步骤 4:集成 SpringMVC
4.1 web.xml 中配置 DispatcherServlet
<servlet>
<servlet-name>springmvc</servlet-name>
<servlet-class>org.springframework.web.servlet.DispatcherServlet</servlet-class>
<init-param>
<param-name>contextConfigLocation</param-name>
<param-value>classpath:springmvc-servlet.xml</param-value>
</init-param>
</servlet>
<servlet-mapping>
<servlet-name>springmvc</servlet-name>
<url-pattern>/</url-pattern>
</servlet-mapping>
为什么还要配一个 DispatcherServlet?之前不是已经有 ContextLoaderListener 了吗?
这是 SSM 面试高频考点——父子容器:
ContextLoaderListener 创建的 → Spring 容器(父容器)
└─ 管:数据源、Mapper、Service、事务("底层组件")
DispatcherServlet 创建的 → SpringMVC 容器(子容器)
└─ 管:Controller、视图解析器("Web 层组件")
子容器可以访问父容器的 Bean(Controller 能 @Autowired Service)
父容器不能访问子容器的 Bean(Service 不能 @Autowired Controller)
为什么要分离:
- 职责分离:Web 层组件和业务层组件分开管理
- Controller 是 Web 层的东西,不应该让 Spring 根容器去扫描它
- 分容器后,单元测试可以只加载父容器,不用启动 Web 环境
4.2 创建 springmvc-servlet.xml
<beans xmlns:mvc="…">
<!– 相当于同时配置了 RequestMappingHandlerMapping 和 RequestMappingHandlerAdapter –>
<mvc:annotation-driven/>
<!– 只扫描 Controller,不扫描 Service(Service 归父容器管) –>
<context:component-scan base-package="此处写controller包名"/>
</beans>
- <mvc:annotation-driven> → 一句话搞定 SpringMVC 的基础设施(Jackson 转换 JSON、参数绑定、校验等)
- <context:component-scan> → 只扫 Controller 包,千万别扫 Service(Service 在父容器里)
4.3 在 Spring 父容器中添加 Service 扫描
<!– 写在 applicationContext.xml 里,不是 springmvc-servlet.xml –>
<context:component-scan base-package="此处写service包名"/>
关键区分:
- applicationContext.xml 扫描 service、不扫描 controller
- springmvc-servlet.xml 扫描 controller、不扫描 service
4.4 写三层代码
请求进来 → @RestController(Controller)
│ @Autowired
▼
@Service(Service)
│ @Autowired
▼
@Mapper(Mapper接口) → XML映射文件 → SQL → 数据库
Controller:
@RestController // = @Controller + @ResponseBody(返回 JSON 不用每个方法加 @ResponseBody)
public class 此处写Controller类名 {
@Autowired
private 此处写Service接口名 deptService; // Controller 依赖 Service,Spring 自动注入
@GetMapping("/get此处写实体类名By此处写实体类名no/{此处写列名}")
public 此处写实体类名 get此处写实体类名By此处写实体类名no(@PathVariable Integer 此处写列名) {
return deptService.query此处写实体类名By此处写实体类名no(此处写列名);
}
}
Service:
@Service // 告诉 Spring:我是一个 Service 组件,请把我管理起来
public class 此处写Service实现类名 implements 此处写Service接口名 {
@Autowired
private 此处写Mapper接口名 deptMapper; // Service 依赖 Mapper,Spring 自动注入代理对象
public 此处写实体类名 query此处写实体类名By此处写实体类名no(Integer 此处写列名) {
return deptMapper.get此处写实体类名ById(此处写列名);
}
}
Mapper(前面步骤 3 已经写好了)
步骤 5:完整项目结构
src/main/java/
├── 此处写controller包名/
│ └── 此处写Controller类名.java @RestController
├── 此处写service包名/
│ ├── 此处写Service接口名.java 接口
│ └── impl/
│ └── 此处写Service实现类名.java @Service
├── 此处写mapper包名/
│ └── 此处写Mapper接口名.java @Mapper
└── 此处写pojo包名/
└── 此处写实体类名.java 实体类
src/main/resources/
├── applicationContext.xml Spring 父容器(数据源+MyBatis+事务+Service扫描)
├── springmvc-servlet.xml SpringMVC 子容器(MVC驱动+Controller扫描)
├── db.properties 数据库配置
└── 此处写mapper包路径/
└── 此处写Mapper接口名.xml 映射文件(必须和接口同包同层级)
第四部分:终极记忆口诀
搭建流程 = “依赖 → 容器 → 数据 → Web → 代码”
第一步:pom.xml 引入依赖
9 组依赖:Spring3 + AOP1 + JSON1 + MyBatis2 + 数据库2 + Servlet1 + 日志1 + 测试2
第二步:web.xml 配置
ContextLoaderListener → 启动时加载 Spring 容器
DispatcherServlet → 拦截所有请求
第三步:applicationContext.xml(Spring 父容器)
db.properties → Druid数据源 → SqlSessionFactory → Mapper扫描 → 事务管理器
↑
扫描 service 包 ← ← ← ← ← ← ← ← ← ← ← ← ← ← ← ← ← ┘
第四步:springmvc-servlet.xml(SpringMVC 子容器)
mvc:annotation-driven + 扫描 controller 包
第五步:写三层代码
Controller(@RestController) → Service(@Service) → Mapper(@Mapper)
↑ ↑ ↑
在子容器中 在父容器中 代理对象在父容器中
MyBatis 配置链口诀:“引数工扫事”
引 → 引入 db.properties
数 → 配置数据源(Druid)
工 → 配置 SqlSessionFactory(MyBatis 核心工厂)
扫 → 配置 MapperScanner(自动扫描 Mapper 接口生成代理)
事 → 配置事务管理器 + 开启注解事务
最容易搞混的两个点:
第五部分:关系索引图
web.xml(启动入口)
/ \\
/ \\
ContextLoaderListener DispatcherServlet
(创建父容器) (创建子容器)
│ │
▼ ▼
applicationContext.xml springmvc-servlet.xml
┌─────────────────────┐ ┌──────────────────────┐
│ db.properties │ │ mvc:annotation-driven│
│ DruidDataSource │ │ 扫描 Controller │
│ SqlSessionFactory │ └──────────────────────┘
│ MapperScannerConfig │ │
│ 事务管理器 │ │
│ 扫描 Service │ │
└─────────────────────┘ │
│ │
│ ┌────────────────────────┘
│ │ 子容器可以访问父容器的 Bean
│ ▼
│ Controller ──@Autowired──▶ Service ──@Autowired──▶ Mapper(代理)
│ │
└────────────────────────────────────────────────────────┘
父容器持有所有底层组件
第六部分:一张表总结所有注解和配置
| 实体类 | 无注解 | pojo 包 | 对应数据库表 |
| Mapper 接口 | @Mapper | mapper 包 | 标记给 MapperScanner 扫描 |
| 映射文件 | <mapper namespace="…"> | resources 下 | SQL 语句,namespace=接口全类名 |
| Service | @Service | service 包 | 标记为 Service 组件,被父容器扫描 |
| Controller | @RestController | controller 包 | 标记为 Controller,被子容器扫描 |
| 依赖注入 | @Autowired | 各层 | Spring 自动注入依赖的 Bean |
| 数据源 | <bean id="dataSource"> | applicationContext.xml | Druid 连接池 |
| SqlSessionFactory | <bean id="sqlSessionFactory"> | applicationContext.xml | MyBatis 核心工厂 |
| Mapper 扫描 | MapperScannerConfigurer | applicationContext.xml | 扫描 @Mapper 接口生成代理 |
| 事务管理器 | DataSourceTransactionManager | applicationContext.xml | 管理数据库事务 |
| MVC 驱动 | <mvc:annotation-driven/> | springmvc-servlet.xml | 启用 SpringMVC 基础设施 |
| Service 扫描 | <context:component-scan> | applicationContext.xml | 扫描 service 包 |
| Controller 扫描 | <context:component-scan> | springmvc-servlet.xml | 扫描 controller 包 |
一句话总结:整个 SSM 集成就一条主线——让 Spring 当管家,把数据层(MyBatis)和 Web 层(SpringMVC)需要的所有组件都管起来,然后通过依赖注入把它们串到一起。 记住这个"管家模式",你永远不会忘掉为什么要这样配。