通过调用官YOLOv8模型训练柑橘果实检测数据集 如何建立 深度学习基于 YOLOv8 的柑橘果实检测系统 柑桔柑橘数据集的训练及应用
文章目录
- 通过调用官YOLOv8模型训练柑橘果实检测数据集 如何建立 深度学习基于 YOLOv8 的柑橘果实检测系统 柑桔柑橘数据集的训练及应用
-
- 数据集描述:
- 🍊如何建立 基于 YOLOv8 的柑橘果实检测系统构建
-
- 🧰 环境搭建(CUDA驱动、Anaconda、Python虚拟环境)
-
- 1. 安装 CUDA 驱动
- 2. 安装 Anaconda
- 3. 创建 Python 虚拟环境
- 4. 安装依赖项
- 📁 数据集结构说明
-
- `data.yaml` 内容如下:
- 🏋️ 使用 YOLOv8 训练模型
-
- 加载官方预训练模型进行训练
- 开始训练(推荐配置)
- 🔍 推理代码(单张图片 + 批量处理)
-
- 单张图片推理
- 批量图片推理
- 📊 模型评估代码(验证精度、混淆矩阵等)
-
- 验证 mAP、Recall、Precision 等指标
- 2. 训练模型
- 3. 推理和评估
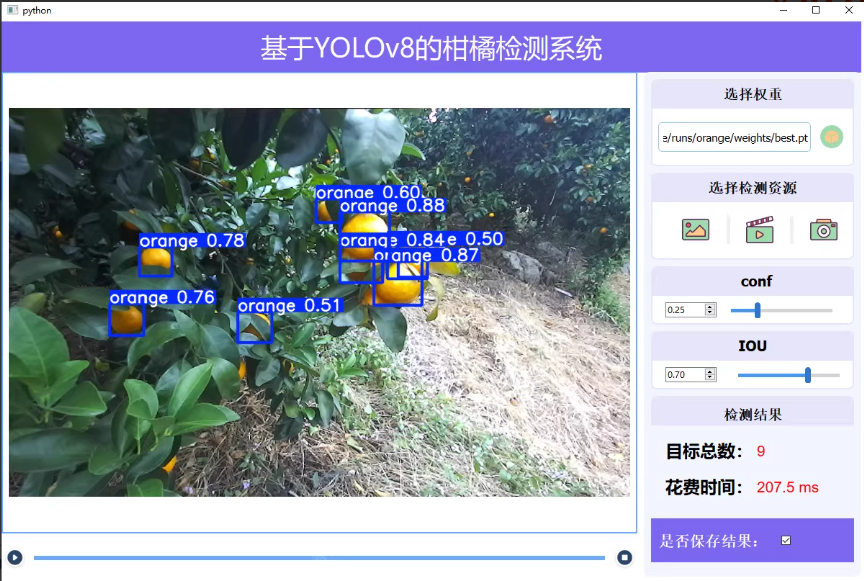
- 4. 构建GUI界面
以下文字及代码仅供参考学习使用。
文章目录
- 通过调用官YOLOv8模型训练柑橘果实检测数据集 如何建立 深度学习基于 YOLOv8 的柑橘果实检测系统 柑桔柑橘数据集的训练及应用
-
- 数据集描述:
- 🍊如何建立 基于 YOLOv8 的柑橘果实检测系统构建
-
- 🧰 环境搭建(CUDA驱动、Anaconda、Python虚拟环境)
-
- 1. 安装 CUDA 驱动
- 2. 安装 Anaconda
- 3. 创建 Python 虚拟环境
- 4. 安装依赖项
- 📁 数据集结构说明
-
- `data.yaml` 内容如下:
- 🏋️ 使用 YOLOv8 训练模型
-
- 加载官方预训练模型进行训练
- 开始训练(推荐配置)
- 🔍 推理代码(单张图片 + 批量处理)
-
- 单张图片推理
- 批量图片推理
- 📊 模型评估代码(验证精度、混淆矩阵等)
-
- 验证 mAP、Recall、Precision 等指标
- 2. 训练模型
- 3. 推理和评估
- 4. 构建GUI界面
以下文字及代码仅供参考学习使用。
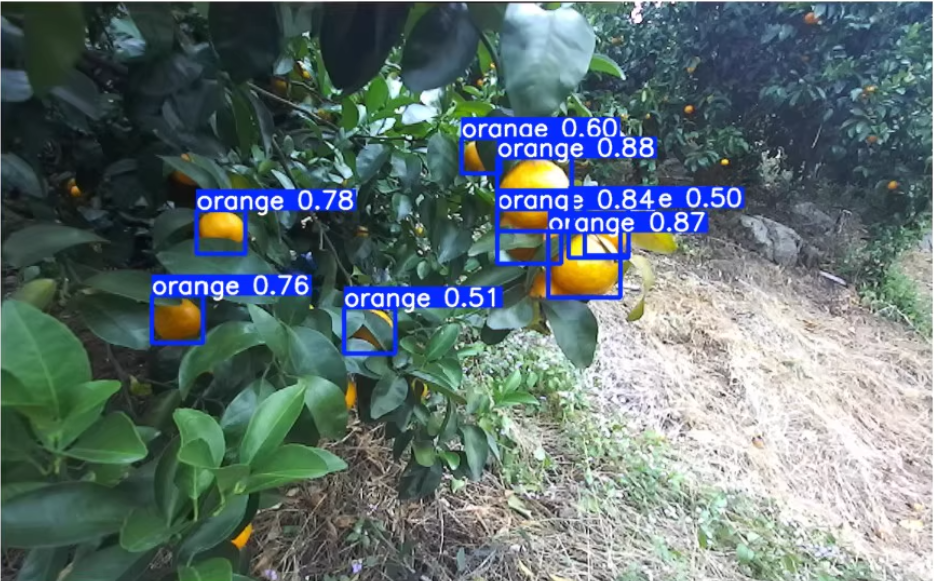
数据集描述:
柑橘果实检测数据集 可yolo目标检测 训练测试验证 标签为txt格式 一类[ ’ orange’] 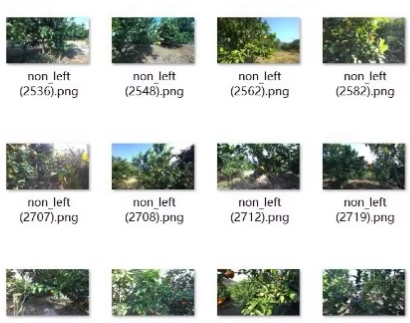
训练集:2913张 测试集:971张 验证集:971张 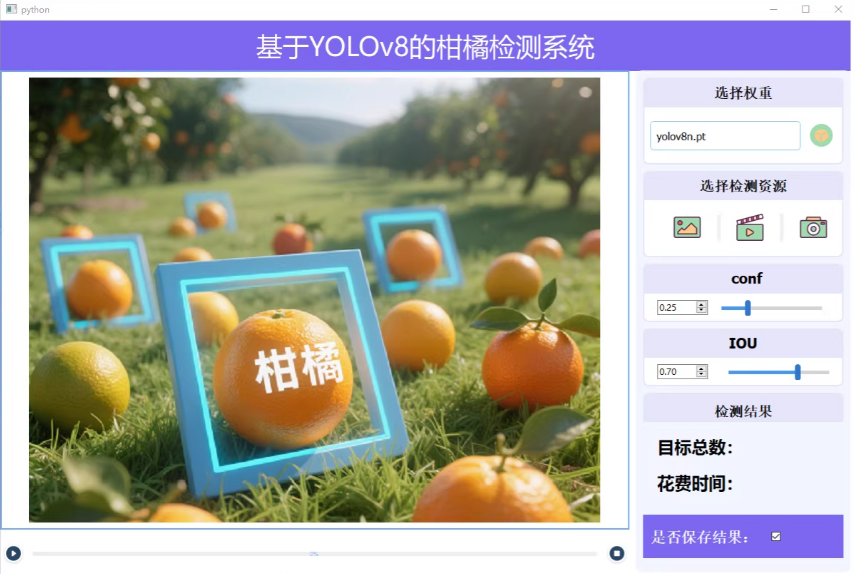 1
1 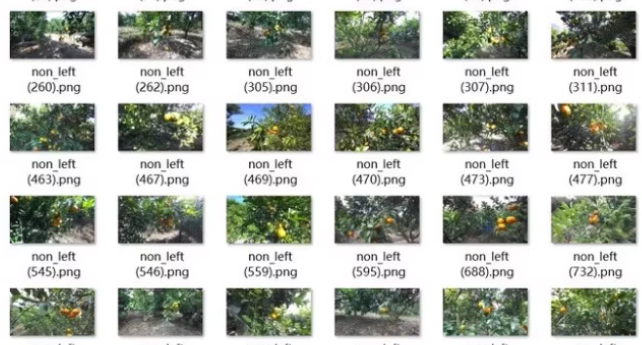
🍊如何建立 基于 YOLOv8 的柑橘果实检测系统构建
🧰 环境搭建(CUDA驱动、Anaconda、Python虚拟环境)
1. 安装 CUDA 驱动
nvidia-smi
- 如果未安装,请前往 NVIDIA官网 下载并安装对应显卡型号的最新驱动。
2. 安装 Anaconda
从 Anaconda官网 下载并安装适合你系统的版本。
3. 创建 Python 虚拟环境
conda create –name yolov8_orange python=3.9
conda activate yolov8_orange
4. 安装依赖项
pip install torch torchvision torchaudio
pip install ultralytics==8.2.0
pip install opencv-python
pip install numpy
pip install matplotlib
pip install tqdm
📁 数据集结构说明
你的柑橘果实数据集应组织如下:
orange_dataset/
├── images/
│ ├── train/
│ ├── val/
│ └── test/
├── labels/
│ ├── train/
│ ├── val/
│ └── test/
└── data.yaml
data.yaml 内容如下:
train: ./orange_dataset/images/train
val: ./orange_dataset/images/val
test: ./orange_dataset/images/test
nc: 1
names: ['orange']
🏋️ 使用 YOLOv8 训练模型
加载官方预训练模型进行训练
from ultralytics import YOLO
# 加载YOLOv8预训练模型(如 yolov8s.pt)
model = YOLO('yolov8s.pt') # 可选:yolov8n, yolov8m, yolov8l, yolov8x
开始训练(推荐配置)
results = model.train(
data='path/to/data.yaml',
epochs=100,
imgsz=640,
batch=16,
name='orange_yolov8s',
pretrained=True,
optimizer='AdamW',
lr0=1e-3,
lrf=1e-4,
momentum=0.937,
weight_decay=0.0005,
warmup_epochs=3,
patience=10,
device=0 if torch.cuda.is_available() else None,
workers=4,
project="runs/orange",
save=True,
save_period=5, # 每5个epoch保存一次模型
verbose=True
)
🔍 推理代码(单张图片 + 批量处理)
单张图片推理
from ultralytics import YOLO
import cv2
# 加载模型
model = YOLO('runs/orange/orange_yolov8s/weights/best.pt')
# 图片路径
image_path = 'test_images/example.jpg'
# 进行预测
results = model(image_path)
# 绘制结果
for result in results:
annotated_img = result.plot()
cv2.imshow('Detection Result', annotated_img)
cv2.waitKey(0)
cv2.destroyAllWindows()
批量图片推理
import os
from ultralytics import YOLO
# 加载模型
model = YOLO('runs/orange/orange_yolov8s/weights/best.pt')
# 输入输出目录
input_dir = 'orange_dataset/images/test'
output_dir = 'inference_results'
os.makedirs(output_dir, exist_ok=True)
# 批量处理
for img_file in os.listdir(input_dir):
if img_file.lower().endswith(('.png', '.jpg', '.jpeg')):
image_path = os.path.join(input_dir, img_file)
results = model(image_path)
for result in results:
annotated_img = result.plot()
output_path = os.path.join(output_dir, img_file)
cv2.imwrite(output_path, annotated_img)
print(f"✅ 批量推理完成,结果已保存到 {output_dir}")
📊 模型评估代码(验证精度、混淆矩阵等)
验证 mAP、Recall、Precision 等指标
# 验证模型性能
metrics = model.val()
# 输出各项指标
print("mAP@0.5:", metrics.box.map50)
print("mAP@0.5:0.95:", metrics.box.map)
print("Precision:", metrics.box.precision)
print("Recall:", metrics.box.recall)
print("F1 Score:", metrics.box.f1)
—
基于YOLOv8的柑橘检测系统,使用Python的`tkinter`库来构建图形用户界面。以下是一个详细的代码示例,包括训练、推理和评估部分,以及一个简单的GUI界面。
### 1. 安装必要的库
确保你已经安装了所有必要的库:
```bash
pip install torch torchvision torchaudio
pip install ultralytics==8.2.0
pip install opencv-python
pip install numpy
pip install matplotlib
pip install tqdm
pip install tk
2. 训练模型
需要训练模型。使用以下代码进行训练:
from ultralytics import YOLO
# 加载YOLOv8预训练模型(如 yolov8s.pt)
model = YOLO('yolov8s.pt')
# 开始训练
results = model.train(
data='path/to/data.yaml',
epochs=100,
imgsz=640,
batch=16,
name='orange_yolov8s',
pretrained=True,
optimizer='AdamW',
lr0=1e-3,
lrf=1e-4,
momentum=0.937,
weight_decay=0.0005,
warmup_epochs=3,
patience=10,
device=0 if torch.cuda.is_available() else None,
workers=4,
project="runs/orange",
save=True,
save_period=5, # 每5个epoch保存一次模型
verbose=True
)
3. 推理和评估
接下来,我们编写推理和评估的代码:
import cv2
from ultralytics import YOLO
# 加载模型
model = YOLO('runs/orange/orange_yolov8s/weights/best.pt')
# 验证模型性能
metrics = model.val()
# 输出各项指标
print("mAP@0.5:", metrics.box.map50)
print("mAP@0.5:0.95:", metrics.box.map)
print("Precision:", metrics.box.precision)
print("Recall:", metrics.box.recall)
print("F1 Score:", metrics.box.f1)
# 单张图片推理
image_path = 'test_images/example.jpg'
results = model(image_path)
for result in results:
annotated_img = result.plot()
cv2.imshow('Detection Result', annotated_img)
cv2.waitKey(0)
cv2.destroyAllWindows()
4. 构建GUI界面
最后,我们使用tkinter构建一个简单的GUI界面:
import tkinter as tk
from PIL import Image, ImageTk
import cv2
from ultralytics import YOLO
import os
class OrangeDetectorApp:
def __init__(self, root):
self.root = root
self.root.title("基于YOLOv8的柑橘检测系统")
# 创建左侧图像显示区域
self.image_frame = tk.Frame(root)
self.image_frame.pack(side=tk.LEFT, padx=10, pady=10)
self.image_label = tk.Label(self.image_frame)
self.image_label.pack()
# 创建右侧控制面板
self.control_panel = tk.Frame(root)
self.control_panel.pack(side=tk.RIGHT, padx=10, pady=10)
# 权重选择
self.weight_frame = tk.Frame(self.control_panel)
self.weight_frame.pack(pady=10)
tk.Label(self.weight_frame, text="选择权重").pack()
self.weight_entry = tk.Entry(self.weight_frame, width=50)
self.weight_entry.pack()
self.weight_entry.insert(0, "runs/orange/orange_yolov8s/weights/best.pt")
tk.Button(self.weight_frame, text="加载", command=self.load_model).pack()
# 数据源选择
self.data_source_frame = tk.Frame(self.control_panel)
self.data_source_frame.pack(pady=10)
tk.Label(self.data_source_frame, text="选择检测资源").pack()
tk.Button(self.data_source_frame, text="图片", command=self.detect_image).pack(side=tk.LEFT)
tk.Button(self.data_source_frame, text="视频", command=self.detect_video).pack(side=tk.LEFT)
tk.Button(self.data_source_frame, text="摄像头", command=self.detect_camera).pack(side=tk.LEFT)
# 参数设置
self.param_frame = tk.Frame(self.control_panel)
self.param_frame.pack(pady=10)
tk.Label(self.param_frame, text="conf").pack()
self.conf_slider = tk.Scale(self.param_frame, from_=0.0, to=1.0, resolution=0.01, orient=tk.HORIZONTAL)
self.conf_slider.set(0.25)
self.conf_slider.pack()
tk.Label(self.param_frame, text="IOU").pack()
self.iou_slider = tk.Scale(self.param_frame, from_=0.0, to=1.0, resolution=0.01, orient=tk.HORIZONTAL)
self.iou_slider.set(0.7)
self.iou_slider.pack()
# 检测结果
self.result_frame = tk.Frame(self.control_panel)
self.result_frame.pack(pady=10)
tk.Label(self.result_frame, text="检测结果").pack()
self.result_label = tk.Label(self.result_frame, text="目标总数:0\\n花费时间:0 ms")
self.result_label.pack()
# 是否保存结果
self.save_frame = tk.Frame(self.control_panel)
self.save_frame.pack(pady=10)
self.save_var = tk.IntVar()
tk.Checkbutton(self.save_frame, text="是否保存结果", variable=self.save_var).pack()
# 初始化模型
self.model = None
def load_model(self):
weight_path = self.weight_entry.get()
if os.path.exists(weight_path):
self.model = YOLO(weight_path)
print("模型加载成功!")
else:
print("模型路径不存在!")
def detect_image(self):
if self.model is not None:
image_path = 'test_images/example.jpg' # 替换为你的测试图片路径
results = self.model(image_path, conf=self.conf_slider.get(), iou=self.iou_slider.get())
for result in results:
annotated_img = result.plot()
img = cv2.cvtColor(annotated_img, cv2.COLOR_BGR2RGB)
img = Image.fromarray(img).resize((640, 480))
imgtk = ImageTk.PhotoImage(image=img)
self.image_label.imgtk = imgtk
self.image_label.configure(image=imgtk)
self.result_label.config(text=f"目标总数:{len(result.boxes)}\\n花费时间:{result.speed['inference']:.1f} ms")
def detect_video(self):
pass # 实现视频检测逻辑
def detect_camera(self):
pass # 实现摄像头检测逻辑
if __name__ == "__main__":
root = tk.Tk()
app = OrangeDetectorApp(root)
root.mainloop()