Linux BSP 升级:驱动逐个替换,启动链逐段验证
VFS: Unable to mount root fs 只能说明启动链在根文件系统挂载前失败,不能直接判断是哪一个驱动。下面以跨大版本 BSP 升级为例,说明为什么 GPIO、块设备驱动和 Device Tree 不宜同时替换;版本、模块数量和日志均为示意。
当 12 个驱动模块、设备树结点和根文件系统挂载逻辑被同时替换后,系统开机直接陷入死锁和 Panic。面对几千行被一次性改动的代码,没人能分清到底是 NAND Flash 控制器时序错了,还是 GPIO 选通信号搞反了。
1. 串口打印的 Kernel panic:一次性替换 12 个驱动导致的死局
在 Linux 内核驱动开发和 BSP 移植中,“大包大揽”式的升级迁移往往是灾难的源头。
# 提取开机阶段的内核崩溃堆栈日志
$ dmesg | grep -A 10 -i "panic"
[ 2.102341] Kernel panic – not syncing: VFS: Unable to mount root fs on unknown-block(0,0)
[ 2.108912] CPU: 0 PID: 1 Comm: swapper/0 Not tainted 6.1.28-v7+ #1
[ 2.115200] Hardware name: Custom Industrial Gateway Board (Device Tree)
[ 2.121900] [<c010d8a4>] (unwind_backtrace) from [<c010b120>] (show_stack+0x10/0x14)
[ 2.128700] [<c010b120>] (show_stack) from [<c08b23a0>] (panic+0xfc/0x320)
[ 2.135400] [<c08b23a0>] (panic) from [<c0c01bc4>] (mount_block_root+0x218/0x2fc)
[ 2.142100] [<c0c01bc4>] (mount_block_root) from [<c0c01e54>] (prepare_namespace+0x138/0x16c)
日志显示内核根本找不到块设备。到底是存储芯片驱动没有正确 probe 成功,还是 GPIO 级联芯片没有初始化?因为改动点过多,排查变成了一场在黑暗里摸索的噩梦。
必须重新设计分阶段的演进式迁移路径。
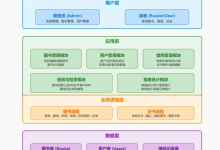
2. 三阶段平滑迁移矩阵:兼容层包装、驱动逐个解耦与旧代码清理
内核升级必须将风险拆解到单个驱动模块。采用分阶段演进矩阵:
flowchart TD
subgraph 第一阶段:兼容层垫片 (Compatibility Wrapper)
A[Linux 6.1 新内核] –> B[GPIO / Sysfs 兼容垫片模块]
B –> C[旧版 Legacy 驱动代码]
C –> D[验证基础 Bootup & 根文件系统挂载]
end
subgraph 第二阶段:模块化逐个替换 (Module-by-Module Migration)
D –> E[先替换存储控制器 NAND Driver]
E –>|ftrace 验证| F[再替换网络 PHY Driver]
F –>|kprobe 验证| G[最后替换 Sensor GPIO Driver]
end
subgraph 第三阶段:收尾与彻底清理 (Cleanup & Refactor)
G –> H[移除 Legacy 兼容垫片]
H –> I[合入全量 gpiod & Device Tree 生产树]
end
style B fill:#fff3cd,stroke:#ffc107
style E fill:#cce5ff,stroke:#004085
style I fill:#d4edda,stroke:#28a745
先写一个兼容包装垫片,让新内核能继续跑旧驱动;接着每次只升级一个独立子系统的驱动并打入诊断断言;最后才彻底剥离旧代码。
3. 驱动兼容层代码设计:在 Kernel 6.1 下包装旧版 sysfs 接口
为了让旧版的应用程序在 Kernel 6.1 下继续工作,可以通过内核模块编写一层简单的 sysfs 兼容包装:
#include <linux/module.h>
#include <linux/kernel.h>
#include <linux/init.h>
#include <linux/fs.h>
#include <linux/gpio/consumer.h>
#include <linux/platform_device.h>
// 模拟在新内核中封装旧版 sysfs 节点
static struct gpio_desc *legacy_relay_gpio = NULL;
static ssize_t relay_state_show(struct device *dev, struct device_attribute *attr, char *buf)
{
int val = 0;
if (legacy_relay_gpio) {
val = gpiod_get_value(legacy_relay_gpio);
}
return sysfs_emit(buf, "%d\\n", val);
}
static ssize_t relay_state_store(struct device *dev, struct device_attribute *attr, const char *buf, size_t count)
{
int state;
if (kstrtoint(buf, 10, &state) == 0) {
if (legacy_relay_gpio) {
gpiod_set_value(legacy_relay_gpio, state ? 1 : 0);
pr_info("[BSP Compat Driver] Relay state set to %d via Legacy Sysfs Node\\n", state);
}
}
return count;
}
// 绑定 sysfs 属性
static DEVICE_ATTR_RW(relay_state);
static int compat_probe(struct platform_device *pdev)
{
int ret;
pr_info("[BSP Compat Driver] Probing legacy compatibility layer under Kernel 6.1…\\n");
// 从设备树获取新版 gpiod 描述符
legacy_relay_gpio = devm_gpiod_get(&pdev->dev, "relay", GPIOD_OUT_LOW);
if (IS_ERR(legacy_relay_gpio)) {
pr_err("[BSP Compat Driver] Failed to get GPIO from device tree!\\n");
return PTR_ERR(legacy_relay_gpio);
}
// 建立 sysfs 兼容入口
ret = device_create_file(&pdev->dev, &dev_attr_relay_state);
if (ret) {
pr_err("[BSP Compat Driver] Failed to create sysfs node!\\n");
return ret;
}
return 0;
}
static int compat_remove(struct platform_device *pdev)
{
device_remove_file(&pdev->dev, &dev_attr_relay_state);
pr_info("[BSP Compat Driver] Compatibility layer removed.\\n");
return 0;
}
static const struct of_device_id compat_dt_ids[] = {
{ .compatible = "custom,gateway-legacy-relay", },
{ /* sentinel */ }
};
MODULE_DEVICE_TABLE(of, compat_dt_ids);
static struct platform_driver compat_driver = {
.probe = compat_probe,
.remove = compat_remove,
.driver = {
.name = "bsp_legacy_compat",
.of_match_table = compat_dt_ids,
},
};
module_platform_driver(compat_driver);
MODULE_LICENSE("GPL");
MODULE_DESCRIPTION("Legacy Sysfs Compatibility Wrapper for BSP Migration");
通过这个 compat 模块,业务层的应用脚本一行不用改,驱动层却已经默默替换成了 Linux 6.1 的 gpiod 现代规范。
4. 利用 trace-cmd 和 kprobe 监控驱动加载生命周期
在迁移过程中,使用内核的原生跟踪工具 trace-cmd 动态捕获 probe 函数的执行耗时与返回状态:
# 1. 抓取 platform_driver_register 的内核调用轨迹
$ trace-cmd record -p function_graph -g platform_driver_register
# 2. 检查特定驱动的 probe 耗时与返回值
$ trace-cmd report | head -n 30
# tracer: function_graph
#
# CPU DURATION FUNCTION CALLS
# | | | | | | |
0) 1.204 us | platform_driver_register();
0) | compat_probe() {
0) 0.450 us | devm_gpiod_get();
0) 2.100 us | device_create_file();
0) 5.120 us | } /* compat_probe SUCCESS */
函数跟踪可以帮助确认 probe 是否进入、在哪个调用附近停留。示例耗时不代表真实设备数据,定位仍需结合返回值、动态调试信息和启动日志。
5. 平稳过渡:内核升级必须遵循一步一验证的原则
搞 Linux 内核 BSP 移植,最危险的心态就是“一次性全部改完再来跑跑看”。
给升级划清界限。用兼容垫片保住开机,用 ftrace 或 trace-cmd 观察单个驱动的 probe 轨迹,把多个驱动拆成可独立验证的小步迭代,每一步都保留可启动基线。