前言:在学习完JavaScript之后,我们就可以使用JavaScript来实现一下好玩的效果了,本篇文章讲解的是如何纯使用JavaScript来实现一个网页中的电子蜘蛛。

✨✨✨这里是秋刀鱼不做梦的BLOG
✨✨✨想要了解更多内容可以访问我的主页秋刀鱼不做梦-CSDN博客
在开始学习如何编写一个网页蜘蛛之前,先让我们看一下这个电子蜘蛛长什么样:
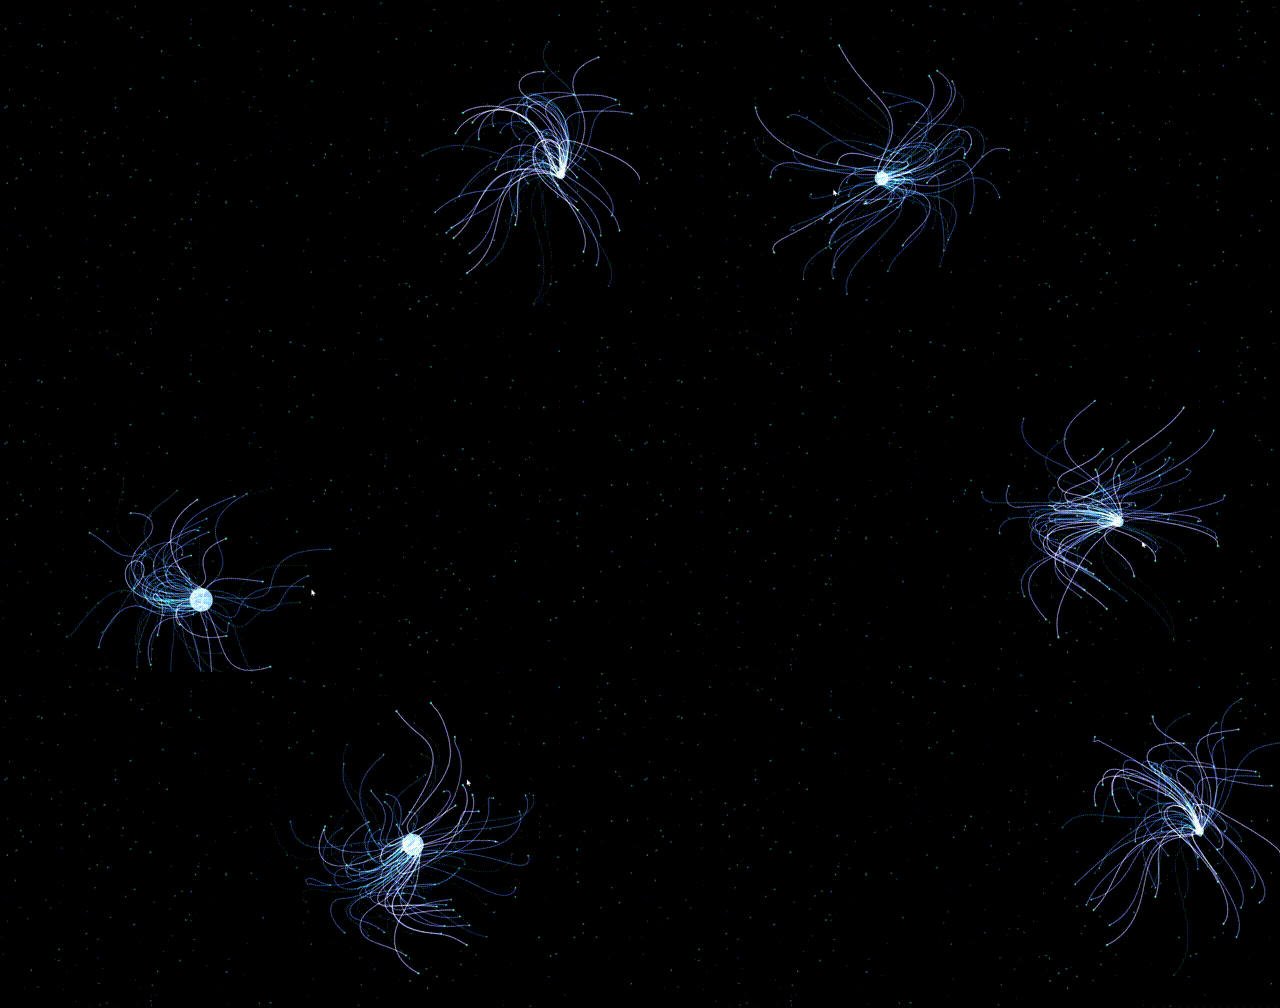
——我们可以看到,其会跟随着我们的鼠标进行移动,那么我们如何实现这样的效果呢?接下来让我们开始讲解。
1.HTML代码
我们的html代码十分的简单,就是创建一个画布,而我们接下来的操作,都是在此上边进行操作的:
<!DOCTYPE html>
<html lang="en">
<head>
<meta charset="UTF-8">
<meta http-equiv="X-UA-Compatible" content="IE=edge">
<meta name="viewport" content="width=device-width, initial-scale=1.0">
<title>秋刀鱼不做梦</title>
<!– 引入外部的JavaScript文件 –>
<script src="./test.js"></script>
<style>
/* 移除body的默认外边距和内边距 */
body {
margin: 0px;
padding: 0px;
position: fixed;
/* 设置网页背景颜色为黑色 */
background: rgb(0, 0, 0);
}
</style>
</head>
<body>
<!– 创建一个画布用于图形绘制 –>
<canvas id="canvas"></canvas>
</body>
</html>
可以看到我们的HTML代码非常的简单,接下来让我们开始在其上边进行操作!
2.JavaScript代码
在开始编写JavaScript代码之前,先让我们理清一下思路:
总体流程
页面加载时,canvas 元素和绘图上下文初始化。
定义触手对象,每条触手由多个段组成。
监听鼠标移动事件,实时更新鼠标的位置。
通过动画循环绘制触手,触手根据鼠标的位置动态变化,形成流畅的动画效果。
大致的流程就是上边的步骤,但是我相信读者在没用自己完成此代码的编写之前,可能不能理解上边的流程,不过没关系,现在让我们开始我们的网页小蜘蛛的编写:
写在前面:为了让读者可以更好的理解代码的逻辑,我们给没一句代码都加上了注释,希望读者可以根据注释的帮助一点一点的理解代码:
JavaScript代码:
// 定义requestAnimFrame函数
window.requestAnimFrame = function () {
// 检查浏览器是否支持requestAnimFrame函数
return (
window.requestAnimationFrame ||
window.webkitRequestAnimationFrame ||
window.mozRequestAnimationFrame ||
window.oRequestAnimationFrame ||
window.msRequestAnimationFrame ||
// 如果所有这些选项都不可用,使用设置超时来调用回调函数
function (callback) {
window.setTimeout(callback)
}
)
}
// 初始化函数,用于获取canvas元素并返回相关信息
function init(elemid) {
// 获取canvas元素
let canvas = document.getElementById(elemid)
// 获取2d绘图上下文,这里d是小写的
c = canvas.getContext('2d')
// 设置canvas的宽度为窗口内宽度,高度为窗口内高度
w = (canvas.width = window.innerWidth)
h = (canvas.height = window.innerHeight)
// 设置填充样式为半透明黑
c.fillStyle = "rgba(30,30,30,1)"
// 使用填充样式填充整个canvas
c.fillRect(0, 0, w, h)
// 返回绘图上下文和canvas元素
return { c: c, canvas: canvas }
}
// 等待页面加载完成后执行函数
window.onload = function () {
// 获取绘图上下文和canvas元素
let c = init("canvas").c,
canvas = init("canvas").canvas,
// 设置canvas的宽度为窗口内宽度,高度为窗口内高度
w = (canvas.width = window.innerWidth),
h = (canvas.height = window.innerHeight),
// 初始化鼠标对象
mouse = { x: false, y: false },
last_mouse = {}
// 定义计算两点距离的函数
function dist(p1x, p1y, p2x, p2y) {
return Math.sqrt(Math.pow(p2x – p1x, 2) + Math.pow(p2y – p1y, 2))
}
// 定义 segment 类
class segment {
// 构造函数,用于初始化 segment 对象
constructor(parent, l, a, first) {
// 如果是第一条触手段,则位置坐标为触手顶部位置
// 否则位置坐标为上一个segment对象的nextPos坐标
this.first = first
if (first) {
this.pos = {
x: parent.x,
y: parent.y,
}
} else {
this.pos = {
x: parent.nextPos.x,
y: parent.nextPos.y,
}
}
// 设置segment的长度和角度
this.l = l
this.ang = a
// 计算下一个segment的坐标位置
this.nextPos = {
x: this.pos.x + this.l * Math.cos(this.ang),
y: this.pos.y + this.l * Math.sin(this.ang),
}
}
// 更新segment位置的方法
update(t) {
// 计算segment与目标点的角度
this.ang = Math.atan2(t.y – this.pos.y, t.x – this.pos.x)
// 根据目标点和角度更新位置坐标
this.pos.x = t.x + this.l * Math.cos(this.ang – Math.PI)
this.pos.y = t.y + this.l * Math.sin(this.ang – Math.PI)
// 根据新的位置坐标更新nextPos坐标
this.nextPos.x = this.pos.x + this.l * Math.cos(this.ang)
this.nextPos.y = this.pos.y + this.l * Math.sin(this.ang)
}
// 将 segment 回执回初始位置的方法
fallback(t) {
// 将位置坐标设置为目标点坐标
this.pos.x = t.x
this.pos.y = t.y
this.nextPos.x = this.pos.x + this.l * Math.cos(this.ang)
this.nextPos.y = this.pos.y + this.l * Math.sin(this.ang)
}
show() {
c.lineTo(this.nextPos.x, this.nextPos.y)
}
}
// 定义 tentacle 类
class tentacle {
// 构造函数,用于初始化 tentacle 对象
constructor(x, y, l, n, a) {
// 设置触手的顶部位置坐标
this.x = x
this.y = y
// 设置触手的长度
this.l = l
// 设置触手的段数
this.n = n
// 初始化触手的目标点对象
this.t = {}
// 设置触手的随机移动参数
this.rand = Math.random()
// 创建触手的第一条段
this.segments = [new segment(this, this.l / this.n, 0, true)]
// 创建其他的段
for (let i = 1; i < this.n; i++) {
this.segments.push(
new segment(this.segments[i – 1], this.l / this.n, 0, false)
)
}
}
// 移动触手到目标点的方法
move(last_target, target) {
// 计算触手顶部与目标点的角度
this.angle = Math.atan2(target.y – this.y, target.x – this.x)
// 计算触手的距离参数
this.dt = dist(last_target.x, last_target.y, target.x, target.y)
// 计算触手的目标点坐标
this.t = {
x: target.x – 0.8 * this.dt * Math.cos(this.angle),
y: target.y – 0.8 * this.dt * Math.sin(this.angle)
}
// 如果计算出了目标点,则更新最后一个segment对象的位置坐标
// 否则,更新最后一个segment对象的位置坐标为目标点坐标
if (this.t.x) {
this.segments[this.n – 1].update(this.t)
} else {
this.segments[this.n – 1].update(target)
}
// 遍历所有segment对象,更新它们的位置坐标
for (let i = this.n – 2; i >= 0; i–) {
this.segments[i].update(this.segments[i + 1].pos)
}
if (
dist(this.x, this.y, target.x, target.y) <=
this.l + dist(last_target.x, last_target.y, target.x, target.y)
) {
this.segments[0].fallback({ x: this.x, y: this.y })
for (let i = 1; i < this.n; i++) {
this.segments[i].fallback(this.segments[i – 1].nextPos)
}
}
}
show(target) {
// 如果触手与目标点的距离小于触手的长度,则回执触手
if (dist(this.x, this.y, target.x, target.y) <= this.l) {
// 设置全局合成操作为lighter
c.globalCompositeOperation = "lighter"
// 开始新路径
c.beginPath()
// 从触手起始位置开始绘制线条
c.moveTo(this.x, this.y)
// 遍历所有的segment对象,并使用他们的show方法回执线条
for (let i = 0; i < this.n; i++) {
this.segments[i].show()
}
// 设置线条样式
c.strokeStyle = "hsl(" + (this.rand * 60 + 180) +
",100%," + (this.rand * 60 + 25) + "%)"
// 设置线条宽度
c.lineWidth = this.rand * 2
// 设置线条端点样式
c.lineCap = "round"
// 设置线条连接处样式
c.lineJoin = "round"
// 绘制线条
c.stroke()
// 设置全局合成操作为“source-over”
c.globalCompositeOperation = "source-over"
}
}
// 绘制触手的圆形头的方法
show2(target) {
// 开始新路径
c.beginPath()
// 如果触手与目标点的距离小于触手的长度,则回执白色的圆形
// 否则绘制青色的圆形
if (dist(this.x, this.y, target.x, target.y) <= this.l) {
c.arc(this.x, this.y, 2 * this.rand + 1, 0, 2 * Math.PI)
c.fillStyle = "whith"
} else {
c.arc(this.x, this.y, this.rand * 2, 0, 2 * Math.PI)
c.fillStyle = "darkcyan"
}
// 填充圆形
c.fill()
}
}
// 初始化变量
let maxl = 400,//触手的最大长度
minl = 50,//触手的最小长度
n = 30,//触手的段数
numt = 600,//触手的数量
tent = [],//触手的数组
clicked = false,//鼠标是否被按下
target = { x: 0, y: 0 }, //触手的目标点
last_target = {},//上一个触手的目标点
t = 0,//当前时间
q = 10;//触手每次移动的步长
// 创建触手对象
for (let i = 0; i < numt; i++) {
tent.push(
new tentacle(
Math.random() * w,//触手的横坐标
Math.random() * h,//触手的纵坐标
Math.random() * (maxl – minl) + minl,//触手的长度
n,//触手的段数
Math.random() * 2 * Math.PI,//触手的角度
)
)
}
// 绘制图像的方法
function draw() {
// 如果鼠标移动,则计算触手的目标点与当前点的偏差
if (mouse.x) {
target.errx = mouse.x – target.x
target.erry = mouse.y – target.y
} else {
// 否则,计算触手的目标点的横坐标
target.errx =
w / 2 +
((h / 2 – q) * Math.sqrt(2) * Math.cos(t)) /
(Math.pow(Math.sin(t), 2) + 1) –
target.x;
target.erry =
h / 2 +
((h / 2 – q) * Math.sqrt(2) * Math.cos(t) * Math.sin(t)) /
(Math.pow(Math.sin(t), 2) + 1) –
target.y;
}
// 更新触手的目标点坐标
target.x += target.errx / 10
target.y += target.erry / 10
// 更新时间
t += 0.01;
// 绘制触手的目标点
c.beginPath();
c.arc(
target.x,
target.y,
dist(last_target.x, last_target.y, target.x, target.y) + 5,
0,
2 * Math.PI
);
c.fillStyle = "hsl(210,100%,80%)"
c.fill();
// 绘制所有触手的中心点
for (i = 0; i < numt; i++) {
tent[i].move(last_target, target)
tent[i].show2(target)
}
// 绘制所有触手
for (i = 0; i < numt; i++) {
tent[i].show(target)
}
// 更新上一个触手的目标点坐标
last_target.x = target.x
last_target.y = target.y
}
// 循环执行绘制动画的函数
function loop() {
// 使用requestAnimFrame函数循环执行
window.requestAnimFrame(loop)
// 清空canvas
c.clearRect(0, 0, w, h)
// 绘制动画
draw()
}
// 监听窗口大小改变事件
window.addEventListener("resize", function () {
// 重置canvas的大小
w = canvas.width = window.innerWidth
w = canvas.height = window.innerHeight
// 循环执行回执动画的函数
loop()
})
// 循环执行回执动画的函数
loop()
// 使用setInterval函数循环
setInterval(loop, 1000 / 60)
// 监听鼠标移动事件
canvas.addEventListener("mousemove", function (e) {
// 记录上一次的鼠标位置
last_mouse.x = mouse.x
last_mouse.y = mouse.y
// 更新点前的鼠标位置
mouse.x = e.pageX – this.offsetLeft
mouse.y = e.pageY – this.offsetTop
}, false)
// 监听鼠标离开事件
canvas.addEventListener("mouseleave", function (e) {
// 将mouse设为false
mouse.x = false
mouse.y = false
})
}
这里我们在大致的梳理一下上述代码的流程:
1. 初始化阶段
- init 函数:当页面加载时,init 函数被调用,获取 canvas 元素并设置其宽高为窗口的大小。获取到的 2D 绘图上下文(context)用于后续绘制。
- window.onload:页面加载完成后,初始化 canvas 和 context,并设置鼠标初始状态。
2. 触手对象的定义
- segment 类:这是触手的一段,每个段有起始点(pos)、长度(l)、角度(ang),并通过角度计算出下一段的位置(nextPos)。
- tentacle 类:代表完整的触手,由若干个 segment 组成。触手的起始点在屏幕中心,并且每个触手包含多个段。tentacle 的主要方法有:
- move:根据鼠标位置更新每一段的位置。
- show:绘制触手的路径。
3. 事件监听
- canvas.addEventListener("mousemove", …):当鼠标移动时,捕捉鼠标的位置并存储在 mouse 变量中。每次鼠标移动会更新 mouse 和 last_mouse 的坐标,用于后续的动画。
4. 动画循环
- draw 函数:这是一个递归的函数,用于创建动画效果。
- 首先,它会在每一帧中为画布填充半透明背景,使得之前绘制的内容逐渐消失,产生拖影效果。
- 然后,遍历所有触手(tentacles),调用它们的 move 和 show 方法,更新位置并绘制每一帧。
- 最后,使用 requestAnimFrame(draw) 不断递归调用 draw,形成一个动画循环。
5. 触手的行为
- 触手的运动是通过 move 函数实现的,触手的最后一个段首先更新位置,然后其他段依次跟随。
- 触手的绘制通过 show 函数,遍历所有段并绘制线条,最后显示在屏幕上。
——这样我们就完成了电子小蜘蛛的制作了!!!
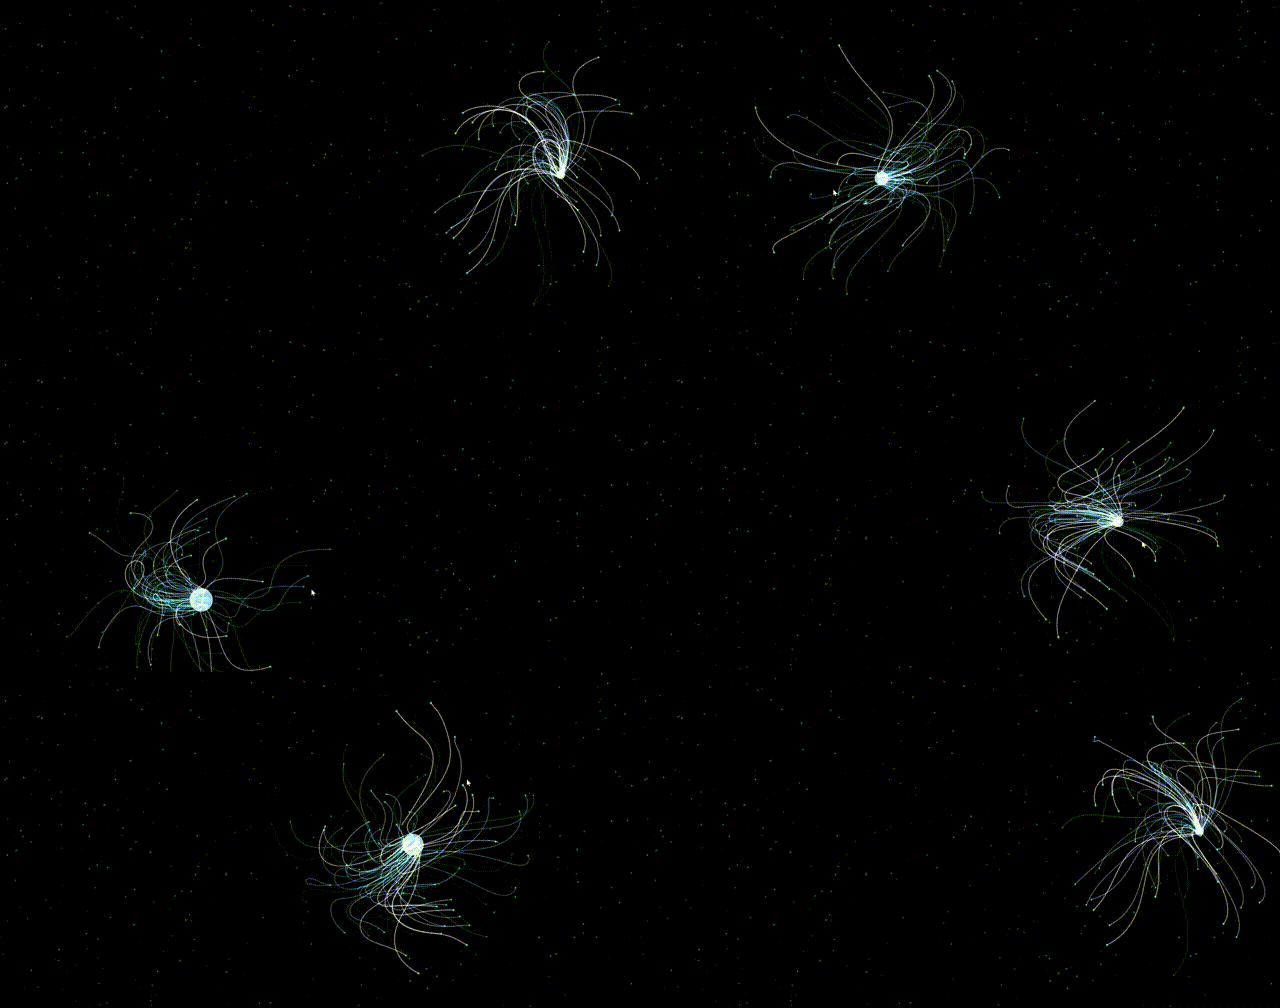
最后,在让我们看一下最终效果:
以上就是本篇文章的全部内容了!!