在玩中学,直接上手实战是猫哥一贯的自学方法心得。假期期间实在无聊!我不睡懒觉、不看电影、也不刷手机、不玩游戏、也无处可去。那么我干嘛嘞?闲的都想看蚂蚁上树,无聊透顶,百无聊赖,感觉假期好没意思啊。做什么呢? 于是翻出来之前做过的“爱影家”影视app项目,找个跨多端的技术栈再玩一把。
该篇继续分享爱影家免费观影APP的实战过程,影视票房榜组件完整实现。免费看电影和听歌,持续迭代中。
项目开源地址:https://gitcode.com/qq8864/uniappx_imovie,
欢迎下载体验。目前已实现的效果: 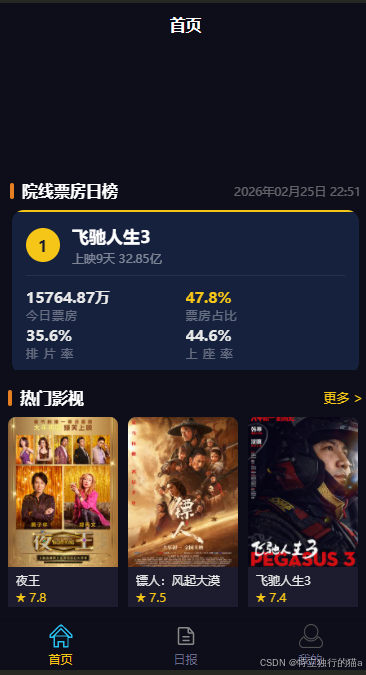

项目概述
本文基于爱影家(imovie)项目,详细介绍如何使用 uni-app x 技术栈开发一个院线票房日榜组件(box-office)。该组件展示实时院线票房数据,包括今日票房、票房占比、排片率、上座率四项核心指标,以横向翻页卡片的形式呈现,视觉上干净现代。
本项目用到的后台影视和音乐接口文档:https://blog.csdn.net/qq8864/article/details/154404554
uni-app x 是 DCloud 推出的新一代跨平台开发框架,支持将代码编译为多个平台的原生代码:
- Android 平台:编译为 Kotlin
- iOS 平台:编译为 Swift
- 鸿蒙 Next 平台:编译为 ArkTS
- Web 和小程序平台:编译为 JS
在 App 端,uni-app x 的工程被整体编译为平台原生代码,性能与原生应用一致。
整体架构
票房榜组件涉及三层代码:
utils/request.uts ← 通用 HTTP 请求封装(拦截器、类型定义)
↓
api/movie.uts ← 业务接口封装(PiaoItem 类型、getPiaomovie 方法)
↓
components/box-office/ ← 票房榜 UI 组件(数据加载、布局渲染)
box-office.uvue
这种分层方式将网络通信、数据模型、UI 渲染三个关注点完全分离,每一层都可以独立维护和复用。
第一层:网络请求封装(utils/request.uts)
设计思路
uni-app x 提供了 uni.request 作为底层网络 API,但直接使用存在几个问题:
- 每次请求都要重复写 baseUrl、Content-Type 等公共配置
- 无法统一注入 token、统一处理错误
- 回调风格不友好,难以配合 async/await 使用
项目封装了一个 Request 类,解决上述问题,提供类似 Axios 的使用体验。
类型定义
// HTTP 方法枚举
type HttpMethod = "GET" | "POST" | "PUT" | "DELETE" | "OPTIONS" | "HEAD"
// 请求选项
export type RequestOptions = {
url : string
method : HttpMethod
data : any | null
headers : Map<string, string>
}
// 统一响应结构(与后端协议约定)
export type ResponseData<T> = {
code : number // 0 表示成功
message : string // 提示信息
data : T // 业务数据
}
// 拦截器函数类型
export type RequestInterceptorFn = (options : RequestOptions) => RequestOptions
export type ResponseInterceptorFn = (response : any) => any
ResponseData<T> 使用泛型,让不同接口的响应体都能得到类型保护。
Request 类核心实现
export class Request {
private baseUrl : string
private headers : Map<string, string>
// 拦截器用 Map 存储,key 为自增 ID,保证按注册顺序执行
private requestInterceptors : Map<number, RequestInterceptorFn>
private responseInterceptors : Map<number, ResponseInterceptorFn>
private requestInterceptorId : number
private responseInterceptorId : number
constructor(baseUrl : string) {
this.baseUrl = baseUrl
this.headers = new Map<string, string>()
this.headers.set('Content-Type', 'application/json')
this.headers.set('accept', 'application/json')
this.requestInterceptors = new Map<number, RequestInterceptorFn>()
this.responseInterceptors = new Map<number, ResponseInterceptorFn>()
this.requestInterceptorId = 0
this.responseInterceptorId = 0
}
// …
}
拦截器设计
拦截器使用 Map<number, Fn> 存储,key 是自增 ID:
- 注册时返回 ID,移除时通过 ID 精确删除,不影响其他拦截器
- 执行时将所有 ID 排序,保证按注册先后顺序依次调用
// 注册请求拦截器(返回 ID 供后续移除)
addRequestInterceptor(fn : RequestInterceptorFn) : number {
this.requestInterceptorId += 1
const id = this.requestInterceptorId
this.requestInterceptors.set(id, fn)
return id
}
removeRequestInterceptor(id : number) : void {
this.requestInterceptors.delete(id)
}
执行拦截器链时,将 Map 中的 key 提取为数组排序后依次执行,每个拦截器的输出作为下一个的输入:
private runRequestInterceptors(options : RequestOptions) : RequestOptions {
const ids : Array<number> = []
this.requestInterceptors.forEach((_ : RequestInterceptorFn, id : number) => {
ids.push(id)
})
ids.sort((a : number, b : number) : number => a – b)
let current = options
for (let i = 0; i < ids.length; i++) {
const fn = this.requestInterceptors.get(ids[i])
if (fn != null) {
current = fn(current)
}
}
return current
}
核心 request 方法
request<T>(options : RequestOptions) : Promise<ResponseData<T>> {
// 1. 执行请求拦截器链(注入 token、修改 header 等)
const interceptedOptions = this.runRequestInterceptors(options)
// 2. 拼接完整 URL(已带 http 则直接用,否则拼接 baseUrl)
const url = interceptedOptions.url.startsWith('http://') || interceptedOptions.url.startsWith('https://')
? interceptedOptions.url
: this.baseUrl + interceptedOptions.url
const header = this.buildHeader(interceptedOptions.headers)
return new Promise<ResponseData<T>>((resolve, reject) => {
uni.request({
url: url,
method: interceptedOptions.method,
data: interceptedOptions.data,
header: header,
success: (res) => {
if (res.statusCode === 200) {
// 3. 执行响应拦截器链(统一错误处理、数据转换等)
const processed = this.runResponseInterceptors(res.data)
resolve(processed as ResponseData<T>)
} else {
reject(new Error(`Request failed: ${res.statusCode}`))
}
},
fail: (err) => {
reject(new Error(err.errMsg))
}
})
})
}
将回调风格的 uni.request 包装为 Promise,上层可以直接 async/await。
语法糖方法
get<T>(url : string, params : any | null, headers : Map<string, string> | null) : Promise<ResponseData<T>> {
return this.request<T>({
url: url, method: 'GET',
data: params,
headers: headers ?? new Map<string, string>()
})
}
post<T>(url : string, data : any | null, headers : Map<string, string> | null) : Promise<ResponseData<T>> {
return this.request<T>({
url: url, method: 'POST',
data: data,
headers: headers ?? new Map<string, string>()
})
}
全局实例与拦截器注册
// 创建全局单例,所有业务 API 共用
export const request = new Request('http://49.235.52.102:8000/api/v1')
// 全局请求拦截器:打印请求日志
request.addRequestInterceptor((options : RequestOptions) : RequestOptions => {
console.log(`[Request] ${options.method} ${options.url}`)
return options
})
// 全局响应拦截器:打印响应并处理错误码
request.addResponseInterceptor((response : any) : any => {
const res = response as ResponseData<any>
console.log(`[Response] code=${res.code} message=${res.message}`)
if (res.code !== 0) {
console.error('[API Error]', res.code, res.message)
}
return response
})
需要 token 鉴权时,在具体业务模块注册拦截器即可:
const tokenId = request.addRequestInterceptor((options : RequestOptions) : RequestOptions => {
const token = uni.getStorageSync('token') as string
if (token != null && token.length > 0) {
options.headers.set('Authorization', `Bearer ${token}`)
}
return options
})
// 不需要时移除
// request.removeRequestInterceptor(tokenId)
第二层:业务接口封装(api/movie.uts)
数据类型定义
票房榜涉及两个类型,清晰描述接口返回的数据结构:
// 院线票房榜单条目
export type PiaoItem = {
top : number // 排名(1、2、3…)
name : string // 影片名称
release_date : string // 上映日期
box_million : string // 今日票房(如 "3542.3万")
share_box : string // 票房占比(如 "28.6%")
row_films : string // 排片率(如 "31.2%")
row_seats : string // 上座率(如 "18.7%")
}
// 票房榜接口完整响应
export type PiaoResult = {
list : PiaoItem[] // 榜单列表
day : string // 数据日期(如 "2026-02-25")
}
注意:票房、占比、排片率、上座率都使用 string 类型——后端直接返回格式化好的文字(如 "3542.3万"、"28.6%"),前端无需再做数字格式化,直接渲染即可。
API 方法封装
export class MovieApi {
/**
* 获取院线票房日榜
* GET /piaomovie
*/
static async getPiaomovie() : Promise<PiaoResult> {
const res = await request.get<any>('/piaomovie', null, null)
const full : any = res
return {
list: full.data as PiaoItem[],
day: full.day as string
} as PiaoResult
}
// …
}
这里有一个细节:full.day 直接挂在响应根节点而非 data 字段里,是后端特有的结构,所以单独从 full.day 取出,不经过 ResponseData.data。
使用方式极为简洁:
MovieApi.getPiaomovie().then((result : PiaoResult) => {
// 使用 result.list 和 result.day
})
第三层:票房榜 UI 组件(box-office.uvue)
组件结构总览
box-office
├── 标题栏(院线票房日榜 + 数据日期)
├── 横向滚动卡片区(scroll-view)
│ └── 卡片行(cards-row,宽度由 JS 精确计算)
│ └── 单张卡片(movie-card)× N
│ ├── 顶部彩色条(rank-accent)
│ └── 卡片主体(card-body)
│ ├── 排名徽章 + 片名区(card-head)
│ ├── 分割线(divider)
│ └── 四项指标 2×2 网格(metrics)
└── 加载占位(loading 时显示)
颜色体系设计
排名不同,视觉强调色也不同,营造金银铜的层次感:
// 前三名:金 / 银 / 铜;其余:深蓝
const getRankColor = (top : number) : string => {
if (top === 1) return '#f5c518' // 金色
if (top === 2) return '#9eb3c2' // 银色
if (top === 3) return '#e67e22' // 铜色
return '#3a5085' // 深蓝(通用)
}
此函数在三处复用:
<view class="rank-accent" :style="`background-color: ${getRankColor(item.top)};`"></view>
<view class="rank-badge" :style="`background-color: ${getRankColor(item.top)};`">
<text class="rank-num" :style="`color: ${item.top <= 3 ? '#1a1a2e' : '#ffffff'};`">
{{ item.top }}
</text>
</view>
横向滚动的关键:精确计算行宽
uni-app x 在 App 端编译为原生代码,原生布局引擎与 Web 浏览器有一个关键差异:
scroll-view 的内容容器必须有明确的、超出 scroll-view 宽度的像素尺寸,原生引擎才会开启横向滚动。仅靠 flex-direction: row + flex-wrap: nowrap 是不够的。
组件的解决方案:
// 卡片宽度:屏幕宽度减去两侧 14px padding,单张近全屏
const cardWidth = Math.floor(uni.getWindowInfo().windowWidth – 28)
// 行总宽度(响应式,随数据加载后动态更新)
// 公式:14(padding-left) + (卡片宽 + 12间距) × 数量 + 14(右侧留白)
const rowWidth = computed(() : number => {
return 14 + (cardWidth + 12) * list.value.length + 14
})
绑定到模板:
<view class="cards-row" :style="`width: ${rowWidth}px;`">
用 computed 而不是 ref 的好处:数据加载完成后 list.value.length 改变,rowWidth 自动重新计算,视图同步更新,不需要手动维护。
每张卡片还必须加 flex-shrink: 0,防止被压缩:
.movie-card {
flex-shrink: 0;
}
四项指标的 2×2 布局
票房、占比、排片率、上座率四项数据用 flex-wrap: wrap + width: 50% 实现 2×2 网格,简洁高效:
<view class="metrics">
<view class="metric">
<text class="metric-val">{{ item.box_million }}</text>
<text class="metric-label">今日票房</text>
</view>
<view class="metric">
<text class="metric-val metric-highlight">{{ item.share_box }}</text>
<text class="metric-label">票房占比</text>
</view>
<view class="metric metric-bottom">
<text class="metric-val">{{ item.row_films }}</text>
<text class="metric-label">排 片 率</text>
</view>
<view class="metric metric-bottom">
<text class="metric-val">{{ item.row_seats }}</text>
<text class="metric-label">上 座 率</text>
</view>
</view>
.metrics {
flex-direction: row;
flex-wrap: wrap;
}
.metric {
width: 50%; /* 2列布局,每列占 50% */
margin-bottom: 4px;
}
.metric-bottom {
margin-bottom: 0; /* 最后一行去掉底部间距 */
}
票房占比用黄色高亮(metric-highlight),视觉上突出核心数据。
加载状态处理
数据未返回前显示占位,避免页面空白造成布局跳动:
const loading = ref<boolean>(true) // 初始为加载中
<!– 有数据时显示卡片 –>
<scroll-view v-if="!loading && list.length > 0" …>
…
</scroll-view>
<!– 加载中时显示占位 –>
<view v-if="loading" class="placeholder">
<text class="placeholder-text">加载中…</text>
</view>
数据加载
onMounted(() => {
MovieApi.getPiaomovie().then((result : any) => {
const raw = result as { list : PiaoItem[], day : string }
// 过滤掉片名为空的异常数据
list.value = raw.list.filter((item : PiaoItem) : boolean => item.name.length > 0)
day.value = raw.day
loading.value = false
}).catch((_ : any) => {
loading.value = false // 失败时也关闭加载状态,避免永久 loading
})
})
在 onMounted 中发起请求,保证组件挂载后再请求数据,避免组件尚未渲染时操作 DOM。过滤 name.length > 0 防御性处理了后端可能返回的空条目。
完整组件代码
box-office.uvue
<template>
<view class="box-office">
<!– 标题栏 –>
<view class="section-header">
<view class="header-left">
<view class="title-bar"></view>
<text class="title">院线票房日榜</text>
</view>
<text v-if="day.length > 0" class="day-text">{{ day }}</text>
</view>
<!– 卡片横向滚动 –>
<scroll-view v-if="!loading && list.length > 0" class="cards-scroll" direction="horizontal">
<view class="cards-row" :style="`width: ${rowWidth}px;`">
<view
v-for="item in list"
:key="item.top"
class="movie-card"
:style="`width: ${cardWidth}px;`"
>
<!– 顶部彩色条 –>
<view class="rank-accent" :style="`background-color: ${getRankColor(item.top)};`"></view>
<view class="card-body">
<!– 排名 + 片名 –>
<view class="card-head">
<view class="rank-badge" :style="`background-color: ${getRankColor(item.top)};`">
<text class="rank-num" :style="`color: ${item.top <= 3 ? '#1a1a2e' : '#ffffff'};`">
{{ item.top }}
</text>
</view>
<view class="name-block">
<text class="movie-name" :numberOfLines="1">{{ item.name }}</text>
<text class="release-text">{{ item.release_date }}</text>
</view>
</view>
<!– 分割线 –>
<view class="divider"></view>
<!– 四项指标 2×2 排列 –>
<view class="metrics">
<view class="metric">
<text class="metric-val">{{ item.box_million }}</text>
<text class="metric-label">今日票房</text>
</view>
<view class="metric">
<text class="metric-val metric-highlight">{{ item.share_box }}</text>
<text class="metric-label">票房占比</text>
</view>
<view class="metric metric-bottom">
<text class="metric-val">{{ item.row_films }}</text>
<text class="metric-label">排 片 率</text>
</view>
<view class="metric metric-bottom">
<text class="metric-val">{{ item.row_seats }}</text>
<text class="metric-label">上 座 率</text>
</view>
</view>
</view>
</view>
<!– 右侧留白,防止最后一张卡片紧贴边缘 –>
<view style="width: 14px; flex-shrink: 0;"></view>
</view>
</scroll-view>
<!– 加载占位 –>
<view v-if="loading" class="placeholder">
<text class="placeholder-text">加载中…</text>
</view>
</view>
</template>
<script setup lang="uts">
import { ref, computed, onMounted } from 'vue'
import { MovieApi, PiaoItem } from '@/api/movie'
const list = ref<PiaoItem[]>([])
const day = ref<string>('')
const loading = ref<boolean>(true)
// 卡片宽度:屏幕宽度减去两侧各 14px,近全屏
const cardWidth = Math.floor(uni.getWindowInfo().windowWidth – 28)
// 行总宽度:原生布局引擎需要明确的像素宽度才能识别横向可滚动内容
const rowWidth = computed(() : number => {
return 14 + (cardWidth + 12) * list.value.length + 14
})
// 按排名返回强调色
const getRankColor = (top : number) : string => {
if (top === 1) return '#f5c518'
if (top === 2) return '#9eb3c2'
if (top === 3) return '#e67e22'
return '#3a5085'
}
onMounted(() => {
MovieApi.getPiaomovie().then((result : any) => {
const raw = result as { list : PiaoItem[], day : string }
list.value = raw.list.filter((item : PiaoItem) : boolean => item.name.length > 0)
day.value = raw.day
loading.value = false
}).catch((_ : any) => {
loading.value = false
})
})
</script>
<style>
.box-office {
margin-top: 4px;
}
.section-header {
flex-direction: row;
justify-content: space-between;
align-items: center;
padding: 18px 12px 10px 12px;
}
.header-left {
flex-direction: row;
align-items: center;
}
.title-bar {
width: 4px;
height: 16px;
background-color: #e67e22;
border-radius: 2px;
margin-right: 8px;
}
.title {
font-size: 16px;
font-weight: bold;
color: #ffffff;
}
.day-text {
font-size: 11px;
color: rgba(255, 255, 255, 0.35);
}
/* scroll-view 必须有固定高度 */
.cards-scroll {
width: 100%;
height: 160px;
}
.cards-row {
flex-direction: row;
flex-wrap: nowrap;
padding-left: 14px;
}
/* flex-shrink: 0 是横向滚动生效的关键 */
.movie-card {
margin-right: 12px;
background-color: #16213e;
border-radius: 12px;
overflow: hidden;
flex-shrink: 0;
}
.rank-accent {
width: 100%;
height: 2px;
}
.card-body {
padding: 14px;
}
.card-head {
flex-direction: row;
align-items: flex-start;
margin-bottom: 10px;
}
.rank-badge {
width: 34px;
height: 34px;
border-radius: 17px;
align-items: center;
justify-content: center;
flex-shrink: 0;
margin-right: 12px;
margin-top: 2px;
}
.rank-num {
font-size: 16px;
font-weight: bold;
}
.name-block {
flex: 1;
}
.movie-name {
font-size: 17px;
font-weight: bold;
color: #ffffff;
margin-bottom: 5px;
}
.release-text {
font-size: 11px;
color: rgba(255, 255, 255, 0.45);
}
.divider {
height: 1px;
background-color: rgba(255, 255, 255, 0.08);
margin-bottom: 12px;
}
.metrics {
flex-direction: row;
flex-wrap: wrap;
}
.metric {
width: 50%;
margin-bottom: 4px;
}
.metric-bottom {
margin-bottom: 0;
}
.metric-val {
font-size: 15px;
font-weight: bold;
color: #e8e8e8;
margin-bottom: 2px;
}
.metric-highlight {
color: #f5c518;
}
.metric-label {
font-size: 10px;
color: rgba(255, 255, 255, 0.35);
letter-spacing: 1px;
}
.placeholder {
height: 100px;
align-items: center;
justify-content: center;
}
.placeholder-text {
font-size: 13px;
color: rgba(255, 255, 255, 0.35);
}
</style>
注意事项与踩坑记录
1. 横向滚动必须为行容器指定精确像素宽度
这是 uni-app x 原生端与 Web 端最大的差异之一。原生布局引擎不会像浏览器那样自动识别 flex 溢出,必须显式告知内容宽度:
// ❌ 错误:没有宽度,不会横向滚动
<view style="flex-direction: row; flex-wrap: nowrap;">
// ✅ 正确:绑定精确的像素总宽度
<view :style="`width: ${rowWidth}px; flex-direction: row;`">
2. 卡片必须设置 flex-shrink: 0
/* ✅ 防止卡片被 flex 容器压缩,保证宽度有效 */
.movie-card {
flex-shrink: 0;
}
3. rowWidth 用 computed 而非 ref
因为数据是异步加载的,组件初始化时 list.value.length 为 0,数据到达后需要重新计算宽度。用 computed 会自动响应 list.value 的变化,无需手动更新。
// ✅ computed 响应 list.value.length 变化,自动更新 rowWidth
const rowWidth = computed(() : number => {
return 14 + (cardWidth + 12) * list.value.length + 14
})
4. scroll-view 需要固定高度
/* ✅ height 必须明确,否则在部分平台会塌陷为 0 */
.cards-scroll {
width: 100%;
height: 160px;
}
5. UTS 中 Map 的 forEach 参数顺序与 JS 相反
UTS 的 Map.forEach 回调参数顺序为 (value, key),与 JavaScript 的 Map.forEach 是 (value, key) 相同,但容易误写为 (key, value)。本项目拦截器链执行时按 key(ID)排序,特别需要注意取对正确的参数:
// ✅ 正确:第一个参数是 value(拦截器函数),第二个是 key(ID)
this.requestInterceptors.forEach((_ : RequestInterceptorFn, id : number) => {
ids.push(id)
})
6. 响应数据中非标准字段需单独提取
部分后端接口响应中,业务字段不在 data 层级内,而是直接挂在响应根节点。此时需在 API 封装层显式提取:
// day 字段直接在响应根节点,不在 data 里
const full : any = res
return {
list: full.data as PiaoItem[], // data 字段
day: full.day as string // 根节点字段
} as PiaoResult
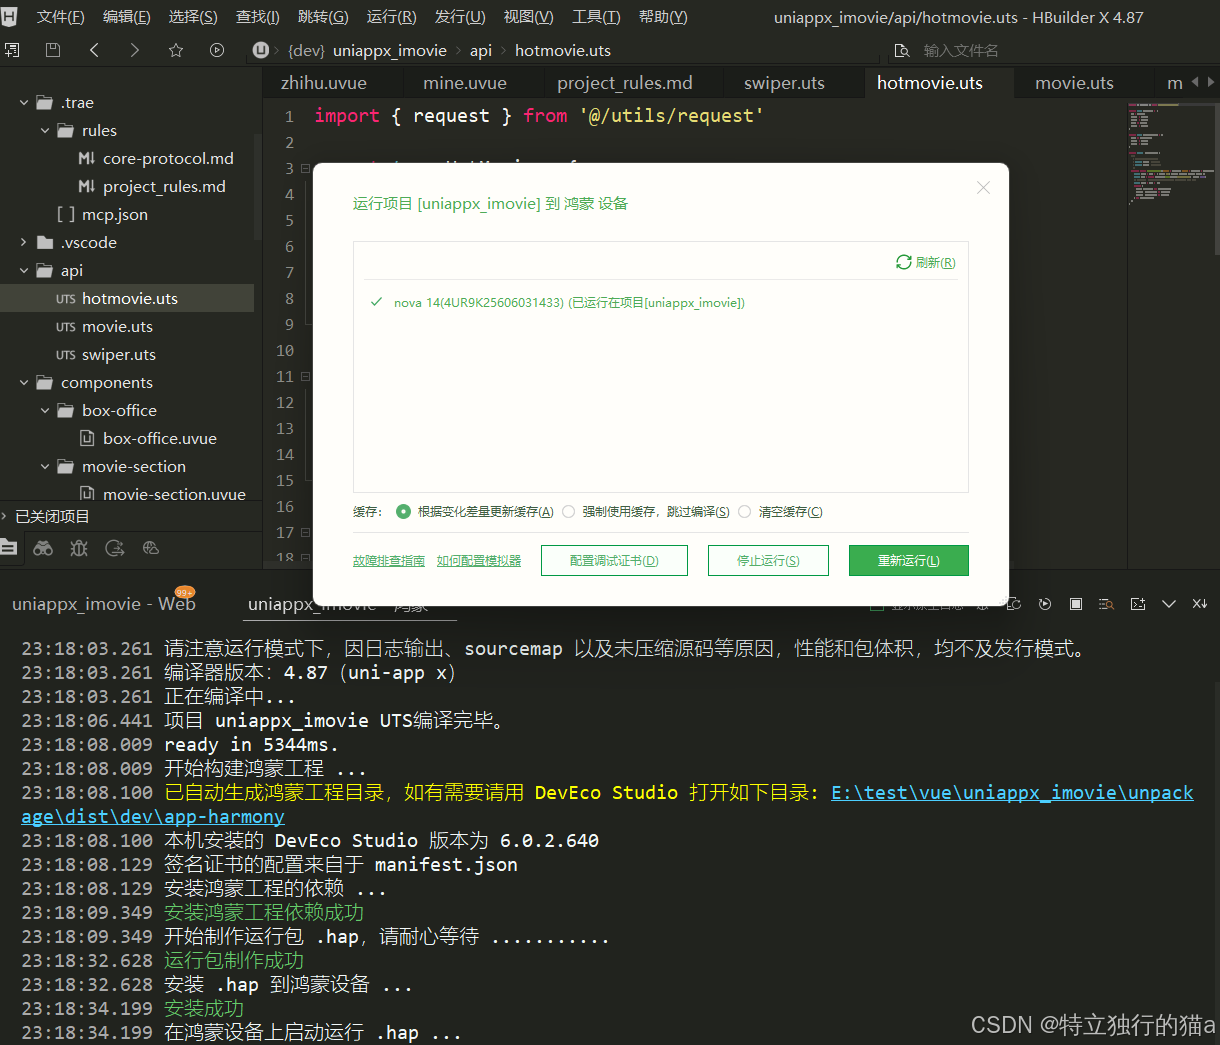
运行到鸿蒙手机上的效果

总结
票房榜组件的实现体现了 uni-app x 项目中的几个最佳实践:
这套模式适用于 uni-app x 项目中所有横向滚动列表场景,可以直接参考复用。
参考链接
uni-app x 跨平台实战入门:从 0 到 1 开发