MAF 实战入门指南
-
- 1. MAF 框架简介
- 2. 项目创建与配置
-
- 2.1 项目初始化
- 2.2 配置AI服务
- 2.3 项目结构
- 3. 核心组件解析
-
- 3.1 Agent(代理)
- 3.2 Workflow(工作流)
- 3.3 工具集成
- 3.4 服务注册与端点映射
- 3.5 完整的项目代码
- 4. 项目运行与测试
-
- 4.1 启动应用
- 4.2 使用 DevUI 测试
- 4.3 使用API测试
- 5. 实际应用场景
- 6. 扩展与定制
-
- 6.1 自定义Agent
- 6.2 自定义工具
- 6.3 集成其他AI服务
- 7. 高级配置与最佳实践
-
- 7.1 配置管理
- 7.2 错误处理
- 7.3 监控与日志
- 8. 总结与展望
- 9. 资源与参考
1. MAF 框架简介
Microsoft Agent Framework (简称 MAF) 是微软推出的一个强大的AI代理开发框架,它允许开发者轻松创建、部署和管理AI代理及其工作流程。MAF提供了一套简洁而强大的API,使得构建复杂的AI应用变得更加容易。
MAF 的核心优势包括:
- 简化 AI Agent / AI代理 的创建和管理
- 支持多种AI服务提供商(GitHub Models、Azure OpenAI、OpenAI、Ollama 等)
- 内置 工作流引擎 ,支持复杂的代理协作
- 提供 OpenAI兼容 的 API接口
- 包含开发 UI(DevUI),便于测试和调试
2. 项目创建与配置
2.1 项目初始化
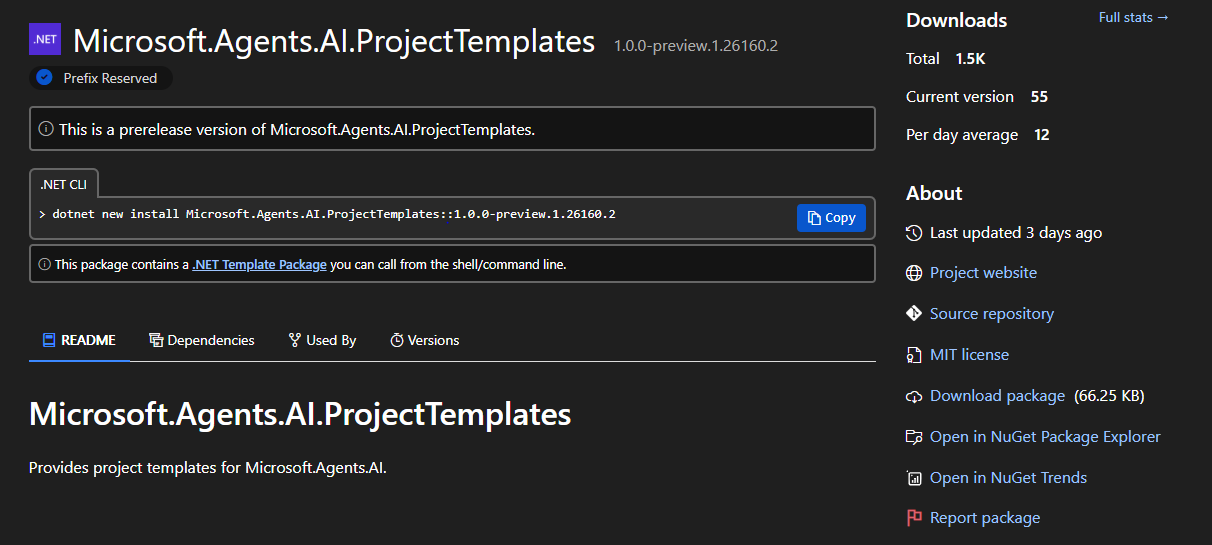
使用 Microsoft.Agents.AI.ProjectTemplates 模板创建MAF项目非常简单:
- 安装 MAF 项目模板包
dotnet new install Microsoft.Agents.AI.ProjectTemplates@1.0.0-preview.1.26160.2
- 创建 MAF 默认项目
# 创建默认项目(使用GitHub Models)
dotnet new aiagent-webapi -n Demo.MAF.WebApi
# 或指定其他AI服务提供商
dotnet new aiagent-webapi -n Demo.MAF.WebApi –provider azureopenai
2.2 配置AI服务
默认项目使用 GitHub Models 作为 AI 服务提供商,需要配置 API令牌:
使用用户密钥(推荐开发环境):
dotnet user-secrets set "GITHUB_TOKEN" "your-github-models-token-here"
使用环境变量:
- Windows (PowerShell)
# Windows (PowerShell)
$env:GITHUB_TOKEN = "your-github-models-token-here"
- Linux/macOS
# Linux/macOS
export GITHUB_TOKEN="your-github-models-token-here"
除了上面两种方式还可自行修改使用 appsettings.json 应用程序配置。
2.3 项目结构
创建的项目包含以下主要文件:
- Program.cs – 应用程序入口点和配置
- appsettings.json – 应用程序配置
- Properties/launchSettings.json – 开发环境启动配置
3. 核心组件解析
3.1 Agent(代理)
Agent 是 MAF 的核心概念,代表一个具有特定功能的AI实体。在示例项目中,定义了两个Agent:
// 创建Writer Agent
builder.AddAIAgent("writer", "You write short stories (300 words or less) about the specified topic.");
// 创建Editor Agent
builder.AddAIAgent("editor", (sp, key) => new ChatClientAgent(
chatClient,
name: key,
instructions: "You edit short stories to improve grammar and style, ensuring the stories are less than 300 words. Once finished editing, you select a title and format the story for publishing.",
tools: [AIFunctionFactory.Create(FormatStory)]
));
Agent 可以通过两种方式创建:
3.2 Workflow(工作流)
Workflow 允许将多个 Agent 组合成一个序列,实现复杂的任务处理:
// 创建Publisher工作流
builder.AddWorkflow("publisher", (sp, key) => AgentWorkflowBuilder.BuildSequential(
workflowName: key,
agents:
[
sp.GetRequiredKeyedService<AIAgent>("writer"),
sp.GetRequiredKeyedService<AIAgent>("editor")
]
)).AddAsAIAgent("publisher-agent");
这里创建了一个顺序工作流,先使用 writer agent 生成故事,然后使用 editor agent 编辑故事。
3.3 工具集成
MAF 允许为 Agent 添加工具,扩展其能力:
// 定义工具函数
[Description("Formats the story for publication, revealing its title.")]
string FormatStory(string title, string story) => $"""
**Title**: {title}
{story}
""";
// 在创建Agent时添加工具
builder.AddAIAgent("editor", (sp, key) => new ChatClientAgent(
chatClient,
name: key,
instructions: "You edit short stories to improve grammar and style…",
tools: [AIFunctionFactory.Create(FormatStory)]
));
3.4 服务注册与端点映射
MAF 需要注册必要的服务并映射相应的端点:
// 注册OpenAI响应和对话服务
builder.Services.AddOpenAIResponses();
builder.Services.AddOpenAIConversations();
// 映射端点
app.MapOpenAIResponses();
app.MapOpenAIConversations();
// 开发环境映射DevUI
if (builder.Environment.IsDevelopment())
{
app.MapDevUI();
}
3.5 完整的项目代码
- Demo.MAF.WebApi1.slnx
<Solution>
<Project Path="Demo.MAF.WebApi1.csproj" />
</Solution>
- Demo.MAF.WebApi.csproj
<Project Sdk="Microsoft.NET.Sdk.Web">
<PropertyGroup>
<TargetFramework>net10.0</TargetFramework>
<Nullable>enable</Nullable>
<ImplicitUsings>enable</ImplicitUsings>
<UserSecretsId>f3d8b192-2b5f-4b91-b3e6-aa10e0c3ac1a</UserSecretsId>
</PropertyGroup>
<ItemGroup>
<PackageReference Include="Microsoft.Agents.AI" Version="1.0.0-rc4" />
<PackageReference Include="Microsoft.Agents.AI.DevUI" Version="1.0.0-preview.260311.1" />
<PackageReference Include="Microsoft.Agents.AI.Hosting" Version="1.0.0-preview.260311.1" />
<PackageReference Include="Microsoft.Agents.AI.Hosting.OpenAI" Version="1.0.0-alpha.260311.1" />
<PackageReference Include="Microsoft.Agents.AI.OpenAI" Version="1.0.0-rc4" />
<PackageReference Include="Microsoft.Agents.AI.Workflows" Version="1.0.0-rc4" />
</ItemGroup>
</Project>
- Program.cs
using System.ClientModel;
using System.ComponentModel;
using Microsoft.Agents.AI;
using Microsoft.Agents.AI.DevUI;
using Microsoft.Agents.AI.Hosting;
using Microsoft.Agents.AI.Workflows;
using Microsoft.Extensions.AI;
using OpenAI;
using OpenAI.Chat;
var builder = WebApplication.CreateBuilder(args);
// You will need to set the token to your own value
// You can do this using Visual Studio's "Manage User Secrets" UI, or on the command line:
// cd this-project-directory
// dotnet user-secrets set "GITHUB_TOKEN" "your-github-models-token-here"
var chatClient = new ChatClient(
"gpt-4o-mini",
new ApiKeyCredential(builder.Configuration["GITHUB_TOKEN"] ?? throw new InvalidOperationException("Missing configuration: GITHUB_TOKEN")),
new OpenAIClientOptions { Endpoint = new Uri("https://models.inference.ai.azure.com") })
.AsIChatClient();
builder.Services.AddChatClient(chatClient);
builder.AddAIAgent("writer", "You write short stories (300 words or less) about the specified topic.");
builder.AddAIAgent("editor", (sp, key) => new ChatClientAgent(
chatClient,
name: key,
instructions: "You edit short stories to improve grammar and style, ensuring the stories are less than 300 words. Once finished editing, you select a title and format the story for publishing.",
tools: [AIFunctionFactory.Create(FormatStory)]
));
builder.AddWorkflow("publisher", (sp, key) => AgentWorkflowBuilder.BuildSequential(
workflowName: key,
agents:
[
sp.GetRequiredKeyedService<AIAgent>("writer"),
sp.GetRequiredKeyedService<AIAgent>("editor")
]
)).AddAsAIAgent("publisher-agent");
// Register services for OpenAI responses and conversations (also required for DevUI)
builder.Services.AddOpenAIResponses();
builder.Services.AddOpenAIConversations();
var app = builder.Build();
app.UseHttpsRedirection();
// Map endpoints for OpenAI responses and conversations (also required for DevUI)
app.MapOpenAIResponses();
app.MapOpenAIConversations();
if (builder.Environment.IsDevelopment())
{
// Map DevUI endpoint to /devui
app.MapDevUI();
}
await app.RunAsync();
[Description("Formats the story for publication, revealing its title.")]
string FormatStory(string title, string story) => $"""
**Title**: {title}
{story}
""";
4. 项目运行与测试
4.1 启动应用
dotnet run -lp https
应用将在以下地址运行:
- HTTP: http://localhost:5275
- HTTPS: https://localhost:7167
说明:此处端口以实际创建项目为准。
4.2 使用 DevUI 测试
在开发环境中,应用提供了 DevUI 界面,可通过 https://localhost:7167/devui/ 访问。DevUI 提供了一个 Web 界面,用于与 Agent 和 工作流 交互。
4.3 使用API测试
应用暴露了 OpenAI 兼容的 API端点,可以使用任何 OpenAI 兼容的客户端或工具进行交互。
5. 实际应用场景
MAF 框架适用于多种AI应用场景:
6. 扩展与定制
6.1 自定义Agent
可以通过实现 AIAgent 接口创建自定义 Agent:
public sealed class MyCustomAgent : AIAgent
{
// 实现必要的方法
}
6.2 自定义工具
可以创建更复杂的工具,扩展 Agent 的能力:
[Description("执行复杂计算")]
public sealed class CalculatorTool
{
public int Add(int a, int b) => a + b;
public int Subtract(int a, int b) => a – b;
// 其他方法…
}
6.3 集成其他AI服务
MAF 支持多种AI服务提供商,可以根据需要切换:
// 使用Azure OpenAI
var chatClient = new AzureOpenAIClient(
new Uri("https://your-azure-openai-endpoint"),
new DefaultAzureCredential()
).GetChatClient("your-deployment-name");
7. 高级配置与最佳实践
7.1 配置管理
对于生产环境,建议使用 Azure Key Vault 或其他安全的配置管理解决方案存储 API密钥 和其他 敏感信息。
7.2 错误处理
在实际应用中,应添加适当的错误处理:
try
{
// Agent调用
}
catch (Exception ex)
{
// 错误处理
}
7.3 监控与日志
添加监控和日志记录,以便跟踪 Agent 的性能和行为:
builder.Services.AddLogging(logging =>
{
logging.AddConsole();
// 添加其他日志提供程序
});
8. 总结与展望
Microsoft Agent Framework (MAF) 为开发者提供了一个强大而灵活的平台,用于构建和部署 AI代理 应用。通过简单的 API 和丰富的功能,MAF 使得创建复杂的 AI工作流 变得更加容易。
随着 AI 技术的不断发展,MAF 也在持续进化,未来将提供更多功能和集成选项。对于希望构建 AI驱动应用 的 .NET 开发者 来说,MAF 是一个值得学习和使用的框架。
9. 资源与参考
- AI apps for .NET developers
- MAF Documentation
- GitHub Models
- Nuget MAF
- Github MAF
通过本文的介绍,相信你已经对 MAF 有了基本的了解,并可以开始构建自己的 AI代理应用 了。祝你在 MAF 的学习和使用过程中取得成功!
