在上一篇文章中,构建了航迹点。使用autoware自带的模型、bag数据包回放的形式加载了纯追踪算法。为此在这里使用纯追踪算法使得gazebo中的模型进行路径跟踪,纯追踪算法代码已经按照车辆模型修改并编译。
参考链接
https://blog.csdn.net/weixin_45168199/article/details/123300238?fromshare=blogdetail&sharetype=blogdetail&sharerId=123300238&sharerefer=PC&sharesource=2201_76065173&sharefrom=from_link
https://blog.csdn.net/2201_76065173/article/details/157171135?fromshare=blogdetail&sharetype=blogdetail&sharerId=157171135&sharerefer=PC&sharesource=2201_76065173&sharefrom=from_link
一、加载gazebo模型
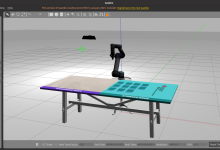
1.1、启动launch文件gazebo_tyut_jjc_model.launch
<launch>
<!– 设置使用仿真时间 –>
<param name="/use_sim_time" value="true"/>
<!– 启动Gazebo时确保时间同步 –>
<include file="$(find gazebo_ros)/launch/empty_world.launch">
<arg name="paused" value="false"/>
<arg name="use_sim_time" value="true"/>
<arg name="gui" value="true"/>
<arg name="headless" value="false"/>
<arg name="debug" value="false"/>
</include>
<!– ===== 加载地图环境 ===== –>
<group ns="environment">
<!– 生成地下环境模型 –>
<node name="spawn_underground_environment" pkg="gazebo_ros" type="spawn_model"
args="-file $(find underground_environment)/urdf/underground_environment.urdf
-urdf
-model underground_environment
-x 0.0 -y 0.0 -z 0.0
-R 0.0 -P 0.0 -Y 0.0"
output="screen" />
<!– 固定地图到世界坐标系 –>
<node name="world_to_environment_tf" pkg="tf" type="static_transform_publisher"
args="0 0 0 0 0 0 world underground_environment 100" />
</group>
<!– 将xacro先加载到robot_description,再加载到Gazebo仿真环境中 –>
<param
name="robot_description"
command="$(find xacro)/xacro $(find tyut_jjc)/urdf/tyut_jjc_model.xacro" />
<node
name="spawn_model"
pkg="gazebo_ros"
type="spawn_model"
args="-param robot_description -urdf -model tyut_jjc_model -x 2.4 -y 0 -z 0 -R 0 -P 0 -Y 0"
output="screen" />
<!– 加载控制启动文件 –>
<include file="$(find my_robot_control)/launch/my_robot_control.launch" />
<!– 发布机器人到world坐标TF –>
<node name="gazebo_robot_tf" pkg="my_robot_control" type="gazebo_robot_tf.py" output="screen"/>
<!– 启动RViz并加载预定义的配置文件urdf.rviz –>
<node name="rviz" pkg="rviz" type="rviz" args="-d $(find tyut_jjc)/config/tyut_jjc_model_rviz.rviz">
</node>
</launch>
其中gazebo模型加载文件以及控制文件如下:
<robot name="tyut_jjc_model" xmlns:xacro="http://wiki.ros.org/xacro">
<xacro:include filename="xacro/tyut_jjc.xacro" />
<xacro:include filename="xacro/transmission.xacro" />
<xacro:include filename="xacro/gazebo_ros_control.xacro" />
<xacro:include filename="xacro/tyut_color.xacro" />
<xacro:include filename="xacro/tyut_mu.xacro" />
<xacro:include filename="xacro/laser.xacro" />
<xacro:HDL-32E parent="base_link" name="velodyne" topic="/points_raw" hz="10" samples="1800" gpu="false">
<origin xyz="0 0 1.0" rpy="0 0 0" />
</xacro:HDL-32E>
<xacro:include filename="xacro/imu.xacro" />
<xacro:include filename="xacro/camera.xacro" />
</robot>
<launch>
<!– 加载控制器、PID、控制频率、控制关节参数 –>
<rosparam file="$(find my_robot_control)/config/control.yaml" command="load"/>
<!– 启动控制器 (不包含oint_state_controller)–>
<node name="controller_manager" pkg="controller_manager" type="controller_manager"
respawn="false" output="screen"
args="spawn
joint_state_controller
joint1_velocity_controller
joint2_velocity_controller
joint3_velocity_controller
joint4_velocity_controller
joint5_position_controller" />
<!– 发布机器人各个Link之间的TF –>
<node pkg="robot_state_publisher" type="robot_state_publisher" name="robot_state_publisher" output="screen" />
<!– 启动底盘控制策略 –>
<node name="cmdvel2gazebo" pkg="my_robot_control"
type="cmdvel_to_gazebo.py" respawn="false" output="screen"/>
<!– 轮速转化 –>
<node name="wheel_velocity_converter" pkg="my_robot_control"
type="wheel_to_velocity.py" respawn="false" output="screen"/>
<!– 启动控制面板 –>
<!– <node name="rqt_robot_steering" pkg="rqt_robot_steering" type="rqt_robot_steering" /> –>
</launch>
tyut@tyut-jjc:~$ cd ~/A_JJC_ws/
tyut@tyut-jjc:~/A_JJC_ws$ source devel/setup.bash
tyut@tyut-jjc:~/A_JJC_ws$ roslaunch tyut_jjc gazebo_tyut_jjc_model.launch
二、启用gazebo位置读取到定位信息
2.1、使用自己的py节点,读取gazebo的位姿作为定位
tyut@tyut-jjc:~/A_JJC_ws/src/my_robot_control/scripts$ ./gazebo_pose_to_ndt.py
2.2、启动Vel pose connect,关联位姿态和速度
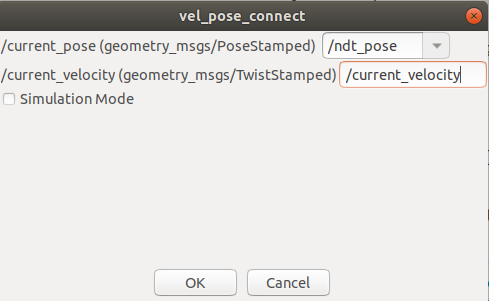
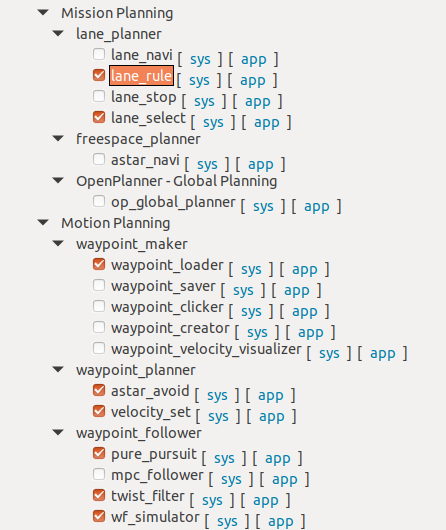
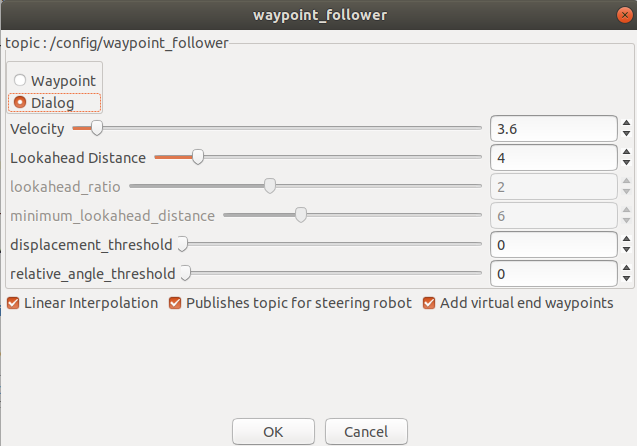
注意,如果使用角度控制需要开启publishes_for_steering_robot_=true
才能发布/ctrl_raw,输出角度控制量
2.3、启动ctrl_cmd_to_cmd_vel.py速度转换节点,转换到cmd_vel控制小车底盘
#!/usr/bin/env python
# -*- coding: utf-8 -*-
import rospy
from geometry_msgs.msg import Twist
from autoware_msgs.msg import ControlCommandStamped
class CtrlCmdToCmdVel:
def __init__(self):
rospy.init_node('ctrl_cmd_to_cmd_vel')
# 订阅 ctrl_cmd 话题
rospy.Subscriber('ctrl_cmd', ControlCommandStamped, self.ctrl_cmd_callback)
# 发布 cmd_vel 话题
self.cmd_vel_pub = rospy.Publisher('cmd_vel', Twist, queue_size=10)
def ctrl_cmd_callback(self, ctrl_cmd_msg):
# 从 ctrl_cmd 消息中提取线速度和角速度
linear_vel = ctrl_cmd_msg.cmd.linear_velocity
angular_vel = ctrl_cmd_msg.cmd.steering_angle
# 创建 Twist 消息
cmd_vel_msg = Twist()
cmd_vel_msg.linear.x = linear_vel
cmd_vel_msg.angular.z = angular_vel
# 发布转换后的消息到 cmd_vel 话题
self.cmd_vel_pub.publish(cmd_vel_msg)
if __name__ == '__main__':
try:
ctrl_cmd_to_cmd_vel = CtrlCmdToCmdVel()
rospy.spin()
except rospy.ROSInterruptException:
pass
注意:纯追踪算法输出两个控制话题twist_raw与/ctrl_raw,具体区别与使用如下:
/twist_cmd与/ctrl_cmd是经过滤波器限制后的输出,节点对应 twist_raw与/ctrl_raw
twist_raw输出角速度;/ctrl_raw输出角度
// 代码中实际发布的话题(对应你的 twist_cmd/ctrl_cmd)
pub1_ = nh_.advertise<geometry_msgs::TwistStamped>("twist_raw", 10); // 对应 twist_cmd
pub2_ = nh_.advertise<autoware_msgs::ControlCommandStamped>("ctrl_raw", 10); // 对应 ctrl_cmd
其中 twist_raw线速度来源,瞬时角速度—-角速度来源w=v/r
2.3.1 twist_raw 输出角速度
void PurePursuitNode::publishTwistStamped(
const bool& can_get_curvature, const double& kappa) const
{
geometry_msgs::TwistStamped ts;
ts.header.stamp = ros::Time::now();
// ① 线速度(linear.x)来源
ts.twist.linear.x = can_get_curvature ? computeCommandVelocity() : 0;
// ② 角速度(angular.z)来源
ts.twist.angular.z = can_get_curvature ? kappa * ts.twist.linear.x : 0;
pub1_.publish(ts);
}
线速度 linear.x 来源:computeCommandVelocity() 函数
根据 velocity_source_ 配置(从 config/waypoint_follower 话题读取)决定线速度
double PurePursuitNode::computeCommandVelocity() const
{
// 情况1:velocity_source_ = 0(dialog模式)→ 使用配置文件的 const_velocity_(默认5.0 km/h)
if (velocity_source_ == enumToInteger(Mode::dialog))
{
return getSgn() * kmph2mps(const_velocity_); // km/h 转 m/s,乘以方向(前进1/后退-1)
}
// 情况2:其他模式 → 使用全局路径点的速度指令(final_waypoints 话题的 waypoints[0].twist.linear.x)
return command_linear_velocity_;
}
角速度 angular.z 来源:曲率 kappa × 线速度
- kappa:纯追踪算法计算的路径曲率(单位:1/m),由 pp_.canGetCurvature(&kappa) 从 PurePursuitCore 核心类获取;
- 曲率 kappa 的计算逻辑:基于「当前车辆位姿(current_pose)」+「全局路径点(final_waypoints)」+「预瞄距离(lookahead distance)」,通过纯追踪公式计算目标点,进而推导路径曲率;
- 预瞄距离 lookahead distance 来源:computeLookaheadDistance() 函数,根据当前车速(current_velocity)动态计算:
double PurePursuitNode::computeLookaheadDistance() const
{
if (velocity_source_ == enumToInteger(Mode::dialog))
{
return const_lookahead_distance_; // 固定值(默认4.0m)
}
// 动态值:当前车速 × 比例系数(默认2.0),且有最小/最大值限制
double maximum_lookahead_distance = current_linear_velocity_ * 10;
double ld = current_linear_velocity_ * lookahead_distance_ratio_;
return ld < minimum_lookahead_distance_ ? minimum_lookahead_distance_ :
ld > maximum_lookahead_distance ? maximum_lookahead_distance : ld;
}
2.3.2 ctrl_raw 输出角度
ctrl_raw 是 autoware_msgs::ControlCommandStamped 类型,包含线速度、线加速度、转向角,仅当 publishes_for_steering_robot_=true 时发布(autoware设置),数值来自 publishControlCommandStamped() 函数:
void PurePursuitNode::publishControlCommandStamped(
const bool& can_get_curvature, const double& kappa) const
{
if (!publishes_for_steering_robot_)
{
return;
}
autoware_msgs::ControlCommandStamped ccs;
ccs.header.stamp = ros::Time::now();
// ① 线速度(linear_velocity):和 twist_raw 的 linear.x 完全相同
ccs.cmd.linear_velocity = can_get_curvature ? computeCommandVelocity() : 0;
// ② 线加速度(linear_acceleration):来自 computeCommandAccel() 函数
ccs.cmd.linear_acceleration = can_get_curvature ? computeCommandAccel() : 0;
// ③ 转向角(steering_angle):曲率 kappa 转换为阿克曼转向角
ccs.cmd.steering_angle =
can_get_curvature ? convertCurvatureToSteeringAngle(wheel_base_, kappa) : 0;
pub2_.publish(ccs);
}
- 线速度(linear_velocity):和 twist_raw 的 linear.x 完全相同
- 线加速度(linear_acceleration):来自 computeCommandAccel() 函数
通过运动学公式 v² – v₀² = 2ax 计算(当前车速→目标点车速的加速度):
double PurePursuitNode::computeCommandAccel() const
{
const geometry_msgs::Pose current_pose = pp_.getCurrentPose(); // 当前位姿(current_pose话题)
const geometry_msgs::Pose target_pose =
pp_.getCurrentWaypoints().at(1).pose.pose; // 下一个路径点位姿(final_waypoints话题)
// x:当前位置到下一个路径点的平面距离
const double x =
std::hypot(current_pose.position.x – target_pose.position.x,
current_pose.position.y – target_pose.position.y);
const double v0 = current_linear_velocity_; // 当前车速(current_velocity话题)
const double v = computeCommandVelocity(); // 目标车速(同twist_raw的线速度)
const double a = getSgn() * (v * v – v0 * v0) / (2 * x); // 加速度公式
return a;
}
- 转向角(steering_angle):曲率 kappa 转换为铰接转向角(适配自己模型)
double convertCurvatureToSteeringAngle(
const double& wheel_base, const double& kappa)
{
return 2*atan(wheel_base * kappa); // wheel_base:前后轴到铰接点的距离相等(默认1.2m,从参数服务器读取)
}
2.4、控制效果
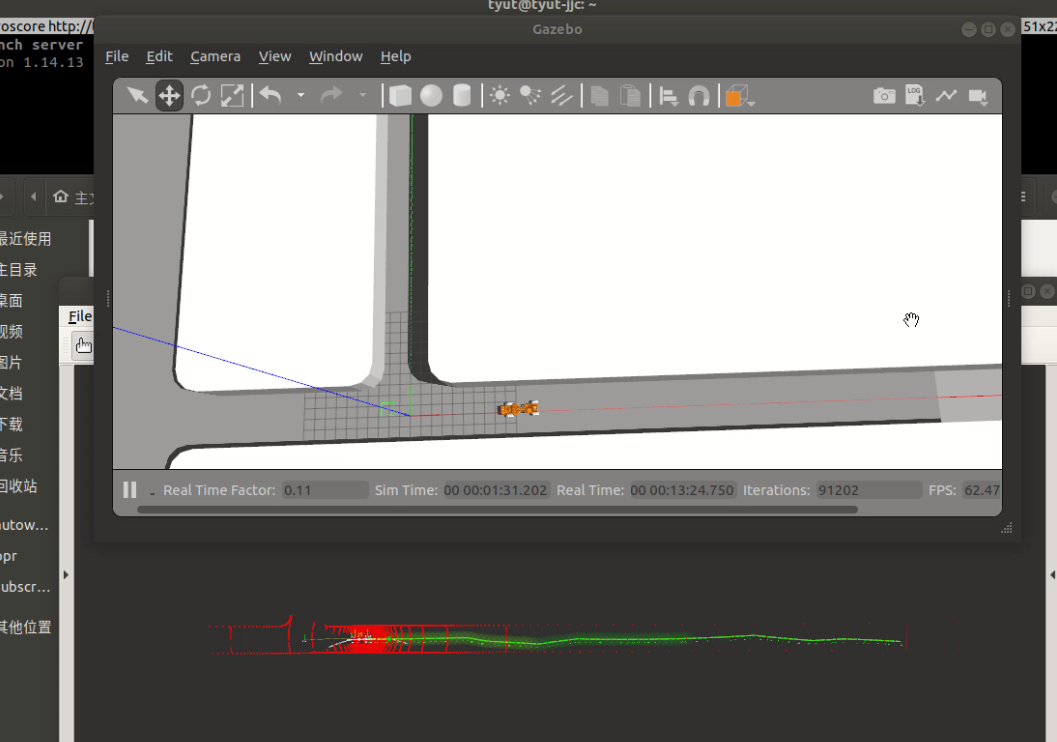
gazebo复现纯追踪航迹点导航