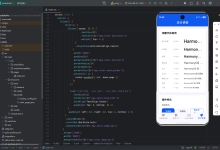
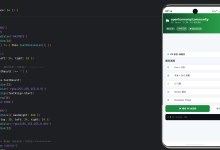
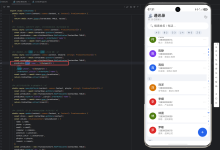
1. 前言:为什么需要最小宽度约束?
在鸿蒙原生应用开发中,布局是最基础也是最复杂的课题之一。ArkUI 提供了 Column(纵向容器)和 Row(横向容器)两大弹性布局容器,配合 layoutWeight、constraintSize、flexGrow、flexShrink 等属性,可以构建出极其灵活的响应式界面。
然而在实际开发中,我们经常会遇到这样一个需求:
“某个 Column 面板可以随容器伸缩,但无论如何不能小于 160vp 的宽度”
这正是 最小宽度约束(min-width constraint) 的应用场景。典型场景包括:
- 分栏布局:一左一右两栏,左侧导航栏最小 200vp,右侧内容区弹性填充
- 仪表盘面板:多列卡片面板,每张卡片最小 280vp,小于此值则横向滚动
- 侧边栏弹出层:底部弹出的 Column 面板,最小宽度与父容器关联
- 响应式表格:表格列在不同屏幕宽度下保持可读的最小宽度
在 Web 开发中,min-width 是一个 CSS 属性。在鸿蒙 ArkUI 中,对应的 API 是 constraintSize({ minWidth: N })。但仅仅设置 constraintSize 还不够,我们还需要配合 layoutWeight 来实现弹性空间分配,这正是本文要深入探讨的技术组合。
2. 布局基础回顾:Column 与 Row 的坐标系
在深入最小宽度约束之前,有必要回顾一下 Column 和 Row 的布局坐标系。
2.1 Column(纵向容器)
Column 的主轴(Main Axis)是 垂直方向,交叉轴(Cross Axis)是 水平方向。
┌─────────────────────┐
│ ┌───────────────┐ │ ← 主轴起点(顶部)
│ │ 子组件 1 │ │
│ ├───────────────┤ │
│ │ 子组件 2 │ │
│ ├───────────────┤ │
│ │ 子组件 3 │ │
│ └───────────────┘ │
│ │ ← 主轴终点(底部)
└─────────────────────┘
← 交叉轴 →
- 主轴控制:justifyContent(FlexAlign.Start | Center | End | SpaceBetween | SpaceAround | SpaceEvenly)
- 交叉轴控制:alignItems(HorizontalAlign.Start | Center | End | Stretch)
2.2 Row(横向容器)
Row 的主轴是 水平方向,交叉轴是 垂直方向。
┌─────────────────────────────┐
│ 子组件 1 │ 子组件 2 │ 子组件 3 │ ← 主轴方向
└─────────────────────────────┘
↑ ↑
交叉轴起点 交叉轴终点
- 主轴控制:justifyContent(FlexAlign.Start | Center | End | …)
- 交叉轴控制:alignItems(VerticalAlign.Top | Center | Bottom | Stretch)
2.3 layoutWeight 的定位
layoutWeight 是 ArkUI 弹性布局的核心属性。它不隶属于 Column 或 Row 独有,而是作用于父容器的剩余空间分配机制:
- 当父容器是 Row 时,layoutWeight 在 水平方向 分配空间
- 当父容器是 Column 时,layoutWeight 在 垂直方向 分配空间
- 当父容器是 Flex 时,layoutWeight 沿 主轴方向 分配空间
关键规则:父容器中所有声明了 layoutWeight 的子组件,会按照权重比例瓜分父容器的剩余空间。
3. 核心 API 详解
3.1 constraintSize —— 约束尺寸
constraintSize 是 ArkUI 提供的尺寸约束 API,可以同时设置最小和最大尺寸阈值。
函数签名:
.constraintSize(value: ConstraintSizeOptions): this
ConstraintSizeOptions 接口:
interface ConstraintSizeOptions {
minWidth?: number; // 最小宽度(vp),组件宽度不会小于此值
maxWidth?: number; // 最大宽度(vp),组件宽度不会超过此值
minHeight?: number; // 最小高度(vp)
maxHeight?: number; // 最大高度(vp)
}
行为特点:
- minWidth 和 minHeight 提供了 下限保护:无论父容器如何压缩,组件的尺寸都不会小于这两个值
- maxWidth 和 maxHeight 提供了 上限限制:无论内容如何撑大,组件的尺寸都不会超过这两个值
- 约束是 双向生效 的:既影响组件自身的尺寸计算,也影响父容器的布局测量
- 当 minWidth > maxWidth 时,以 minWidth 为准(下限优先)
注意事项:
- 约束值的单位是 vp(virtual pixel),即鸿蒙的虚拟像素单位,与屏幕密度无关
- 设置 constraintSize({ minWidth: 0 }) 等价于没有最小宽度约束
- constraintSize 不改变组件的初始尺寸,只限制其伸缩边界
3.2 layoutWeight —— 弹性权重
layoutWeight 是 ArkUI 实现弹性布局的关键属性。
函数签名:
.layoutWeight(value: number | string): this
行为特点:
典型使用模式:
Row() {
Column().width(0).layoutWeight(1) // 占 1 份
Column().width(0).layoutWeight(2) // 占 2 份
Column().width(0).layoutWeight(3) // 占 3 份
}
注意事项:
- layoutWeight 仅在父容器是 Row、Column、Flex 时生效
- 如果父容器自身没有固定宽度,layoutWeight 无法分配(因为没有"剩余空间"的概念)
- layoutWeight 不支持负值
3.3 width(0) + layoutWeight 黄金组合
这是 ArkUI 布局中非常经典的一个组合技巧:
Column()
.width(0) // ← 放弃固定宽度,完全由 layoutWeight 接管
.layoutWeight(1) // ← 按权重分配空间
.constraintSize({ // ← 设置边界约束
minWidth: 160,
maxWidth: 400
})
为什么需要 width(0)?
如果不设置 width(0),Column 的默认宽度行为是:
- 如果 Column 内部有固定宽度的子组件,Column 的宽度会"撑开"到子组件的宽度
- 这会导致 layoutWeight 分配的空间与 Column 的固有宽度产生冲突,造成布局不确定
设置 width(0) 后,Column 的固有宽度被清零,layoutWeight 可以完全接管宽度分配,此时 constraintSize 作为边界约束发挥作用。
行为的完整链路:
父容器 Row 计算总宽度
│
▼
Row 测量所有子组件的"需求宽度"
│
▼
对于 layoutWeight 子组件:需求的宽度是 width(0)=0
│
▼
Row 计算剩余空间 = 总宽度 – 所有非 layoutWeight 子组件的宽度
│
▼
按 layoutWeight 比例分配剩余空间给每个子组件
│
▼
对每个子组件:最终宽度 = max(分配宽度, minWidth)
min(最终宽度, maxWidth)
3.4 animateTo 动画驱动布局
animateTo 是 ArkUI 提供的显式动画 API,用于驱动状态变化触发布局更新。
函数签名:
animateTo(value: AnimateOptions, callback: () => void): void
AnimateOptions 接口:
interface AnimateOptions {
duration: number; // 动画时长(毫秒)
curve?: Curve; // 动画曲线(默认 Linear)
delay?: number; // 延迟(毫秒)
iterations?: number; // 循环次数,-1 表示无限
playMode?: PlayMode; // 播放模式
expectedFrameRate?: number;
}
在布局中的应用:
在我们的演示中,animateTo 用于驱动容器宽度的平滑变化:
private shrinkWidth(): void {
animateTo({ duration: 500, curve: Curves.FastOutSlowIn }, () => {
this.shrinkStage++;
if (this.shrinkStage === 1) {
this.containerWidth = 70; // 从 100% 过渡到 70%
} else if (this.shrinkStage >= 2) {
this.containerWidth = 40; // 从 70% 过渡到 40%
}
});
}
Curves.FastOutSlowIn 是 Material Design 风格的速度曲线:起始迅速,终止缓慢,给人以自然的弹性感。
4. 实战项目:分栏面板最小宽度约束演示
4.1 项目结构全景
MyApplication/
├── entry/src/main/ets/
│ ├── pages/
│ │ └── ColumnMinWidthPage.ets ← 主页面(本篇核心)
│ └── entryability/
│ └── EntryAbility.ets ← 应用入口,加载页面
├── entry/src/main/resources/
│ └── base/profile/
│ └── main_pages.json ← 页面路由注册
└── …
4.2 数据模型设计
首先定义 ColumnInfo 接口,描述每一列面板的元数据:
interface ColumnInfo {
label: string; // 列的名称(如"基础列""中等列")
minWidth: number; // 最小宽度约束值(vp)
widthRatio: number; // layoutWeight 权重
color: string; // 背景色(十六进制字符串)
items: string[]; // 列内展示的信息条目
}
设计 4 列数据,各自具有不同的最小宽度和权重:
| 📋 基础列 | 80vp | 1 | #F0F8FF | 3 |
| 📦 中等列 | 160vp | 2 | #F5F0FF | 4 |
| 🛡️ 宽列 | 220vp | 3 | #EBFFF5 | 5 |
| 🏛️ 固定宽列 | 280vp | 4 | #FFF5EB | 3 |
这个设计的巧妙之处在于:不同列的 minWidth 和 weight 都是递增的,当父容器缩小时,高权重大约束的列会"率先触壁",形成依次卡住的效果,便于观察。
4.3 组件封装:InfoRow
InfoRow 是一个极简的行组件,在每列内部展示一条信息:
@Component
struct InfoRow {
private text: string = '';
build() {
Row() {
// 圆点装饰
Circle()
.width(6)
.height(6)
.fill('#3a7bd5')
.margin({ right: 8 })
// 文字内容(单行省略)
Text(this.text)
.fontSize(13)
.fontColor('#333333')
.lineHeight(20)
.textOverflow({ overflow: TextOverflow.Ellipsis })
.maxLines(1)
}
.alignItems(VerticalAlign.Center)
.width('100%')
.height(28)
.padding({ left: 8, right: 8 })
}
}
设计要点:
- 使用 Circle + Text 组合,模拟列表项的圆点前缀
- textOverflow({ overflow: TextOverflow.Ellipsis }) 保证文本超长时以省略号结尾
- 限定 height(28) 确保行高一致,视觉整齐
4.4 组件封装:DemoColumn
DemoColumn 是演示的核心子组件,代表一个带有最小宽度约束的 Column 面板:
@Component
struct DemoColumn {
private columnInfo: ColumnInfo = {
label: '', minWidth: 0, widthRatio: 1,
color: '#FFFFFF', items: [],
};
private columnIndex: number = 0;
build() {
Column() {
// 1. 列标题
Text(this.columnInfo.label)
.fontSize(14)
.fontWeight(FontWeight.Bold)
.fontColor('#1a1a2e')
.lineHeight(20)
// 2. 约束信息显示
Text(`最小宽度: ${this.columnInfo.minWidth}vp · 权重: ${this.columnInfo.widthRatio}`)
.fontSize(11)
.fontColor('#888888')
.margin({ top: 2, bottom: 6 })
// 3. 分隔线
Divider()
.height(1)
.width('100%')
.color('#e0e0e0')
.margin({ bottom: 8 })
// 4. 内容列表
ForEach(this.columnInfo.items, (item: string) => {
InfoRow({ text: item })
}, (item: string) => item)
// 5. 底部弹性占位条
Row()
.width('100%')
.layoutWeight(1)
.backgroundColor('#28000000')
// 6. 底部分隔装饰线
Row()
.width('80%')
.height(3)
.borderRadius(2)
.backgroundColor('#3a7bd5')
.margin({ bottom: 6 })
}
// ========== ★★★ 关键布局属性链 ★★★ ==========
.alignItems(HorizontalAlign.Center)
.justifyContent(FlexAlign.Start)
.width(0) // 放弃固定宽度
.height('100%') // 撑满父容器高度
.layoutWeight(this.columnInfo.widthRatio) // 按权重分配水平空间
.constraintSize({ // ★ 最小宽度约束
minWidth: this.columnInfo.minWidth
})
.padding(12)
.margin({ left: 4, right: 4 })
.backgroundColor(this.columnInfo.color)
.borderRadius(10)
.shadow({ radius: 4, color: '#15000000', offsetX: 0, offsetY: 2 })
}
}
布局链说明(从下往上读):
| width(0) | 固宽清零 | 让 layoutWeight 完全接管水平尺寸 |
| height('100%') | 纵向撑满 | 配合父 Row 的 height('100%') 占满可视区 |
| layoutWeight(N) | 弹性权重 | Row 父容器按 N 分配剩余水平空间 |
| constraintSize({ minWidth }) | 最小宽度 | 当分配宽度小于此值时,以 minWidth 为准 |
| alignItems + justifyContent | 子组件对齐 | 交叉轴居中,主轴顶部起始 |
4.5 主页面:ColumnMinWidthPage
这是应用的主入口页面,整合了标题区、控制区、核心演示区和说明面板。
页面结构层次:
Column(最外层,全屏)
├── Column(标题区:蓝色背景,白色文字)
│ ├── Text(主标题)
│ └── Text(副标题 + API 名称)
│
├── Column(控制区:灰白背景)
│ ├── Row(按钮行)
│ │ ├── Button(重置宽度)
│ │ └── Button(缩小容器)
│ └── Text(状态提示文字)
│
├── Scroll(核心演示区:水平滚动)
│ └── Row(容器宽度 = containerWidth%)
│ ├── DemoColumn(基础列)
│ ├── DemoColumn(中等列)
│ ├── DemoColumn(宽列)
│ ├── DemoColumn(固定宽列)
│ └── Column(溢出提示区,虚线边框)
│
├── Column(说明面板)
│ ├── Text(标题)
│ ├── Row × 4(要点列表)
│ ├── Divider
│ ├── Text(代码标题)
│ └── Column(代码块)
4.6 交互控制逻辑
主页面使用 @State 装饰的两个状态变量驱动布局:
@State private containerWidth: number = 100; // 容器宽度百分比
@State private shrinkStage: number = 0; // 当前收缩阶段
重置逻辑:
private resetWidth(): void {
animateTo({ duration: 500, curve: Curves.FastOutSlowIn }, () => {
this.shrinkStage = 0;
this.containerWidth = 100;
});
}
收缩逻辑(分阶段执行):
private shrinkWidth(): void {
animateTo({ duration: 500, curve: Curves.FastOutSlowIn }, () => {
this.shrinkStage++;
if (this.shrinkStage === 1) {
this.containerWidth = 70; // 第一阶段:70%
} else if (this.shrinkStage >= 2) {
this.containerWidth = 40; // 第二阶段:40%
}
});
}
状态反馈:
private getStatusText(): string {
switch (this.shrinkStage) {
case 0:
return '✅ 容器宽度: 100% — 各列按 layoutWeight 权重等比例分配,均满足最小宽度';
case 1:
return '⚠️ 容器宽度: 70% — 部分列已接近最小宽度约束阈值';
case 2:
return '🛑 容器宽度: 40% — 各列被 minWidth "卡住",超出部分进入 Scroll 滚动区';
default:
return `📐 容器宽度: ${this.containerWidth}%`;
}
}
4.7 主页面完整代码
以下是完整的主页面 ColumnMinWidthPage.ets,可以直接用于鸿蒙 NEXT 项目:
/**
* ============================================================
* 鸿蒙原生 ArkTS 布局示例 — Column 最小宽度约束
* 功能:演示 Column 容器的最小宽度约束布局效果
* 通过 constraintSize 设置最小宽度,
* 配合 layoutWeight 实现弹性空间分配
* 场景:响应式卡片布局 / 侧边栏 / 分栏面板 / 自适应界面
* 核心技术:
* – Column 容器 + constraintSize({ minWidth: … })
* – layoutWeight 等比例分配剩余空间
* – animateTo 伸缩动画动态展示约束效果
* ============================================================
*/
import { hilog } from '@kit.PerformanceAnalysisKit';
const TAG = 'ColumnMinWidthDemo';
interface ColumnInfo {
label: string;
minWidth: number;
widthRatio: number;
color: string;
items: string[];
}
@Component
struct InfoRow {
private text: string = '';
build() {
Row() {
Circle()
.width(6)
.height(6)
.fill('#3a7bd5')
.margin({ right: 8 })
Text(this.text)
.fontSize(13)
.fontColor('#333333')
.lineHeight(20)
.textOverflow({ overflow: TextOverflow.Ellipsis })
.maxLines(1)
}
.alignItems(VerticalAlign.Center)
.width('100%')
.height(28)
.padding({ left: 8, right: 8 })
}
}
@Component
struct DemoColumn {
private columnInfo: ColumnInfo = {
label: '', minWidth: 0, widthRatio: 1,
color: '#FFFFFF', items: [],
};
private columnIndex: number = 0;
build() {
Column() {
Text(this.columnInfo.label)
.fontSize(14)
.fontWeight(FontWeight.Bold)
.fontColor('#1a1a2e')
.lineHeight(20)
Text(`最小宽度: ${this.columnInfo.minWidth}vp · 权重: ${this.columnInfo.widthRatio}`)
.fontSize(11)
.fontColor('#888888')
.margin({ top: 2, bottom: 6 })
Divider()
.height(1)
.width('100%')
.color('#e0e0e0')
.margin({ bottom: 8 })
ForEach(this.columnInfo.items, (item: string) => {
InfoRow({ text: item })
}, (item: string) => item)
Row()
.width('100%')
.layoutWeight(1)
.backgroundColor('#28000000')
Row()
.width('80%')
.height(3)
.borderRadius(2)
.backgroundColor('#3a7bd5')
.margin({ bottom: 6 })
}
.alignItems(HorizontalAlign.Center)
.justifyContent(FlexAlign.Start)
.width(0)
.height('100%')
.layoutWeight(this.columnInfo.widthRatio)
.constraintSize({
minWidth: this.columnInfo.minWidth
})
.padding(12)
.margin({ left: 4, right: 4 })
.backgroundColor(this.columnInfo.color)
.borderRadius(10)
.shadow({ radius: 4, color: '#15000000', offsetX: 0, offsetY: 2 })
}
}
@Entry
@Component
struct ColumnMinWidthPage {
private readonly columns: ColumnInfo[] = [
{
label: '📋 基础列',
minWidth: 80,
widthRatio: 1,
color: '#F0F8FF',
items: ['条目 A-1', '条目 A-2', '条目 A-3'],
},
{
label: '📦 中等列',
minWidth: 160,
widthRatio: 2,
color: '#F5F0FF',
items: ['条目 B-1', '条目 B-2', '条目 B-3', '条目 B-4'],
},
{
label: '🛡️ 宽列',
minWidth: 220,
widthRatio: 3,
color: '#EBFFF5',
items: ['条目 C-1', '条目 C-2', '条目 C-3', '条目 C-4', '条目 C-5'],
},
{
label: '🏛️ 固定宽列',
minWidth: 280,
widthRatio: 4,
color: '#FFF5EB',
items: ['条目 D-1', '条目 D-2', '条目 D-3'],
},
];
@State private containerWidth: number = 100;
@State private shrinkStage: number = 0;
private resetWidth(): void {
animateTo({ duration: 500, curve: Curves.FastOutSlowIn }, () => {
this.shrinkStage = 0;
this.containerWidth = 100;
});
}
private shrinkWidth(): void {
animateTo({ duration: 500, curve: Curves.FastOutSlowIn }, () => {
this.shrinkStage++;
if (this.shrinkStage === 1) {
this.containerWidth = 70;
} else if (this.shrinkStage >= 2) {
this.containerWidth = 40;
}
});
}
build() {
Column() {
/* 标题区 */
Column() {
Text('📐 Column + constrainSize + layoutWeight')
.fontSize(20)
.fontWeight(FontWeight.Bold)
.fontColor('#ffffff')
.lineHeight(28)
Text('Column 容器「最小宽度约束」演示 · 鸿蒙原生 ArkTS 布局')
.fontSize(12)
.fontColor('#cce0ff')
.margin({ top: 4 })
Text('constraintSize({ minWidth: X }) + layoutWeight 弹性权重')
.fontSize(11)
.fontColor('#aaccff')
.margin({ top: 2 })
}
.alignItems(HorizontalAlign.Start)
.width('100%')
.padding({ top: 20, bottom: 14, left: 20, right: 20 })
.backgroundColor('#2d5f8a')
/* 控制区 */
Column() {
Row() {
Button('🔄 重置宽度 (100%)')
.height(36)
.fontSize(13)
.fontWeight(FontWeight.Medium)
.backgroundColor('#3a7bd5')
.fontColor('#ffffff')
.borderRadius(18)
.padding({ left: 16, right: 16 })
.onClick(() => this.resetWidth())
Button('📉 缩小容器')
.height(36)
.fontSize(13)
.fontWeight(FontWeight.Medium)
.backgroundColor('#e67e22')
.fontColor('#ffffff')
.borderRadius(18)
.padding({ left: 16, right: 16 })
.margin({ left: 10 })
.onClick(() => this.shrinkWidth())
}
.width('100%')
.justifyContent(FlexAlign.Center)
Text(this.getStatusText())
.fontSize(12)
.fontColor('#3a7bd5')
.fontWeight(FontWeight.Medium)
.margin({ top: 8 })
.lineHeight(18)
}
.width('100%')
.padding({ top: 12, bottom: 10 })
.backgroundColor('#f5f7fa')
/* 核心演示区 */
Scroll() {
Row() {
ForEach(this.columns, (col: ColumnInfo, idx: number) => {
DemoColumn({
columnInfo: col,
columnIndex: idx,
})
}, (col: ColumnInfo) => col.label)
Column() {
Text('📌 溢出区')
.fontSize(12)
.fontWeight(FontWeight.Bold)
.fontColor('#e67e22')
.lineHeight(16)
Text('当容器宽度缩小,\\n各列被 minWidth 卡住后,\\n多余内容会进入此区域\\n(Scroll 横向滚动可见)')
.fontSize(11)
.fontColor('#cc6600')
.lineHeight(16)
.margin({ top: 6 })
.textAlign(TextAlign.Center)
}
.width(120)
.height('100%')
.justifyContent(FlexAlign.Center)
.alignItems(HorizontalAlign.Center)
.padding(10)
.margin({ left: 4 })
.backgroundColor('#fff3e0')
.borderRadius(10)
.border({ width: 2, color: '#e67e22', style: BorderStyle.Dashed })
}
.alignItems(VerticalAlign.Top)
.height('100%')
.width(`${this.containerWidth}%`)
.padding({ left: 8, right: 8 })
}
.layoutWeight(1)
.width('100%')
.scrollable(ScrollDirection.Horizontal)
.edgeEffect(EdgeEffect.Spring)
.margin({ top: 10 })
/* 说明面板 */
Column() {
Text('🎯 Column 最小宽度约束 · 布局要点')
.fontSize(14)
.fontWeight(FontWeight.Bold)
.fontColor('#1a1a2e')
.margin({ bottom: 10 })
Row() {
Text('●').fontColor('#3a7bd5').fontSize(10).margin({ right: 8 })
Text('constraintSize({ minWidth: N }) 设置 Column 的最小宽度阈值').fontSize(12).fontColor('#555')
}.alignItems(VerticalAlign.Top).margin({ bottom: 5 })
Row() {
Text('●').fontColor('#e67e22').fontSize(10).margin({ right: 8 })
Text('layoutWeight 在 Row 父容器中按权重分配水平空间').fontSize(12).fontColor('#555')
}.alignItems(VerticalAlign.Top).margin({ bottom: 5 })
Row() {
Text('●').fontColor('#27ae60').fontSize(10).margin({ right: 8 })
Text('父容器缩小到临界值时,minWidth 阻止列继续压缩,触发 Scroll 滚动').fontSize(12).fontColor('#555')
}.alignItems(VerticalAlign.Top).margin({ bottom: 5 })
Row() {
Text('●').fontColor('#8e44ad').fontSize(10).margin({ right: 8 })
Text('width(0) + layoutWeight(N) 组合 = 弹性宽度,由约束和权重共同决定').fontSize(12).fontColor('#555')
}.alignItems(VerticalAlign.Top).margin({ bottom: 8 })
Divider().height(1).width('100%').color('#e8e8e8').margin({ bottom: 10 })
Text('💻 核心代码')
.fontSize(13)
.fontWeight(FontWeight.Bold)
.fontColor('#1a1a2e')
.margin({ bottom: 6 })
Column() {
Text('Column() { /* 子组件 */ }').fontSize(12).fontColor('#2d5f8a').fontFamily('Courier New')
Text(' .width(0) // 由 layoutWeight 接管')
.fontSize(12).fontColor('#999').fontFamily('Courier New')
Text(' .constraintSize({ minWidth: 160 })')
.fontSize(12).fontColor('#c7254e').fontWeight(FontWeight.Bold).fontFamily('Courier New')
Text(' .layoutWeight(2)')
.fontSize(12).fontColor('#2d5f8a').fontWeight(FontWeight.Bold).fontFamily('Courier New')
}
.alignItems(HorizontalAlign.Start)
.width('100%')
.padding(12)
.backgroundColor('#f0f4f8')
.borderRadius(8)
}
.alignItems(HorizontalAlign.Start)
.width('100%')
.padding(14)
.backgroundColor('#fafbfc')
.borderRadius(12)
.margin({ left: 12, right: 12, bottom: 12 })
.border({ width: 1, color: '#e8ecf0' })
}
.width('100%')
.height('100%')
.backgroundColor('#eef2f7')
}
private getStatusText(): string {
switch (this.shrinkStage) {
case 0: return '✅ 容器宽度: 100% — 各列按 layoutWeight 权重等比例分配,均满足最小宽度';
case 1: return '⚠️ 容器宽度: 70% — 部分列已接近最小宽度约束阈值';
case 2: return '🛑 容器宽度: 40% — 各列被 minWidth "卡住",超出部分进入 Scroll 滚动区';
default: return `📐 容器宽度: ${this.containerWidth}%`;
}
}
}
5. 运行效果与行为分析
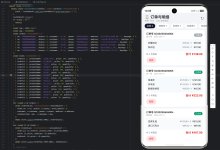
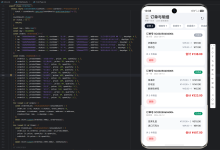
将应用运行在 HarmonyOS NEXT 模拟器或真机上,页面的呈现效果如下:
5.1 阶段一:全宽模式
初始状态下,containerWidth = 100%,Row 容器占满 Scroll 的宽度。
┌─────────────────────────────────────────────────────────────────┐
│ [🔄 重置宽度] [📉 缩小容器] ✅ 容器宽度: 100% │
├─────────────────────────────────────────────────────────────────┤
│ ┌─────────┐ ┌──────────────────┐ ┌──────────────────────┐ ┌─── │
│ │ 📋 基础 │ │ 📦 中等列 │ │ 🛡️ 宽列 │ │ 🏛️ │
│ │ 80vp │ │ 160vp │ │ 220vp │ │ 280 │
│ │ 权重=1 │ │ 权重=2 │ │ 权重=3 │ │ 权4 │
│ ├─────────┤ ├──────────────────┤ ├──────────────────────┤ ├─── │
│ │ A-1 │ │ B-1 │ │ C-1 │ │ D1 │
│ │ A-2 │ │ B-2 │ │ C-2 │ │ D2 │
│ │ A-3 │ │ B-3 │ │ C-3 │ │ D3 │
│ │ │ │ B-4 │ │ C-4 │ │ │
│ │ │ │ │ │ C-5 │ │ │
│ └─────────┘ └──────────────────┘ └──────────────────────┘ └─── │
│ 1/10 2/10 3/10 4/10 │
│ ← 按 layoutWeight 1:2:3:4 分配 →
└─────────────────────────────────────────────────────────────────┘
行为分析:
- Row 容器宽度 = Scroll 组件的宽度(约等于屏幕宽度)
- 4 列 Column 按 layoutWeight 比例 1:2:3:4 分配宽度
- 基础列宽度 ≈ 屏幕宽度 × 1/10,远超其 minWidth(80vp)
- 所有列都处于"正常弹性"状态,约束未触发
5.2 阶段二:部分收缩
点击一次缩小按钮,containerWidth = 70%。
┌──────────────────────────────────────────────────────┐
│ [🔄] [📉] ⚠️ 容器宽度: 70% — 部分列已接近阈值 │
├──────────────────────────────────────────────────────┤
│ ┌──────┐┌──────────────┐┌──────────────────┐┌───────│
│ │📋基础 ││ 📦中等列 ││ 🛡️宽列 ││ 🏛️固 │
│ │80vp ││ 160vp ││ 220vp ││ 280v │
│ └──────┘└──────────────┘└──────────────────┘└───────│
└──────────────────────────────────────────────────────┘
行为分析:
- Row 宽度缩减到原来的 70%
- layoutWeight 重新计算各列的分配宽度
- 基础列(minWidth=80)不受影响,依然有富余
- 中等列(minWidth=160)开始接近阈值
- 宽列(minWidth=220)接近阈值
- 固定宽列(minWidth=280)可能已触及约束(取决于屏幕宽度)
- 注意:此时 Scroll 尚未触发滚动,因为所有列加起来的总宽度 ≤ Scroll 的宽度
5.3 阶段三:极窄模式
再点击一次缩小按钮,containerWidth = 40%。
此时是最关键的演示阶段:
┌──────────────────────────────────────────────┐
│ [🔄] [📉] 🛑 容器宽度: 40% │
├──────────────────────────────────────────────┤
│ ┌───┐┌──────┐┌──────┐┌──────┐┌────────────┐ │
│ │📋 ││ 📦 ││ 🛡️ ││ 🏛️ ││ 溢出区 │←←←→ scroll
│ │80 ││160 ││220 ││280 ││ ┊┊┊┊┊┊┊┊┊┊ │
│ └───┘└──────┘└──────┘└──────┘└────────────┘ │
│ ↑ ↑ ↑ ↑ │
│ 所有列都被 minWidth "卡住" │
│ 容器宽度 < 列宽度总和 → Scroll 可横向滚动 │
└──────────────────────────────────────────────┘
行为分析:
- Row 宽度 = 屏幕宽度的 40%
- 4 列的最小宽度总和 = 80 + 160 + 220 + 280 = 740vp
- 加上溢出区的 120vp,总需求宽度 = 860vp
- 而 40% 的屏幕宽度通常远小于 860vp
- 因此 所有列都触发了 minWidth 约束,宽度不再缩小
- Row 宽度 < 内部列总宽度 → Scroll 启用横向滚动
- 用户向左滑动可以看到被压缩到右侧的"溢出区"提示
关键结论:
当父容器宽度小于子组件 minWidth 总和时,constraintSize 的约束力覆盖了 layoutWeight 的弹性分配。这就是最小宽度约束的核心机制。
6. 从原理到源码:布局引擎如何执行最小宽度约束
为了深入理解 constraintSize 的工作原理,我们需要了解 ArkUI 布局引擎的三阶段测量过程。
第一阶段:需求测量
布局引擎首先测量每个子组件的"需求尺寸"(desired size)。
对于声明了 layoutWeight 的子组件,其需求宽度就是 width(0)(因为固宽被清零)。但 ArkUI 引擎在测量时会记下该组件的 constraintSize 信息。
子组件 A:layoutWeight=1, constraintSize(minWidth=80)
→ 需求宽度 = 0(由 width(0) 决定)
→ 约束信息 = { minWidth: 80, maxWidth: Infinity }
子组件 B:layoutWeight=2, constraintSize(minWidth=160)
→ 需求宽度 = 0
→ 约束信息 = { minWidth: 160, maxWidth: Infinity }
第二阶段:空间分配
父容器(Row)计算总宽度,减去非 layoutWeight 子组件的宽度,得到"可分配空间"。
Row 总宽度 = 360vp(以 40% 屏幕宽度为例)
非 layoutWeight 子组件宽度 = 溢出区 120vp + padding
可分配空间 ≈ 360 – 120 – 16 = 224vp
布局引擎按 layoutWeight 比例分配这 224vp:
基础列:224 × 1/10 = 22.4vp
中等列:224 × 2/10 = 44.8vp
宽列: 224 × 3/10 = 67.2vp
固定列:224 × 4/10 = 89.6vp
第三阶段:约束裁剪
这是最关键的一步。布局引擎将前一步计算出的分配值与 constraintSize 进行对比:
基础列:分配值 22.4vp, minWidth=80vp
→ 最终宽度 = max(22.4, 80) = 80vp ✓ 触发约束
中等列:分配值 44.8vp, minWidth=160vp
→ 最终宽度 = max(44.8, 160) = 160vp ✓ 触发约束
宽列:分配值 67.2vp, minWidth=220vp
→ 最终宽度 = max(67.2, 220) = 220vp ✓ 触发约束
固定列:分配值 89.6vp, minWidth=280vp
→ 最终宽度 = max(89.6, 280) = 280vp ✓ 触发约束
约束后的总宽度 = 80 + 160 + 220 + 280 + 120 + 16 = 876vp > Row 的 360vp
因此 Scroll 需要提供横向滚动能力。
7. layoutWeight 与 constraintSize 的优先级博弈
layoutWeight 和 constraintSize 的交互遵循一个清晰的优先级规则:
layoutWeight 计算分配宽度
│
▼
constraintSize 裁切实例宽度
│
▼
最终渲染宽度
7.1 第一轮:layoutWeight 分配可用空间
layoutWeight 是一个建议性的空间分配机制。它告诉布局引擎:“我希望按这个比例获得空间。”
但 layoutWeight 没有强制力——它计算出的值可以被后续的约束覆盖。
7.2 第二轮:minWidth 截断
constraintSize 是一个命令性的边界约束。它的优先级高于 layoutWeight:
- 如果 layoutWeight 分配值 < minWidth → 采纳 minWidth
- 如果 layoutWeight 分配值 > maxWidth → 采纳 maxWidth
- 如果分配值在区间内 → 采纳分配值
这个设计是合理的:layoutWeight 负责"弹性分配",constraintSize 负责"安全边界"。
7.3 第三轮:Scroll 接管溢出
当所有子组件的最终宽度(约束后)总和超过父容器宽度时,布局引擎会进入"溢出模式":
- 如果父容器没有包裹在 Scroll 中:子组件会溢出裁剪(overflow clipping),部分内容不可见
- 如果父容器包裹在 Scroll 中:Scroll 提供滚动能力,用户可以滚动查看所有内容
- 如果父容器包裹在 Scroll 中且设置了 edgeEffect(EdgeEffect.Spring):到达边界时会有弹簧回弹效果
这就是为什么我们的示例中一定要使用 Scroll + scrollable(Horizontal):
Scroll() {
Row() { /* 约束列 */ }
.width(`${this.containerWidth}%`)
}
.scrollable(ScrollDirection.Horizontal)
.edgeEffect(EdgeEffect.Spring)
没有 Scroll 的话,当容器缩小时列会被直接裁剪,用户体验很差。
8. 常见陷阱与最佳实践
8.1 忘记设置 width(0)
错误示例:
Column()
.layoutWeight(2) // 忘记设置 width(0)
.constraintSize({ minWidth: 160 })
问题:Column 的默认宽度由子组件撑开。如果子组件(比如 Text)的固有宽度为 200vp,那么 Column 的"需求宽度"就是 200vp,而非 0。布局引擎在计算溢出时会把 200vp 作为基础,导致空间分配不符合预期。
正确做法:
Column()
.width(0) // 主动清零
.layoutWeight(2)
.constraintSize({ minWidth: 160 })
8.2 minWidth 总和超过父容器宽度
这是最常见的"问题",但其实是正确行为。
当所有子组件的 minWidth 总和超过父容器宽度时,layoutWeight 完全失效(因为分配值始终小于 minWidth),所有列都卡在最小宽度。这不是 Bug,而是 constraintSize 的设计目的。
解决方案:
- 如果这是预期行为:用 Scroll 包裹,提供横向滚动
- 如果不希望出现滚动:调整 minWidth 值,确保总和不超过目标屏幕宽度
- 如果需要自适应:使用 layoutWeight 替代 constraintSize,不设 minWidth
8.3 constraintSize 与百分比宽度混用
需要注意的顺序:
Column()
.width('50%') // 先设置百分比宽度
.constraintSize({ minWidth: 200 }) // 再设置约束
这种情况下,Column 的宽度是 max(50% of parent, 200vp)。当父容器很宽时(如 1000vp),50% = 500vp,约束不触发。当父容器变窄时(如 300vp),50% = 150vp,约束触发,实际宽度为 200vp。
不建议混用百分比和 constraintSize,因为语义上有重叠。更好的做法是用 width(0) + layoutWeight 替代百分比。
8.4 Scroll 无法滚动
问题:设置了 Scroll 但内容不能横向滚动。
常见原因:
排查方法:
// 确认 Scroll 配置正确
Scroll() {
Row() {
// 列…
}
.width(…) // ← 确保 Row 在某些状态下会超过 Scroll 宽度
}
.scrollable(ScrollDirection.Horizontal) // ← 必须设置
.edgeEffect(EdgeEffect.Spring) // ← 推荐,增加回弹体验
8.5 动画卡顿
在使用 animateTo 驱动 containerWidth 变化时,如果出现卡顿,可能的原因:
优化建议:
animateTo({
duration: 600, // 适当增加时长
curve: Curves.FastOutSlowIn, // 使用缓动曲线
expectedFrameRate: 60, // 期望帧率
}, () => {
this.containerWidth = 70;
});
9. 拓展场景:自适应侧边栏响应式面板
constraintSize + layoutWeight 的组合不仅仅适用于演示场景,在生产中有着广泛的应用。以下给出三个典型场景的代码片段。
9.1 左侧导航栏 + 右侧内容区
最常见的两栏布局:左侧导航栏有最小宽度,右侧内容区弹性填充。
@Component
struct SidebarLayout {
build() {
Row() {
// 左侧导航栏:最小 200vp,最大 300vp
Column() {
Text('导航菜单').fontSize(16).fontWeight(FontWeight.Bold).margin({ bottom: 16 })
ForEach(['首页', '发现', '消息', '我的'], (item: string) => {
Text(item).fontSize(14).padding({ top: 8, bottom: 8 })
})
}
.width(0)
.layoutWeight(1)
.constraintSize({ minWidth: 200, maxWidth: 300 })
.padding(16)
.backgroundColor('#f5f5f5')
.height('100%')
// 右侧内容区:弹性填充
Column() {
Text('主内容区域').fontSize(18)
// 内容…
}
.width(0)
.layoutWeight(3)
.padding(20)
.height('100%')
}
.width('100%')
.height('100%')
}
}
9.2 三栏仪表盘面板
监控面板的三栏布局,每栏有不同的最小宽度。
@Component
struct DashboardLayout {
build() {
Scroll() {
Row() {
// 实时监控面板:最小 240vp
Column() {
Text('📊 实时监控').fontSize(16).fontWeight(FontWeight.Bold)
// 图表组件…
}
.width(0).layoutWeight(1).constraintSize({ minWidth: 240 })
.padding(12).margin(4).backgroundColor('#F0F8FF').borderRadius(8)
// 告警列表面板:最小 280vp
Column() {
Text('⚠️ 告警列表').fontSize(16).fontWeight(FontWeight.Bold)
// 告警条目…
}
.width(0).layoutWeight(1).constraintSize({ minWidth: 280 })
.padding(12).margin(4).backgroundColor('#FFF5F5').borderRadius(8)
// 统计概览面板:最小 200vp
Column() {
Text('📈 统计概览').fontSize(16).fontWeight(FontWeight.Bold)
// 统计卡片…
}
.width(0).layoutWeight(1).constraintSize({ minWidth: 200 })
.padding(12).margin(4).backgroundColor('#F5FFFA').borderRadius(8)
}
.height('100%')
.padding(8)
}
.scrollable(ScrollDirection.Horizontal)
}
}
9.3 多栏可拖拽布局
结合 PanGesture 手势,可以实现在运行时动态调整 layoutWeight 的比例:
@Component
struct DraggablePanel {
@State private leftRatio: number = 1;
@State private rightRatio: number = 3;
build() {
Row() {
Column() {
Text('左侧面板(可拖拽调整宽度)')
.fontSize(14)
.lineHeight(20)
}
.width(0)
.layoutWeight(this.leftRatio)
.constraintSize({ minWidth: 150, maxWidth: 400 })
.padding(16)
.backgroundColor('#e8f4f8')
// 拖拽手柄
Column()
.width(8)
.height('100%')
.backgroundColor('#cccccc')
.gesture(
PanGesture({ direction: PanDirection.Horizontal })
.onActionUpdate((event: GestureEvent) => {
// 根据拖拽偏移量动态调整权重比例
const deltaWeight = event.offsetX / 50;
animateTo({ duration: 100 }, () => {
this.leftRatio = Math.max(0.5, Math.min(5, this.leftRatio + deltaWeight));
this.rightRatio = Math.max(0.5, Math.min(5, this.rightRatio – deltaWeight));
});
})
)
Column() {
Text('右侧内容区').fontSize(14).lineHeight(20)
}
.width(0)
.layoutWeight(this.rightRatio)
.constraintSize({ minWidth: 200 })
.padding(16)
.backgroundColor('#f0f0f0')
}
.width('100%')
.height('100%')
}
}
10. 性能优化建议
在使用 constraintSize + layoutWeight 布局时,以下优化技巧可以帮助提升性能:
10.1 减少不必要的嵌套
每层 Column/Row 嵌套都会增加布局计算的开销。在保证可读性的前提下,尽量减少嵌套深度。
不推荐:
Column() {
Column() {
Column() {
// 三层嵌套
}
}
}
推荐:
Column() {
// 直接在顶层编排子组件
Text('…')
Row() {
// 只有需要不同方向的布局时才嵌套
}
}
10.2 @State 管理粒度
@State 的变化会触发布局重新计算。如果可能,将状态变量控制在需要变化的组件内部:
不推荐(整个页面重新布局):
@State private width: number = 100;
// 传递给所有子组件
推荐(局部分割):
// 只在控制区使用 @State
@State private shrinkStage: number = 0;
// 子组件内部使用 @Link 或 @Prop 接收
// 只有受影响的组件会重新布局
10.3 合理使用 layoutWeight
不要对所有子组件都使用 layoutWeight。通常 2-4 个权重分配即可满足大多数场景。过多的权重分配会导致布局引擎的分数计算开销增加。
10.4 Scroll 的懒加载
如果 Column 内的列表数据量很大,使用 LazyForEach 替代 ForEach:
Scroll() {
Column() {
LazyForEach(this.dataSource, (item: Item) => {
ItemCard({ data: item })
}, (item: Item) => item.id)
}
.constraintSize({ minWidth: 300 })
}
LazyForEach 只渲染可视区域的子组件,大幅降低内存占用。
11. 总结
本文深入剖析了鸿蒙原生 ArkTS 布局中 Column 最小宽度约束 的完整实现方案。我们从基础概念出发,逐步深入到 API 使用、组件封装、布局引擎原理、性能优化等方方面面。
核心收获
| constraintSize | 设置组件的 min/max 尺寸边界,优先级高于 layoutWeight |
| layoutWeight | 在父容器中按比例分配剩余空间,需要配合 width(0) 使用 |
| width(0) | 清零固宽,让 layoutWeight 完全接管水平尺寸 |
| animateTo | 驱动状态变化触发布局更新,实现平滑动画 |
| Scroll + horizontal | 解决 minWidth 触发后的内容溢出问题 |
| 布局三阶段 | 需求测量 → 空间分配 → 约束裁剪 |
适用场景
- 分栏布局:导航栏 + 内容区的最小宽度保护
- 响应式面板:不同屏幕尺寸下保持面板可读性
- 仪表盘:多列监控面板的最小宽度约束
- 设置页面:Form 表单区域的最小宽度
- 消息列表:信息流卡片的最小尺寸保护
下一步学习方向
- 探索 Flex 容器的 flexGrow、flexShrink、flexBasis 属性
- 学习 GridRow / GridCol 栅格系统,更高层次的响应式布局
- 掌握 Measure 接口,自定义布局节点的测量逻辑
- 研究 Layout 接口,实现完全自定义的容器布局