写在前面
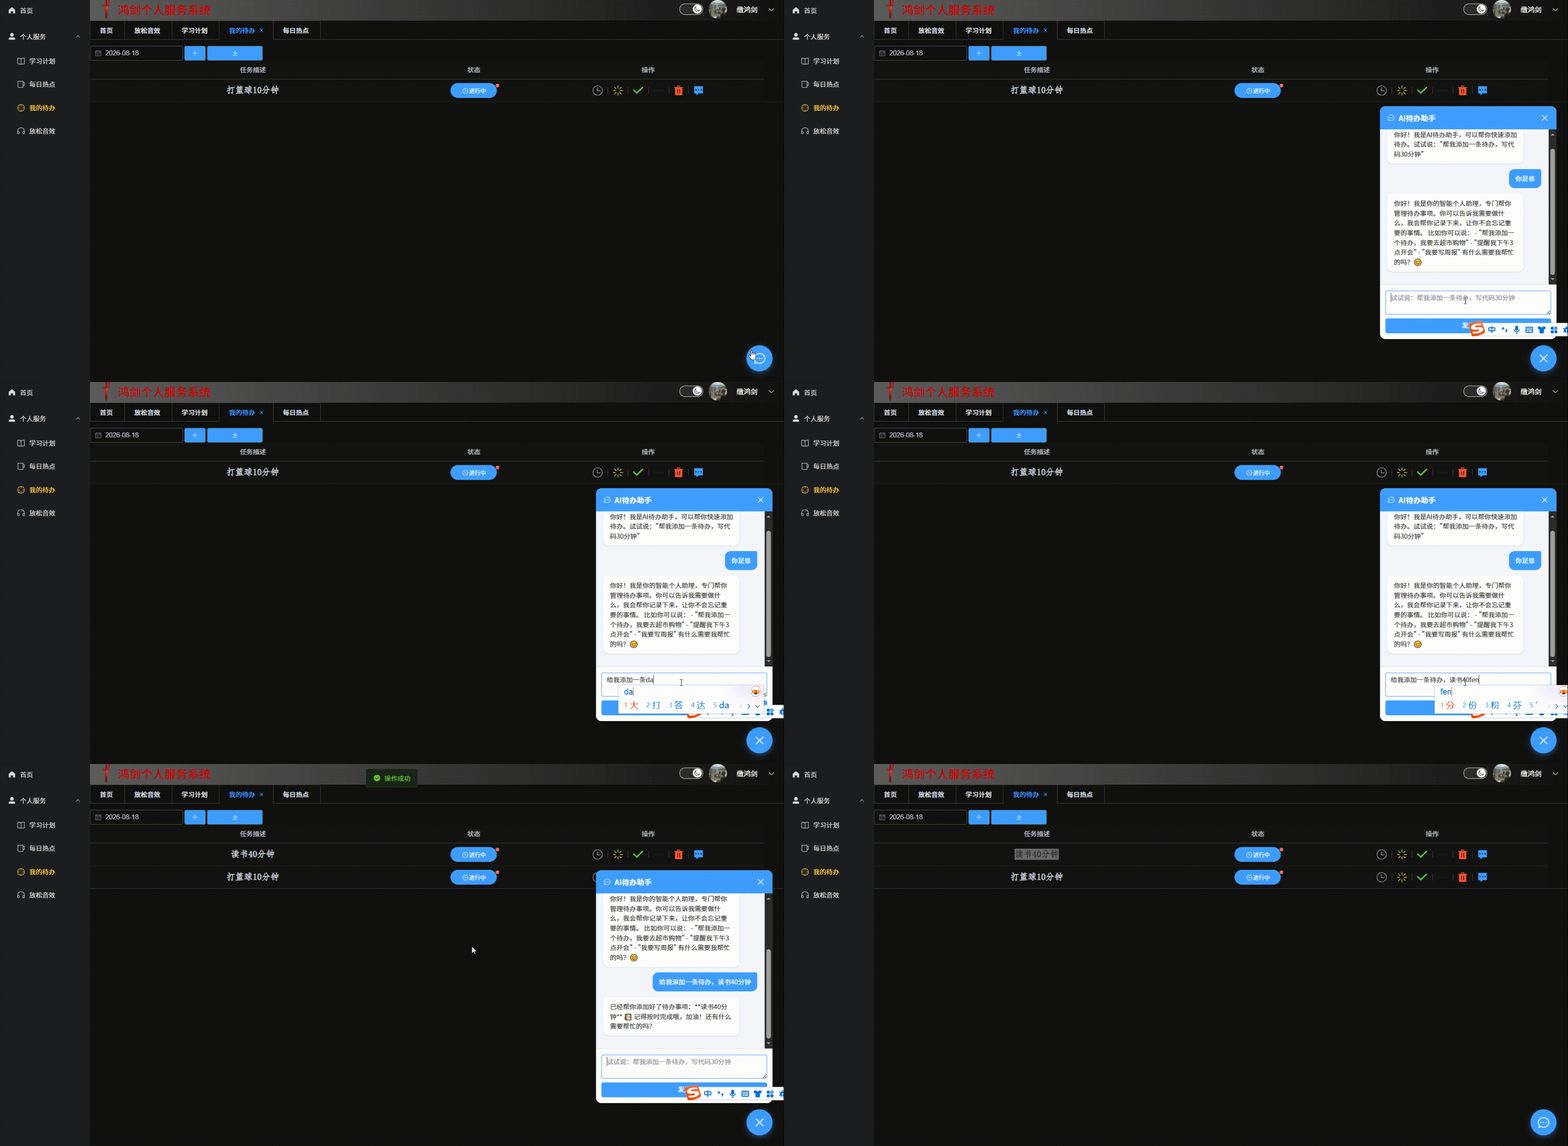
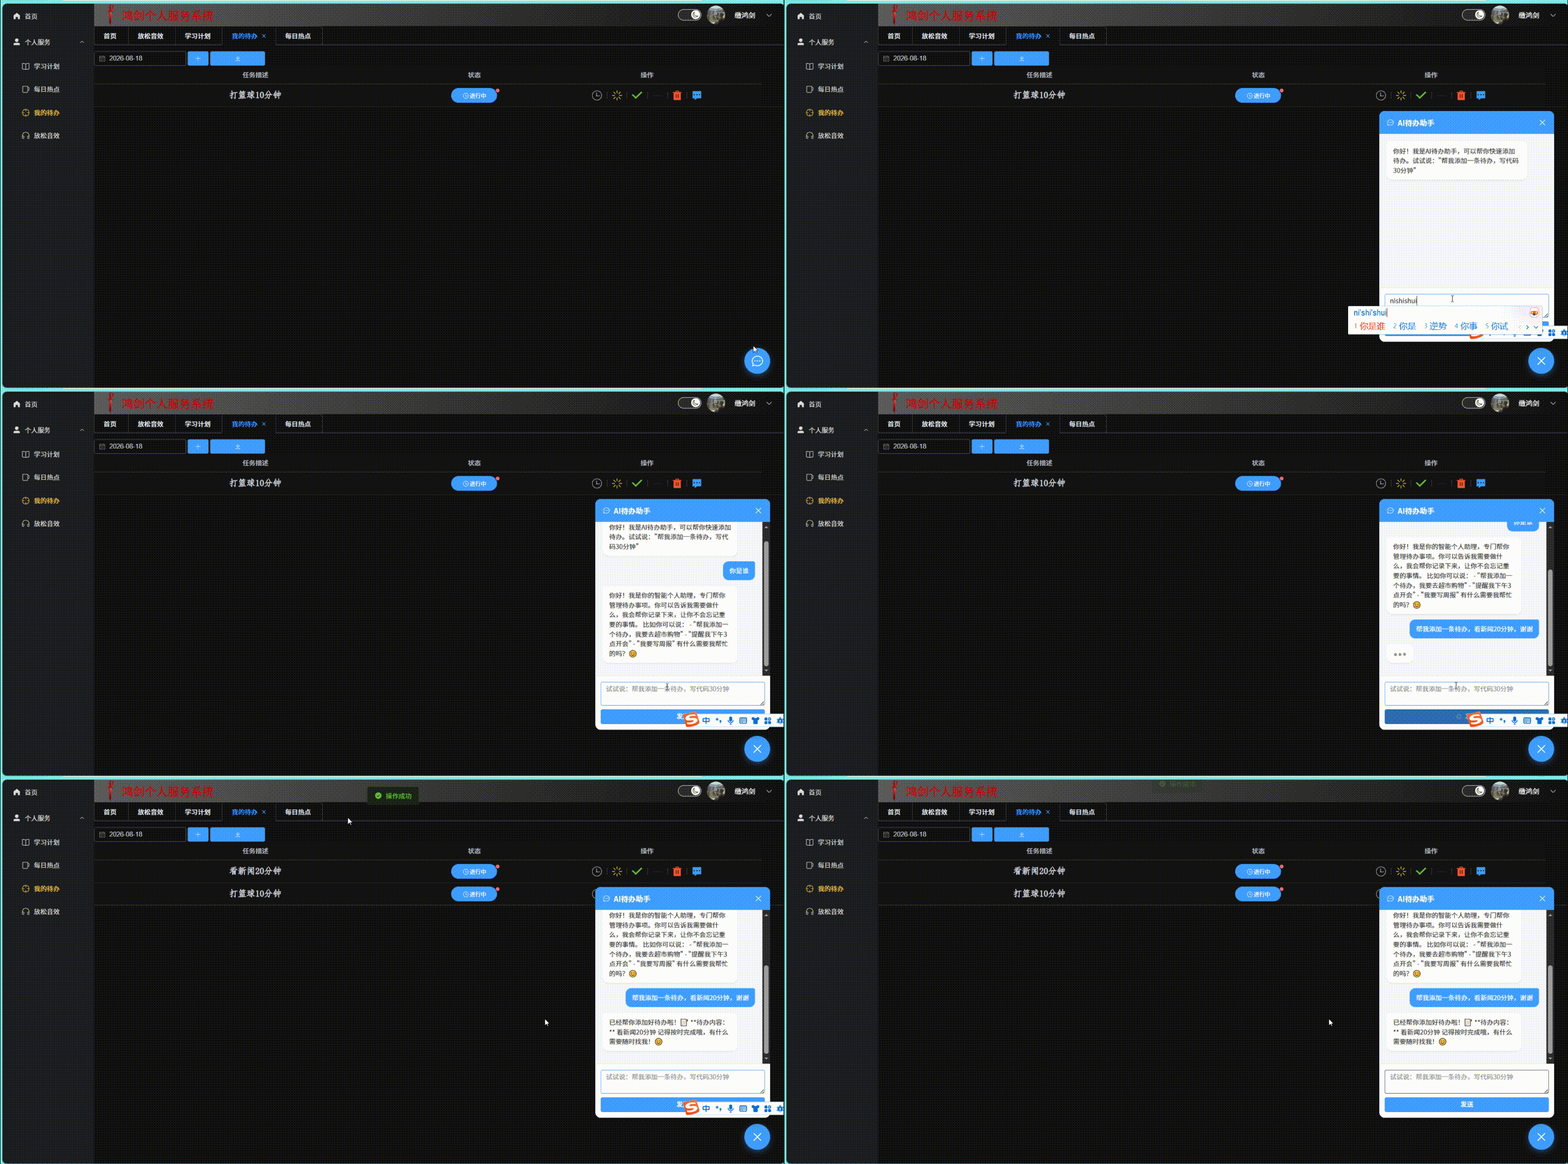
本篇文章主打实战,话不多说,直接上效果图
前言
最近在捣鼓自己的个人项目,突然想到一个有趣的场景:能不能让我的应用具备智能助手的能力?比如我只需要说一句"给我添加一个今日待办,我要写30分钟代码,然后发一篇CSDN博客技术帖",系统就能自动识别我的意图,帮我完成这些操作。
经过一番调研和实践,我选择了 FastAPI + LangChain 来实现这个Agent功能,完美配合我现有的 Vue3 + SpringBoot 架构。今天就来分享一下我的实现方案。
摘要
本文介绍了如何利用FastAPI和LangChain为Vue3+SpringBoot应用集成智能Agent。系统能理解自然语言指令,自动识别意图并调用后端接口完成待办创建、博客发布等任务。文章提供了完整的代码实现与优化建议,展示了如何通过AI降低操作门槛,快速赋予应用智能助手能力。
目录
基础准备
1. 安装 LangChain 核心包
2. 安装fastApi
3. 创建项目结构
①main.py是我们下面要写代码的文件,创建一下,先空着
②创建.env文件,里面配置要使用的大模型的ApiKey(我们此时用的是Deepseek)
一. 核心实现
1. FastAPI代码(Agent服务)
2. 看一下我们等待被agent调用的SpringBoot服务接口
3. Vue3前端调用fastApi服务(agent服务)
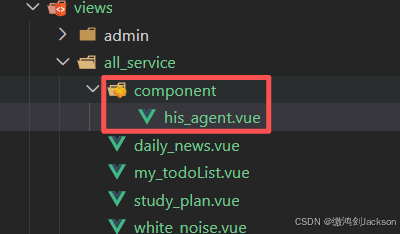
① 创建一个智能对话组件(名为his_agent.vue的文件)
② 在原来的“待办页面”,引入该agent页面组件
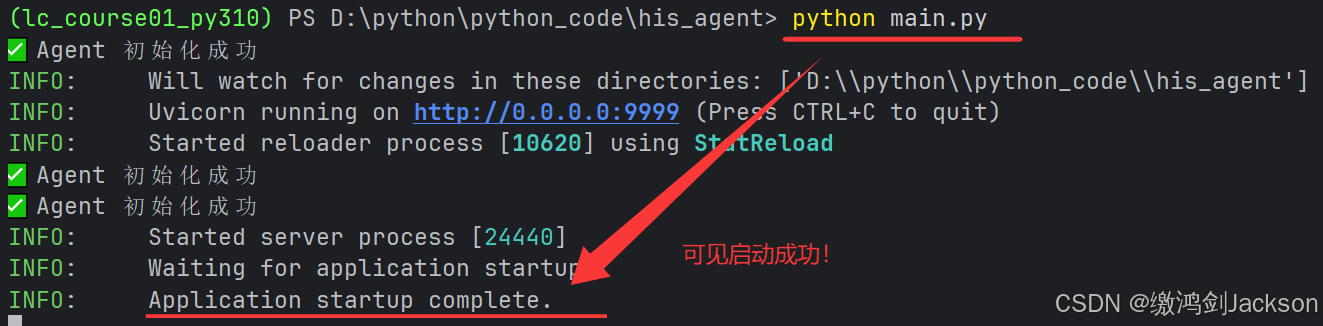
4.本地启动fastApi项目、springboot项目
5.查看最终效果
二. 技术栈概览
三. 架构设计
为什么选择这种架构?
四. 使用示例
场景一:创建待办
总结
基础准备
1. 安装 LangChain 核心包
注意:下面的包,要求python的版本在 Python 3.9 ~ 3.11之间,如果你的python版本过老/过新,可以按下面的文章操作,下载合适的版本
安装Python(保姆级教程)-CSDN博客
# 安装 langchain 核心库
pip install langchain
# 安装 langchain-openai 集成
pip install langchain-openai
# 安装 langchain-community(包含一些常用的工具)
pip install langchain-community
2. 安装fastApi
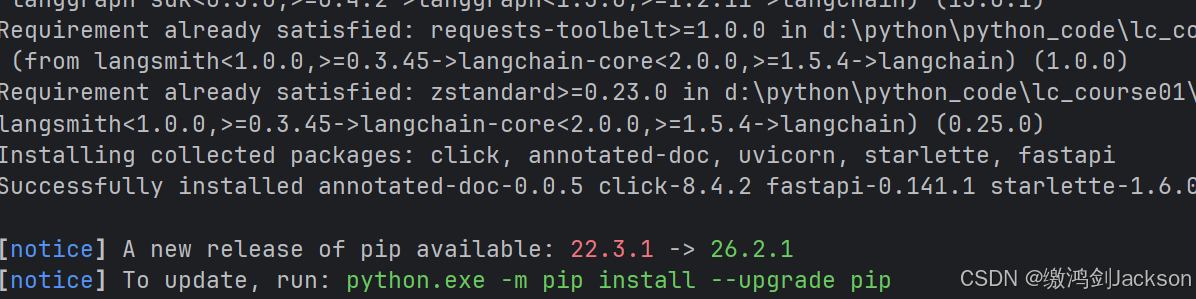
pip install fastapi uvicorn httpx requests python-dotenv openai langchain langchain-openai -i https://pypi.tuna.tsinghua.edu.cn/simple
效果展示:
3. 创建项目结构
首先,确保你的项目目录结构是这样的:
D:\\python\\python_code\\lc_course01\\
├── main.py # 你的 Agent 服务代码
├── .env # 环境变量配置文件(需要创建)
└── lc_course01_py310/ # 你的虚拟环境(已经创建好了,在上面提到的另一篇文章里)
①main.py是我们下面要写代码的文件,创建一下,先空着
②创建.env文件,里面配置要使用的大模型的ApiKey(我们此时用的是Deepseek)

一. 核心实现
1. FastAPI代码(Agent服务)
首先创建Agent服务,这是整个智能助手的核心:
# agent_service/main.py
from fastapi import FastAPI
import httpx
import json
import os
from datetime import datetime
from typing import Optional
from dotenv import load_dotenv
from pydantic import BaseModel
# 新版 LangChain 导入
from langchain_openai import ChatOpenAI
from langchain.agents import create_agent
from langchain.tools import tool
from starlette.middleware.cors import CORSMiddleware
load_dotenv()
app = FastAPI(title="Personal Agent Service")
# ==================== 添加 CORS 配置 ====================
app.add_middleware(
CORSMiddleware,
allow_origins=["*"], # 允许所有来源,生产环境建议改为具体域名
allow_credentials=True,
allow_methods=["*"],
allow_headers=["*"],
)
# ==================== 数据模型 ====================
class ChatRequest(BaseModel):
message: str
user_id: Optional[int] = 90 # 默认用户ID
class ChatResponse(BaseModel):
success: bool
response: Optional[str] = None
error: Optional[str] = None
tool_called: bool = False # 用于记录是否调用了工具(false表示只是单纯聊天,true表示调用了“添加待办”接口)
timestamp: str
# ==================== 定义工具(新版方式) ====================
@tool
def add_todo(description: str, userId: int = 90):
"""
添加一条待办事项
Args:
description: 待办描述(用户想要做什么)
userId: 用户ID,默认为90
"""
try:
import requests
todo_data = {
"userId": userId,
"description": description
}
response = requests.post(
# 注意:由于我们的fastApi和springboot项目部署到了同一台linux服务器
# 所以此时这个localhost在本地调试可以,后续要改成springboot服务所部署服务器的具体ip
"http://localhost:9000/api/todo_task/addOneTodo",
json=todo_data,
timeout=10
)
result = response.json()
if result.get("code") == 200:
return f"✅ {result.get('message')} 待办内容:{description}"
else:
return f"❌ 添加待办失败:{result.get('message')}"
except Exception as e:
return f"❌ 添加待办失败:{str(e)}"
# ==================== 初始化 Agent ====================
def init_agent():
"""初始化 Agent"""
api_key = os.getenv("DEEPSEEK_API_KEY")
if not api_key:
print("⚠️ 警告:未找到 DEEPSEEK_API_KEY,请在 .env 文件中配置")
return None
try:
# 初始化LLM – 使用DeepSeek
llm = ChatOpenAI(
temperature=0,
model="deepseek-chat",
api_key=os.getenv("DEEPSEEK_API_KEY"),
base_url="https://api.deepseek.com"
)
# 新版创建 Agent 的方式
agent = create_agent(
model=llm,
tools=[add_todo],
system_prompt="""你是一个智能个人助理,帮助用户管理待办事项。
你的能力:
– 添加待办事项(add_todo)
当用户提出请求时,你需要:
– 理解用户的自然语言指令
– 提取关键信息(待办内容)
– 调用 add_todo 工具添加待办
示例:
– "给我添加一个今日待办,我要写30分钟代码" → 调用 add_todo,description="写30分钟代码"
– "提醒我明天要交报告" → 调用 add_todo,description="明天要交报告"
– "我要读书" → 调用 add_todo,description="读书"
请用友好、简洁的语言回复用户。"""
)
print("✅ Agent 初始化成功")
return agent
except Exception as e:
print(f"❌ Agent 初始化失败:{e}")
return None
# 初始化 agent(全局)
agent = init_agent()
# ==================== API 端点 ====================
@app.get("/")
async def root():
return {
"message": "Personal Agent Service",
"status": "running",
"agent_initialized": agent is not None
}
@app.get("/health")
async def health_check():
return {
"status": "healthy",
"service": "agent-service",
"agent_initialized": agent is not None,
"timestamp": datetime.now().isoformat()
}
@app.post("/agent/chat", response_model=ChatResponse)
async def chat(request: ChatRequest):
"""处理用户对话"""
if not agent:
return ChatResponse(
success=False,
error="Agent 未初始化,请检查 DEEPSEEK_API_KEY 配置",
timestamp=datetime.now().isoformat()
)
try:
# 执行 Agent
result = await agent.ainvoke({
"messages": [{"role": "user", "content": request.message}]
})
# 提取响应文本
if "messages" in result and len(result["messages"]) > 0:
response_text = result["messages"][-1].content
else:
response_text = str(result)
# ========== 添加这段:判断是否调用了工具 ==========
tool_called = False
if "messages" in result:
for msg in result["messages"]:
# 检查消息中是否有 tool_calls
if hasattr(msg, 'tool_calls') and msg.tool_calls:
tool_called = True
break
# ================================================
return ChatResponse(
success=True,
response=response_text,
tool_called=tool_called, # 添加这个参数
timestamp=datetime.now().isoformat()
)
except Exception as e:
return ChatResponse(
success=False,
error=str(e),
timestamp=datetime.now().isoformat()
)
# ==================== 启动配置 ====================
if __name__ == "__main__":
import uvicorn
uvicorn.run(
"main:app",
host="0.0.0.0",
port=9999,
reload=True
)
2. 看一下我们等待被agent调用的SpringBoot服务接口
在SpringBoot中提供相应的REST API接口:
package com.neuedu.his.controller;
import com.neuedu.his.DTO.GetUnFinishedCountDto;
import com.neuedu.his.DTO.TodoTaskDto;
import com.neuedu.his.DTO.UpdateStatusDto;
import com.neuedu.his.DTO.UpdateTodoDto;
import com.neuedu.his.pojo.TodoTask;
import com.neuedu.his.service.TodoTaskService;
import com.neuedu.his.utils.Result;
import jakarta.servlet.http.HttpServletResponse;
import org.springframework.beans.factory.annotation.Autowired;
import org.springframework.web.bind.annotation.*;
import java.io.IOException;
/**
* ClassName: TodoTaskController
* Package: com.neuedu.his.controller
* Description:
*
* @Author 缴鸿剑
* @Create 2025/12/27 23:06
* @Version 1.0
*/
@RestController
@RequestMapping("/api/todo_task")
public class TodoTaskController {
@Autowired
private TodoTaskService todoTaskService;
//添加一条待办
@PostMapping("/addOneTodo")
public Result addOneTodo(@RequestBody TodoTask todoTask){
return todoTaskService.addOneTodo(todoTask);
}
}
3. Vue3前端调用fastApi服务(agent服务)
① 创建一个智能对话组件(名为his_agent.vue的文件)
<template>
<!– AI助手悬浮按钮 –>
<div class="ai-fab" @click="toggleChat" title="AI助手">
<el-icon :size="28" color="white">
<ChatDotRound v-if="!showChat" />
<Close v-else />
</el-icon>
</div>
<!– AI助手聊天窗口 –>
<transition name="chat-fade">
<div v-if="showChat" class="ai-chat-panel">
<!– 头部 –>
<div class="ai-chat-header">
<div class="ai-chat-title">
<el-icon><ChatDotRound /></el-icon>
<span>AI待办助手</span>
</div>
<el-icon class="ai-chat-close" @click="showChat = false">
<Close />
</el-icon>
</div>
<!– 消息区域 –>
<div class="ai-chat-messages" ref="messageList">
<div v-for="(msg, index) in messages" :key="index" :class="['ai-message', msg.role]">
<div class="ai-message-bubble">{{ msg.content }}</div>
</div>
<div v-if="loading" class="ai-message assistant">
<div class="ai-message-bubble typing">
<span></span><span></span><span></span>
</div>
</div>
</div>
<!– 输入区域 –>
<div class="ai-chat-input">
<el-input
v-model="inputMessage"
type="textarea"
:rows="2"
placeholder="试试说:帮我添加一条待办,写代码30分钟"
@keydown.enter.prevent="sendMessage"
/>
<el-button type="primary" @click="sendMessage" :loading="loading" style="margin-top: 8px; width: 100%;">
发送
</el-button>
</div>
</div>
</transition>
</template>
<script setup>
import { ref, nextTick } from 'vue';
import { ChatDotRound, Close } from '@element-plus/icons-vue';
import { ElMessage } from 'element-plus';
// ========== 改动1:添加这一行,定义事件 ==========
const emit = defineEmits(['todoAdded']);
// ================================================
const showChat = ref(false);
const inputMessage = ref('');
const loading = ref(false);
const messageList = ref(null);
const messages = ref([
{
role: 'assistant',
content: '你好!我是AI待办助手,可以帮你快速添加待办。试试说:"帮我添加一条待办,写代码30分钟"'
}
]);
// 切换聊天窗口
const toggleChat = () => {
showChat.value = !showChat.value;
if (showChat.value) {
nextTick(() => {
scrollToBottom();
});
}
};
// 滚动到底部
const scrollToBottom = async () => {
await nextTick();
if (messageList.value) {
messageList.value.scrollTop = messageList.value.scrollHeight;
}
};
// 发送消息
const sendMessage = async () => {
if (!inputMessage.value.trim() || loading.value) return;
const userMsg = inputMessage.value.trim();
messages.value.push({ role: 'user', content: userMsg });
inputMessage.value = '';
loading.value = true;
await scrollToBottom();
try {
//localhost后续要改成fastAPI所部署的服务器的ip
const response = await fetch('http://localhost:9999/agent/chat', {
method: 'POST',
headers: {
'Content-Type': 'application/json'
},
body: JSON.stringify({
message: userMsg
})
});
const data = await response.json();
if (data.success) {
messages.value.push({ role: 'assistant', content: data.response });
// ========== 改动2:添加这一行,触发事件通知父组件刷新 ==========
//emit('todoAdded');
//ElMessage.success('操作成功');
//注意:只有实际调用了工具才触发刷新和成功提示
if (data.tool_called) {
emit('todoAdded');
ElMessage.success('操作成功');
}
// ================================================================
} else {
messages.value.push({ role: 'assistant', content: '抱歉,操作失败:' + data.error });
ElMessage.error('操作失败');
}
} catch (error) {
messages.value.push({ role: 'assistant', content: '网络错误,请检查服务是否正常运行' });
ElMessage.error('网络错误');
} finally {
loading.value = false;
await scrollToBottom();
}
};
</script>
<style scoped>
/* 样式保持不变 */
.ai-fab {
position: fixed;
right: 30px;
bottom: 30px;
width: 56px;
height: 56px;
background: #409EFF;
border-radius: 50%;
display: flex;
align-items: center;
justify-content: center;
cursor: pointer;
box-shadow: 0 4px 12px rgba(64, 158, 255, 0.4);
transition: all 0.3s;
z-index: 999;
}
.ai-fab:hover {
transform: scale(1.1);
box-shadow: 0 6px 16px rgba(64, 158, 255, 0.6);
}
.ai-chat-panel {
position: fixed;
right: 30px;
bottom: 100px;
width: 380px;
height: 500px;
background: white;
border-radius: 12px;
box-shadow: 0 8px 24px rgba(0, 0, 0, 0.15);
display: flex;
flex-direction: column;
z-index: 999;
overflow: hidden;
}
.ai-chat-header {
height: 50px;
background: #409EFF;
color: white;
display: flex;
align-items: center;
justify-content: space-between;
padding: 0 16px;
flex-shrink: 0;
}
.ai-chat-title {
display: flex;
align-items: center;
gap: 8px;
font-size: 16px;
font-weight: 600;
}
.ai-chat-close {
cursor: pointer;
font-size: 20px;
}
.ai-chat-messages {
flex: 1;
overflow-y: auto;
padding: 16px;
background: #f5f7fa;
}
.ai-message {
display: flex;
margin-bottom: 12px;
}
.ai-message.user {
justify-content: flex-end;
}
.ai-message-bubble {
max-width: 80%;
padding: 10px 14px;
border-radius: 12px;
font-size: 14px;
line-height: 1.5;
word-break: break-word;
}
.ai-message.user .ai-message-bubble {
background: #409EFF;
color: white;
border-top-right-radius: 4px;
}
.ai-message.assistant .ai-message-bubble {
background: white;
color: #333;
border-top-left-radius: 4px;
box-shadow: 0 1px 2px rgba(0, 0, 0, 0.1);
}
.ai-chat-input {
padding: 12px;
background: white;
border-top: 1px solid #e4e7ed;
flex-shrink: 0;
}
.chat-fade-enter-active,
.chat-fade-leave-active {
transition: all 0.3s ease;
}
.chat-fade-enter-from,
.chat-fade-leave-to {
opacity: 0;
transform: translateY(20px);
}
.typing span {
display: inline-block;
width: 6px;
height: 6px;
border-radius: 50%;
background: #999;
margin: 0 2px;
animation: typing 1.4s infinite;
}
.typing span:nth-child(2) {
animation-delay: 0.2s;
}
.typing span:nth-child(3) {
animation-delay: 0.4s;
}
.ai-chat-input :deep(.el-textarea__inner) {
color: #333 !important; /* 改成你想要的深色 */
}
@keyframes typing {
0%, 60%, 100% {
transform: translateY(0);
}
30% {
transform: translateY(-6px);
}
}
</style>
② 在原来的“待办页面”,引入该agent页面组件
<!– 将AI助手悬浮窗加到此页面 –>
<HisAgent @todoAdded="refreshTodoList"/>
//引入"AI助手"悬浮窗
import HisAgent from './component/his_agent.vue';
//新增了 refreshTodoList 方法
const refreshTodoList = () => {
queryToDoList(); // 刷新待办表格(原来就有的方法,只是添加待办后应该刷新一下更合理)
queryUnfinishedCount(); // 刷新当月未完成待办数(原来就有的方法,只是添加待办后应该刷新一下更合理)
};
4.本地启动fastApi项目、springboot项目
- 启动fastApi项目
- 启动springboot项目

5.查看最终效果
二. 技术栈概览
-
前端:Vue3 – 负责用户界面和交互
-
后端:SpringBoot – 处理业务逻辑和数据存储
-
AI服务:FastAPI + LangChain – 智能Agent核心
-
LLM:DeepSeek的deepseek-chat(可替换为其他模型)
三. 架构设计
整个系统的架构如下:
┌─────────────┐
│ Vue3前端 │
└──────┬──────┘
│ HTTP请求
┌──────▼──────┐ ┌──────────────┐
│ FastAPI Agent │────▶│ SpringBoot │
│ (LangChain) │ │ 后端服务 │
└──────┬──────┘ └──────┬───────┘
│ │
│ LLM调用 │ 数据存储
┌──────▼──────┐ ┌──────▼───────┐
│ OpenAI/LLM │ │ 数据库 │
└─────────────┘ └──────────────┘
为什么选择这种架构?
-
职责分离:AI能力与业务逻辑解耦,互不影响
-
灵活扩展:可以独立升级AI服务,不影响主业务
-
技术适配:FastAPI适合异步处理,LangChain提供强大的Agent能力
-
部署灵活:Agent服务可以独立部署和扩展
四. 使用示例
场景一:创建待办
用户输入:
给我添加一个今日待办,我要写30分钟代码
Agent执行过程:
识别意图:创建待办
提取信息:标题="写代码",时长=30分钟,日期=今天
调用CreateTodo工具
返回结果:"已为你创建待办:写代码(30分钟)"
总结
通过这个项目,我实现了:
-
✅ 自然语言交互的智能助手
-
✅ 自动化的任务管理
-
✅ 灵活的架构设计
-
✅ 良好的扩展性
这个方案的优点:
-
解耦清晰:AI能力与业务逻辑分离
-
易于维护:各服务独立升级
-
扩展性强:可以轻松添加新的工具
-
用户体验好:自然语言交互
后续可以扩展的方向:
-
添加更多工具(查询天气、发送邮件等)
-
接入语音输入
-
实现多轮对话
-
添加用户个性化配置
如果你也在做类似的项目,欢迎交流讨论!有问题可以在评论区留言,我会及时回复。