nextTick 的实现原理 | 源码解析系列 4.4
一、引言
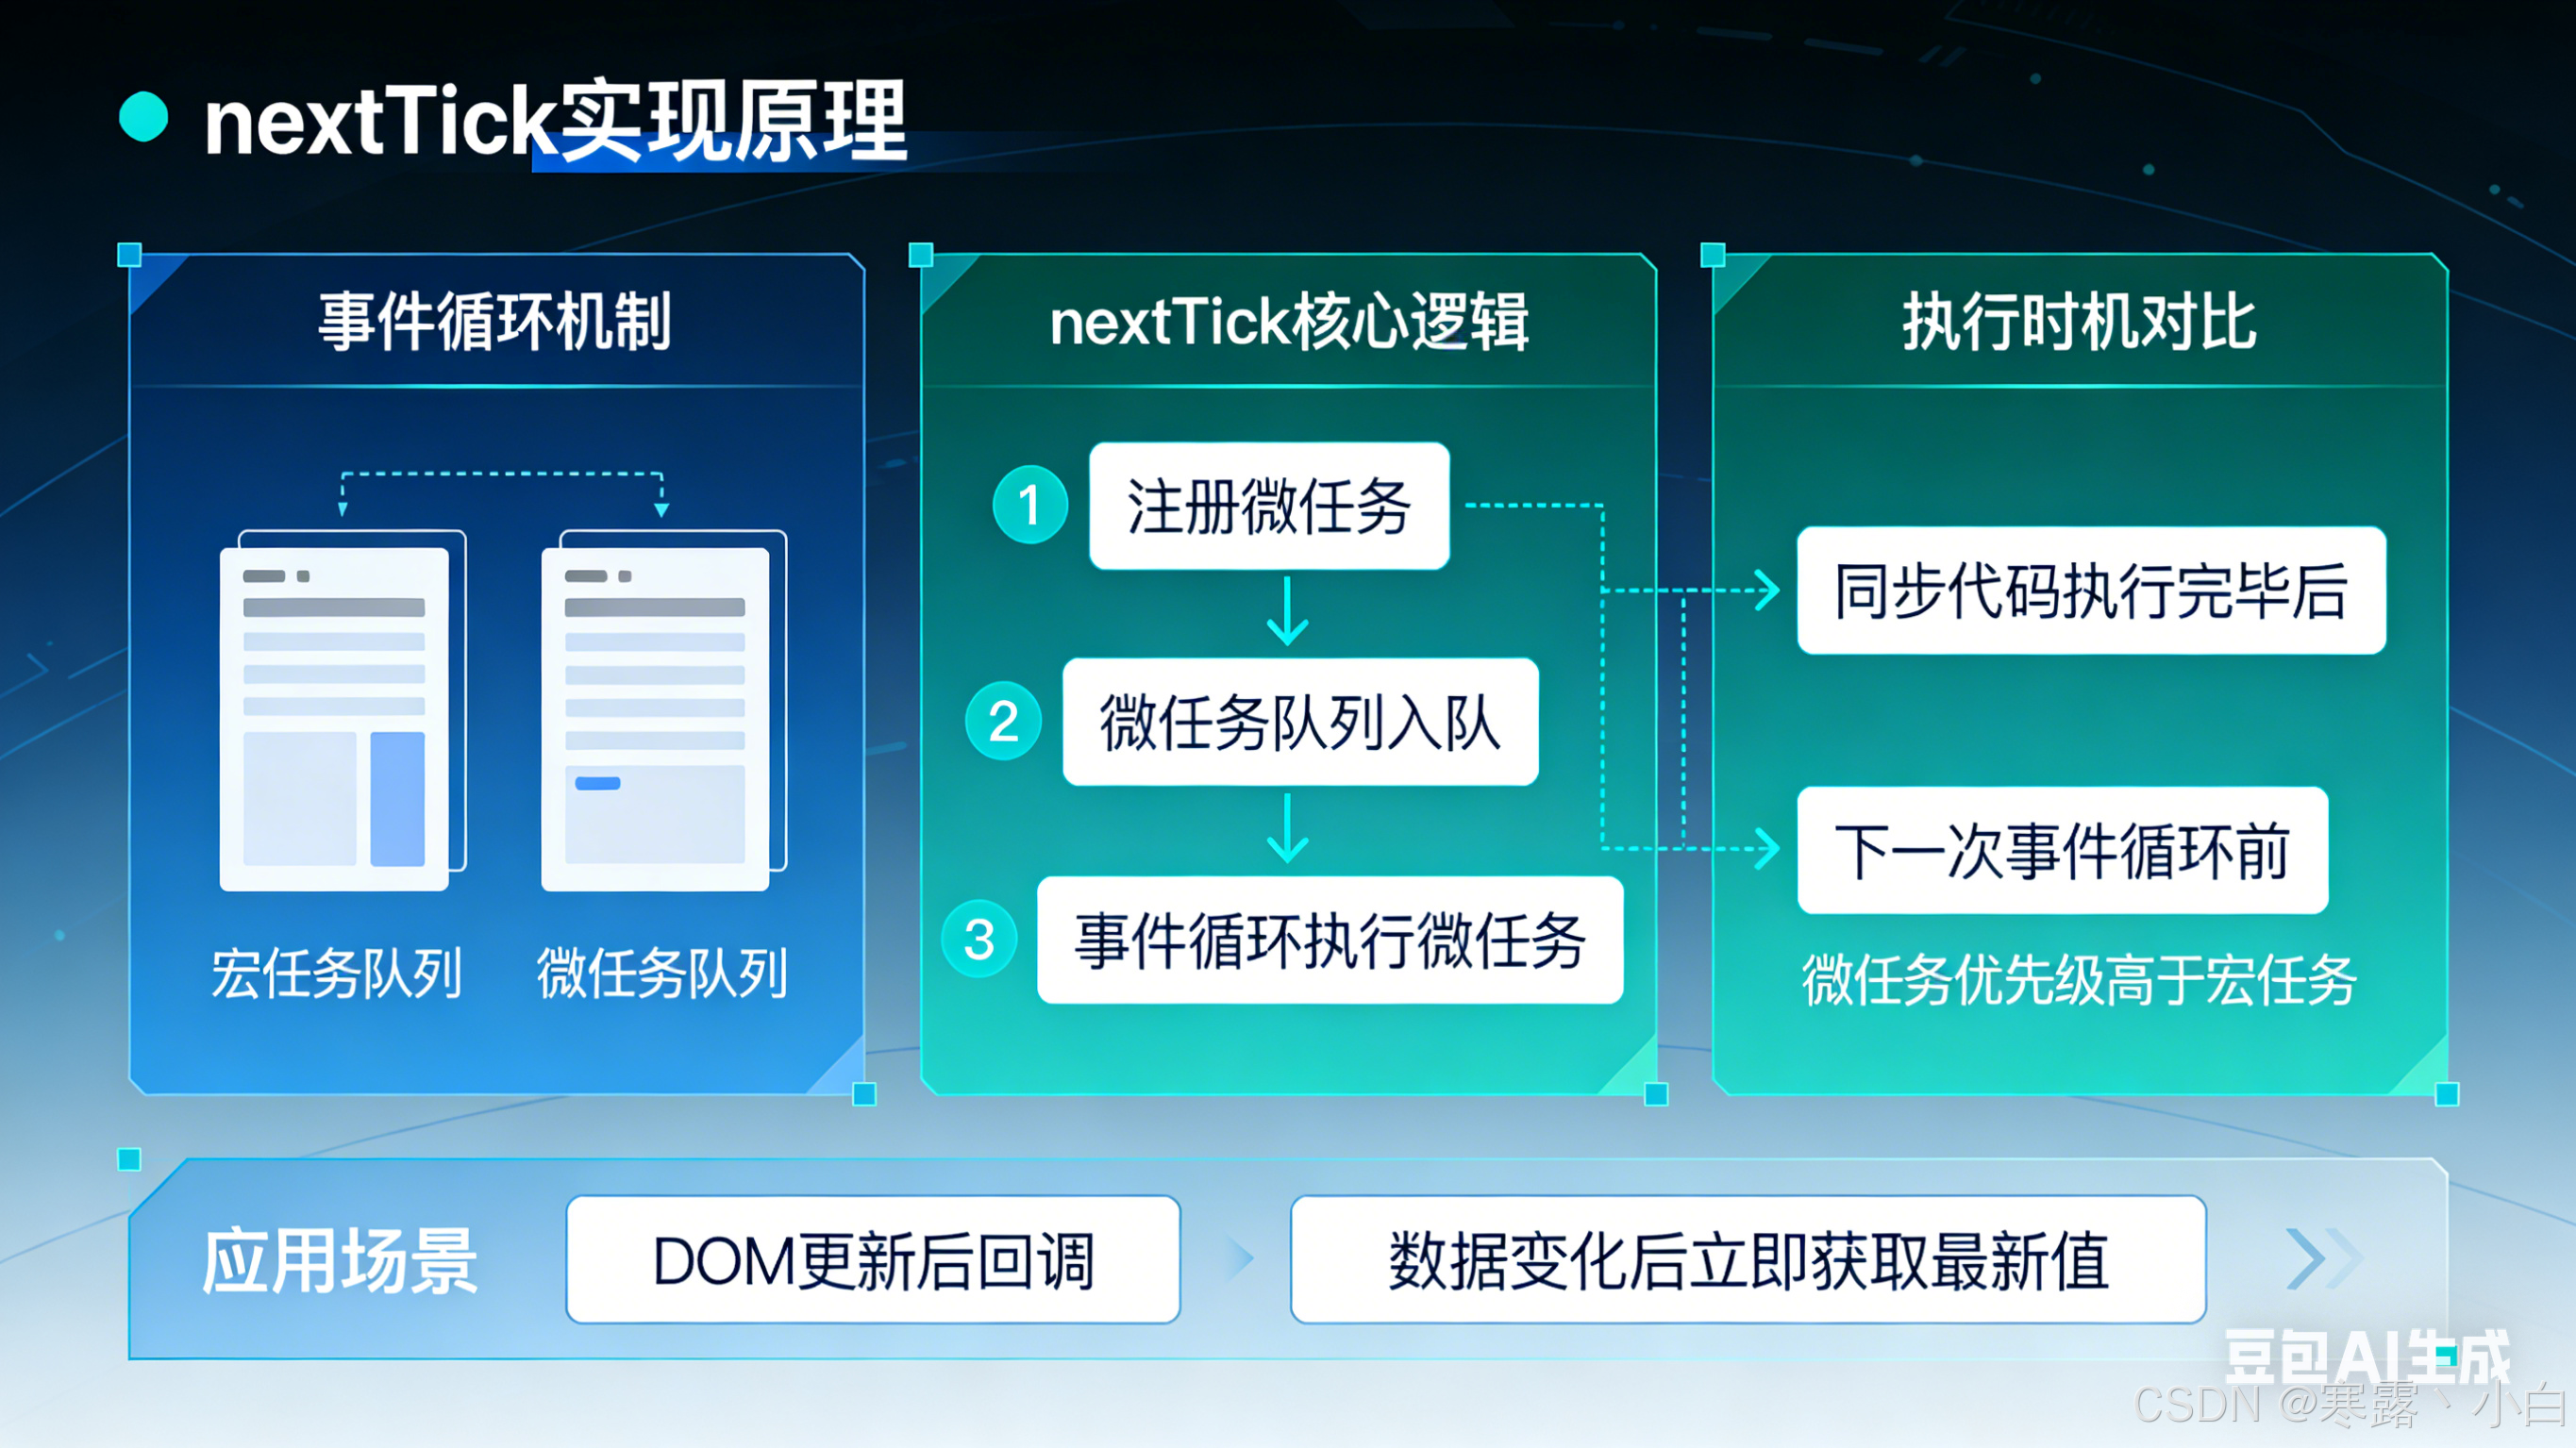
nextTick是Vue中一个非常重要的工具函数,它用于等待DOM更新完成后执行回调。在Vue中,数据变化不会立即反映到DOM上,而是会经过一个异步更新队列。nextTick允许我们在数据变化后,等待DOM更新完成再执行特定的逻辑。本文将深入解析nextTick的实现原理。
二、nextTick概述
2.1 什么是nextTick
nextTick是一个异步函数,它返回一个Promise,在DOM更新完成后解析。
import { ref, nextTick } from 'vue'
const count = ref(0)
async function update() {
count.value = 1
// 此时DOM还未更新
console.log(DOM content) // 旧值
await nextTick()
// DOM已更新完成
console.log(DOM content) // 新值
}
2.2 使用场景
nextTick主要用于以下场景:数据变化后需要操作更新后的DOM、需要在下一个事件循环中执行代码、解决异步更新导致的问题。
三、实现原理
3.1 Promise基础
nextTick底层使用Promise实现异步。
// packages/runtime-core/src/scheduler.ts
// Promise解析函数
let p: Promise<any>
export function nextTick<T = void>(
this: T,
fn?: (this: T) => void
): Promise<T extends void ? void : T> {
// 返回Promise
return fn ? p.then(fn) : p
}
3.2 队列机制
Vue使用队列来管理异步任务。
// 任务队列
const pendingJobs: SchedulerJob[] = []
// 添加到队列
function queueJob(job: SchedulerJob) {
if (!pendingJobs.includes(job)) {
pendingJobs.push(job)
queueFlush()
}
}
// flush队列
function queueFlush() {
// 使用Promise执行队列
if (!isFlushing) {
isFlushing = true
p = Promise.resolve()
p.then(flushJobs)
}
}
3.3 microTask
Promise是microTask,会在当前同步代码执行完成后执行。
// 执行顺序
// 1. 同步代码
count.value = 1
// 2. 触发更新,添加到队列
// 3. Promise resolve
p = Promise.resolve()
// 4. microTask执行
p.then(flushJobs) // 这里的回调会在DOM更新后执行
// 5. nextTick回调
await nextTick() // 等待Promise解析
四、完整的nextTick实现
4.1 核心实现
// 完整的nextTick实现
export function nextTick<T = void>(
this: T,
fn?: (this: T) => void
): Promise<T extends void ? void : T> {
// 创建Promise
const p = currentQueue
? Promise.resolve()
: Promise.resolve()
// 如果有回调,在microTask中执行
if (fn) {
return p.then(fn)
}
return p
}
4.2 队列管理
// 队列flush函数
function flushJobs() {
// 执行队列中的所有任务
while (queue.length) {
const job = queue.shift()
job()
}
// 清空队列
queue.length = 0
}
4.3 更新队列
// Vue的更新队列
const updateQueue: SchedulerJob[] = []
// 组件更新会被添加到队列
function queueUpdate(instance: ComponentInternalInstance) {
const job = () => instance.update()
updateQueue.push(job)
nextTick(flushUpdates)
}
function flushUpdates() {
updateQueue.forEach(job => job())
updateQueue.length = 0
}
五、与setTimeout对比
5.1 执行时机
// setTimeout是macroTask
setTimeout(() => {
console.log('setTimeout') // 后执行
}, 0)
// nextTick是microTask
nextTick(() => {
console.log('nextTick') // 先执行
})
5.2 性能差异
nextTick比setTimeout性能更好,因为microTask执行时机更早,不需要等待宏任务队列。
六、使用示例
6.1 基本用法
import { ref, nextTick } from 'vue'
const count = ref(0)
async function handleClick() {
count.value++
await nextTick()
// DOM已更新
console.log('Updated')
}
6.2 不使用async/await
nextTick().then(() => {
console.log('Updated')
})
6.3 多次调用
// 多次nextTick会合并
count.value = 1
count.value = 2
count.value = 3
nextTick(() => {
// 只执行一次,在所有更新完成后
console.log('All updated')
})
七、内部使用
7.1 watch回调
watch的回调默认使用nextTick。
watch(count, (newVal) => {
// 回调在nextTick中执行
})
7.2 组件更新
组件更新也在nextTick中执行。
// 组件更新流程
// 1. 数据变化
// 2. trigger -> queueJob
// 3. nextTick -> 执行更新
// 4. DOM更新完成
八、错误处理
8.1 tryCatch包装
function flushJob(job: SchedulerJob) {
try {
job()
} catch (error) {
// 错误处理
handleError(error)
}
}
九、最佳实践
9.1 需要DOM操作时使用
// 需要操作更新后的DOM
async function handleClick() {
item.value = 'new value'
await nextTick()
// 可以安全操作DOM
el.focus()
}
9.2 避免过度使用
// 不需要nextTick的情况
const count = ref(0)
// 只需要读取响应式值,不需要DOM操作
console.log(count.value) // 正常读取,不需要nextTick
十、总结
本文深入解析了Vue3中nextTick的实现原理。nextTick基于Promise的microTask实现,在DOM更新完成后解析。Vue的响应式更新通过队列机制管理,nextTick利用这个队列来确保回调在DOM更新后执行。理解nextTick的原理有助于更好地处理异步更新场景。
参考资料
- Vue3 官方源码:https://github.com/vuejs/core
- Vue3 scheduler:packages/runtime-core/src/scheduler.ts