在 AI 工具与开源应用快速普及的今天,环境配置的技术门槛,始终是普通用户与优质开源项目之间最大的鸿沟。
以 OpenClaw 这款 AI 助手工具为例,用户想要完成本地部署,需要手动完成「Git 安装→Node.js 版本适配→npm 镜像源配置→依赖安装→环境变量配置→启动脚本部署」等十余个步骤,任何一步的版本不兼容、网络超时、命令执行错误,都会导致部署失败。对于非技术用户而言,这些操作几乎是不可逾越的障碍。
基于此,我们设计并实现了OpenClaw 本地部署全自动化安装工具,以「全流程自动化 + 强容错 + 单文件分发」为核心,用一个 EXE 文件,实现了「点击安装→全程自动化→开箱即用」的完整闭环。本文将从架构实现、核心技术细节、工程化打包等维度,完整拆解这款生产级安装工具的全部实现逻辑。
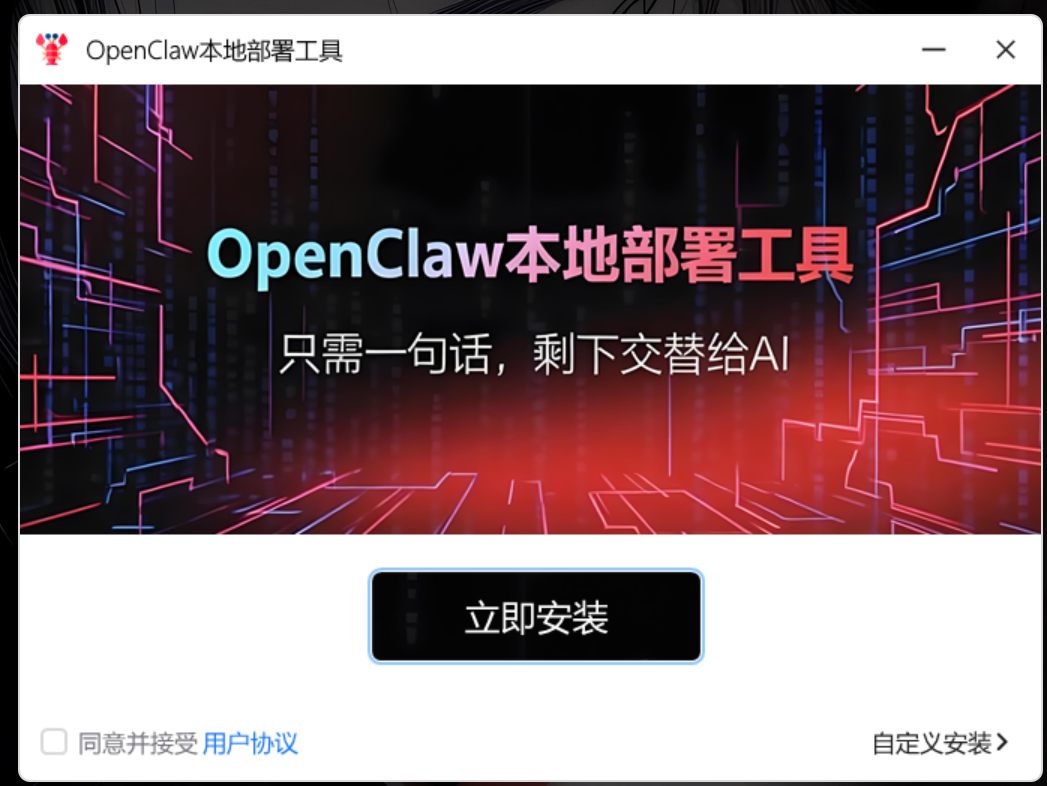
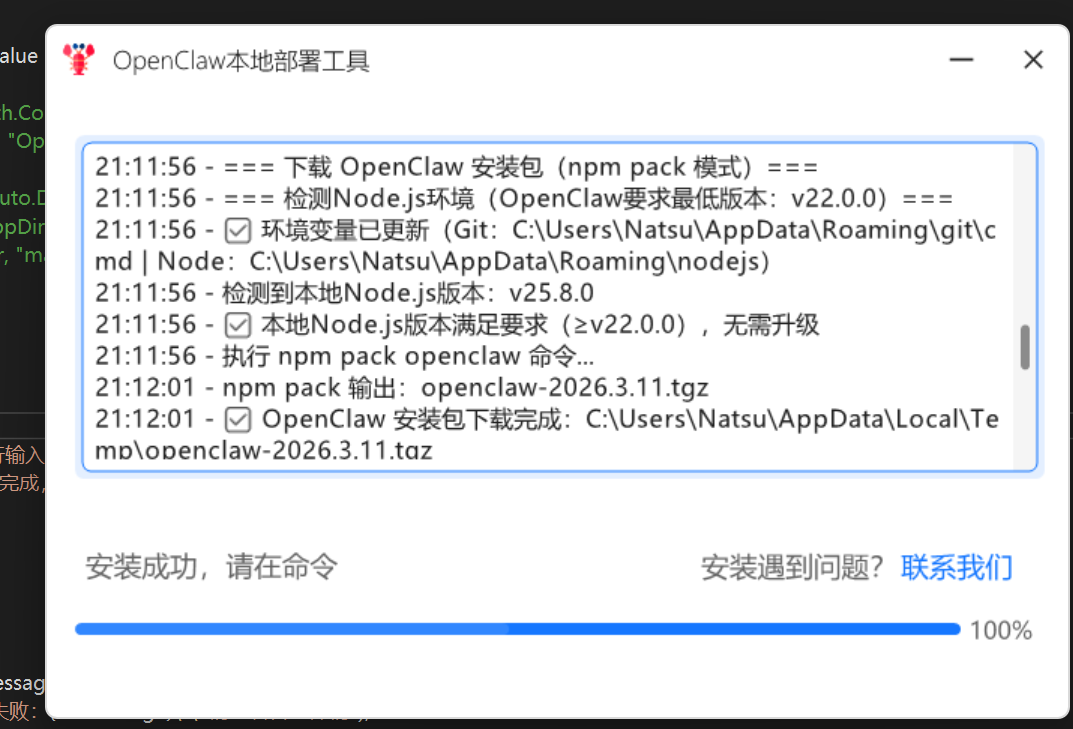
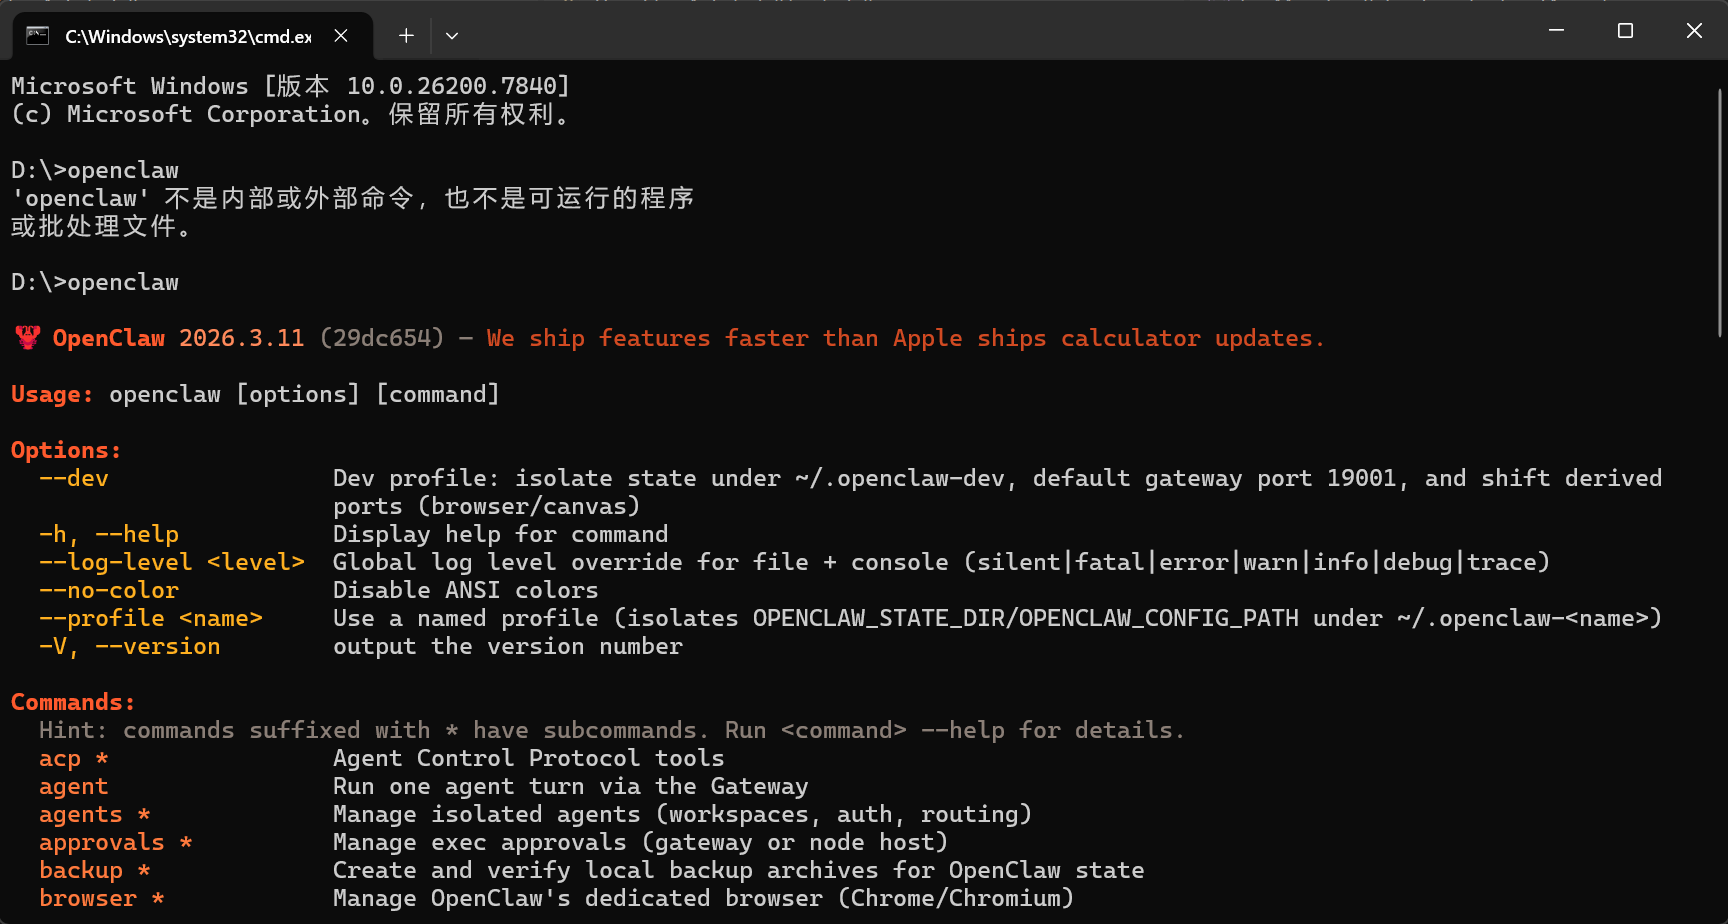
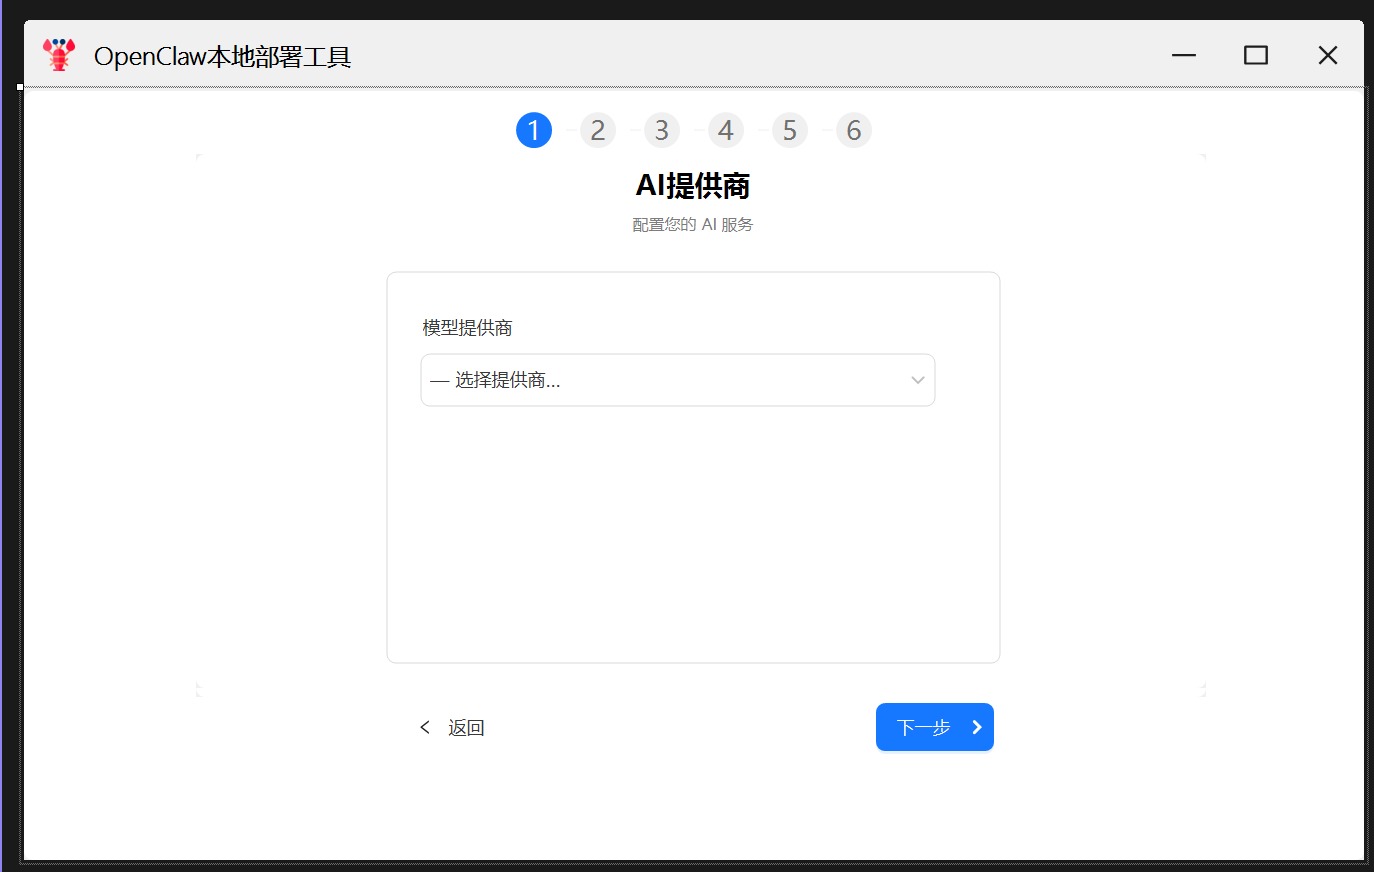
下面2张图片仅作为后续扩展参考UI,代码部分未实现(已提供源代码供自行diy扩展)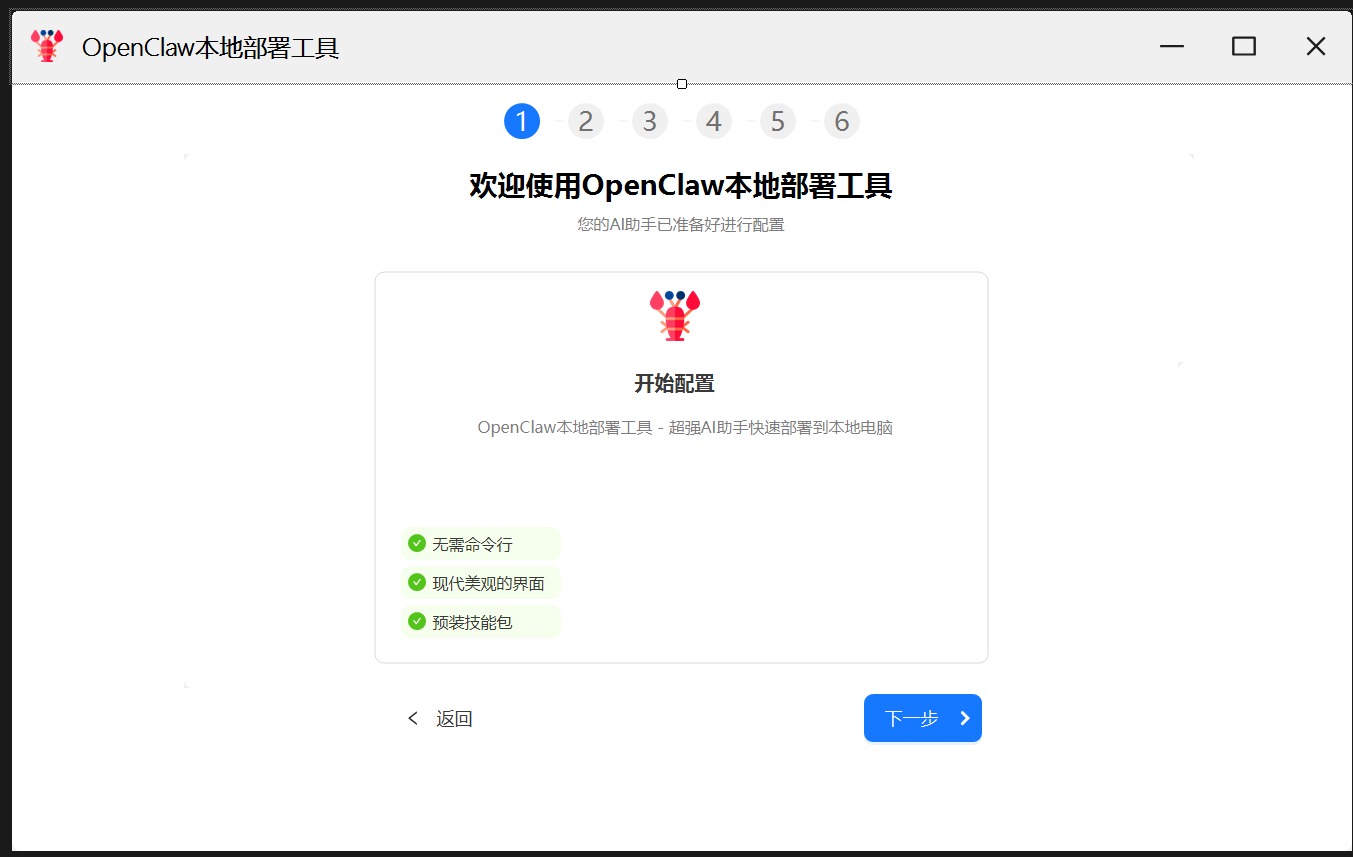
1.1 核心设计目标
1.2 技术栈选型
| .NET Framework 4.8 | 基础开发框架 | Windows 系统原生预装,用户无需额外安装运行时,对 Windows 7/10/11 全版本兼容性最强 |
| AntdUI | UI 界面库 | 基于 WinForm 的现代化 UI 组件库,开发效率高,界面美观,无需 WPF 的高学习成本 |
| 7-Zip | 解压组件 | 全格式压缩包支持,完美适配 npm 的 tgz 格式、Node.js/Git 的 zip 包,开源免费无版权风险 |
| Costura.Fody | 程序集打包工具 | 将所有引用的托管 DLL 嵌入最终 EXE,实现单文件分发,彻底解决「缺少 dll 无法运行」的依赖地狱问题 |
| HttpClient | 网络下载组件 | .NET 原生 HTTP 客户端,支持异步流式下载、断点续传、连接复用,性能与可控性远超老旧组件 |
二、全局初始化与核心框架
2.1 全局常量与路径设计
首先,我们需要定义整个程序用到的常量和路径,这里有一个核心设计原则:所有路径都指向用户的 AppData 目录。
🔍 技术科普:Windows 系统的Environment.SpecialFolder.ApplicationData目录是用户级的目录,普通用户拥有完全的读写权限,无需管理员权限即可操作。这是我们实现「免管理员权限安装」的核心基础。
// 配置常量
// 淘宝镜像源,解决国内网络访问npm官方源超时的问题
private const string NPM_MIRROR_URL = "https://registry.npmmirror.com";
// Git for Windows的淘宝镜像API
private const string GIT_MIRROR_API = "https://registry.npmmirror.com/-/binary/git-for-windows/";
// Node.js的淘宝镜像版本列表API
private const string NODEJS_MIRROR_API = "https://cdn.npmmirror.com/binaries/node/index.json";
// OpenClaw要求的最低Node.js版本
private const string OPENCLAW_MIN_NODE_VERSION = "22.0.0";
// 路径配置 – 全部安装在用户AppData目录,无需管理员权限
private readonly string _appDir = Path.Combine(Environment.GetFolderPath(Environment.SpecialFolder.ApplicationData), "myopenclaw");
private readonly string _gitInstallDir = Path.Combine(Environment.GetFolderPath(Environment.SpecialFolder.ApplicationData), "git");
private readonly string _nodeInstallDir = Path.Combine(Environment.GetFolderPath(Environment.SpecialFolder.ApplicationData), "nodejs");
private string _npmGlobalInstallPath = Path.Combine(Environment.GetFolderPath(Environment.SpecialFolder.ApplicationData), "npm");
private readonly string _openClawRelativePath = "node_modules\\\\openclaw";
private string _openClawPackageName = "";
// HttpClient实例 – 全局复用
private readonly HttpClient _httpClient;
2.2 窗体初始化与全局对象设计
窗体的Load事件是整个安装流程的入口,这里有一个核心的 Windows 桌面开发原则:绝对不能在 UI 线程执行耗时操作。
🔍 技术科普:WinForm 的 UI 控件所有的属性更新、重绘都必须在 UI 线程(也就是创建控件的线程)中执行。如果在 UI 线程中执行耗时操作(比如下载文件、执行命令),会导致窗体卡死、无响应,用户体验极差。
因此,我们必须将整个安装流程放到后台线程中执行,仅在需要更新 UI 时,通过Invoke/BeginInvoke切回 UI 线程。
public FrmInstall()
{
InitializeComponent();
// HttpClient配置优化
var httpClientHandler = new HttpClientHandler
{
UseProxy = false, // 禁用系统代理,避免国内网络下载超时
AllowAutoRedirect = true,
MaxAutomaticRedirections = 5,
MaxConnectionsPerServer = 10, // 增大连接池,提升下载性能
UseCookies = false
};
_httpClient = new HttpClient(httpClientHandler);
_httpClient.Timeout = TimeSpan.FromMinutes(10); // 大文件下载长超时
// 预创建目录
Directory.CreateDirectory(_appDir);
Directory.CreateDirectory(_gitInstallDir);
Directory.CreateDirectory(_nodeInstallDir);
}
private async void FrmMain_Load(object sender, EventArgs e)
{
// 初始化7-Zip组件
ExtractEmbedded7zFiles();
SevenZipHelper.InitInstance(_appDir);
progress1.Value = 0f;
txtLog.Clear();
// 后台线程执行安装流程
await Task.Run(async () =>
{
try
{
// 完整安装流程
AppendLog("=== 开始前置环境检测 ===");
await CheckAndInstallGitEnvironment();
AppendLog("进度更新:10%");
Invoke(new Action(() => progress1.Value = 0.1f));
AppendLog("=== 开始检测Node.js(npm)环境 ===");
await CheckAndInstallNodeEnvironment();
AppendLog("进度更新:20%");
Invoke(new Action(() => progress1.Value = 0.2f));
AppendLog("=== 配置npm镜像源 ===");
await SetNpmRegistry();
AppendLog("进度更新:30%");
Invoke(new Action(() => progress1.Value = 0.3f));
AppendLog("=== 下载OpenClaw最新版 ===");
await DownloadOpenClawPackage();
AppendLog("进度更新:50%");
Invoke(new Action(() => progress1.Value = 0.5f));
AppendLog("=== 查询npm全局安装路径 ===");
var (exitCode, output, _) = await ExecuteCommand($"npm prefix -g");
if (exitCode == 0 && !string.IsNullOrWhiteSpace(output))
{
_npmGlobalInstallPath = output.Trim();
AppendLog($"✅ 查询到npm全局安装路径:{_npmGlobalInstallPath}");
}
else
{
AppendLog("=== 重新设置npm全局安装路径 ===");
(exitCode, output, _) = await ExecuteCommand($"npm config set prefix \\"{_npmGlobalInstallPath}\\"");
if (exitCode == 0 && !string.IsNullOrWhiteSpace(output))
{
AppendLog($"✅ 设置Node全局安装路径成功:{output.Trim()}");
}
else
{
AppendLog($"❌ 设置Node全局安装路径失败:{output.Trim()}");
throw new Exception("无法设置npm全局安装路径,安装异常");
}
}
AddPathToUserEnv(_npmGlobalInstallPath);
NotifyEnvironmentChange();
AppendLog("进度更新:60%");
Invoke(new Action(() => progress1.Value = 0.6f));
var tempOpenClawPath = Path.Combine(Path.GetTempPath(), _openClawPackageName);
AppendLog("=== 解压OpenClaw包 ===");
var openClawDir = Path.Combine(_npmGlobalInstallPath, _openClawRelativePath);
if (!Directory.Exists(openClawDir))
Directory.CreateDirectory(openClawDir);
AppendLog("解压路径:" + tempOpenClawPath);
AppendLog("目标路径:" + openClawDir);
SevenZipHelper.Instance.Extract(tempOpenClawPath, openClawDir);
MoveNodeFilesFromSubDir(openClawDir, "package");
if (File.Exists(tempOpenClawPath)) File.Delete(tempOpenClawPath);
AppendLog("进度更新:70%");
Invoke(new Action(() => progress1.Value = 0.7f));
AppendLog("=== 清理npm缓存 ===");
await ExecuteCommand("npm cache clean –force", openClawDir);
AppendLog("进度更新:75%");
Invoke(new Action(() => progress1.Value = 0.75f));
AppendLog("=== 配置OpenClaw全局启动脚本 ===");
ExtractResourceToFile(Resources.openclaw, "openclaw", _npmGlobalInstallPath);
ExtractResourceToFile(Resources.openclaw_ps1, "openclaw.ps1", _npmGlobalInstallPath);
ExtractResourceToFile(Resources.openclaw_cmd, "openclaw.cmd", _npmGlobalInstallPath);
AppendLog("进度更新:80%");
Invoke(new Action(() => progress1.Value = 0.8f));
AppendLog("=== 安装OpenClaw依赖包 ===");
await ExecuteCommand("npm install", openClawDir, true);
AppendLog("进度更新:90%");
Invoke(new Action(() => progress1.Value = 0.9f));
RestartExplorer();
Invoke(new Action(() =>
{
AppendLog("✅ 全部安装完成!");
progress1.Value = 1f;
label1.Text = "安装成功,请在命令行输入 openclaw 来使用吧!";
AntdUI.Message.success(this, "安装完成,准备部署!");
}));
}
catch (Exception ex)
{
Invoke(new Action(() =>
{
AppendLog($"❌ 安装失败:{ex.Message}");
AntdUI.Message.error(this, $"安装失败:{ex.Message}\\r\\n请查看日志详情");
}));
}
});
}
2.3 线程安全的日志更新
private void AppendLog(string message)
{
if (string.IsNullOrEmpty(message)) return;
if (txtLog?.InvokeRequired == true)
{
txtLog.BeginInvoke(new Action<string>(AppendLog), message);
return;
}
try
{
if (txtLog == null || !txtLog.IsHandleCreated || txtLog.IsDisposed)
return;
txtLog.AppendText($"{DateTime.Now:HH:mm:ss} – {message}\\r\\n");
txtLog.SelectionStart = txtLog.Text.Length;
txtLog.ScrollToCaret();
LimitLogLines(1000);
}
catch (Exception ex)
{
System.Diagnostics.Debug.WriteLine($"日志更新失败:{ex.Message}");
}
}
private void LimitLogLines(int maxLines)
{
if (txtLog.Lines.Length <= maxLines) return;
string[] newLines = txtLog.Lines.Skip(txtLog.Lines.Length – maxLines).ToArray();
txtLog.Lines = newLines;
txtLog.SelectionStart = txtLog.Text.Length;
txtLog.ScrollToCaret();
}
三、核心功能模块实现
3.1 高性能断点续传下载器
下载是安装流程中最核心的环节之一,国内网络环境复杂,很容易出现下载中断、超时、速度慢的问题。我们需要实现一个支持断点续传、高性能、进度可控的下载器。
断点续传的核心原理
🔍 技术科普:断点续传的核心是 HTTP 协议的Range请求头。
- 客户端在请求头中添加Range: bytes=xxx-,告诉服务器从文件的第 xxx 字节开始返回数据,而不是从头开始。
- 服务器如果支持断点续传,会返回206 Partial Content状态码,并返回对应范围的文件数据。
- 客户端将接收到的数据追加到本地已下载的文件末尾,实现续传。
下载器的核心优化点
完整代码实现与逐行解析
进度节流辅助类
首先,我们实现一个进度节流辅助类,避免频繁的进度更新导致 UI 卡顿。
// 辅助类:进度报告节流(避免频繁更新UI)
private class ProgressThrottler
{
// 节流间隔,这里设置为100ms,最多每100ms更新一次进度
private readonly TimeSpan _throttleInterval;
// 外部传入的进度回调
private readonly IProgress<(long, long)> _progress;
// 上一次上报的进度值
private (long, long) _lastReportedValue;
// 上一次上报的时间
private DateTime _lastReportTime = DateTime.MinValue;
public ProgressThrottler(TimeSpan throttleInterval, IProgress<(long, long)> progress)
{
_throttleInterval = throttleInterval;
_progress = progress;
}
// 上报进度
public void Report((long, long) value)
{
if (_progress == null) return;
var now = DateTime.Now;
// 只有超过节流间隔,或者下载完成时,才上报进度
if (now – _lastReportTime >= _throttleInterval || value.Item1 == value.Item2)
{
_progress.Report(value);
_lastReportedValue = value;
_lastReportTime = now;
}
}
// 强制刷新一次进度,下载完成时调用
public void Flush()
{
if (_progress != null && _lastReportedValue != default)
{
_progress.Report(_lastReportedValue);
}
}
}
// 辅助方法:格式化文件大小,让日志更友好
private string FormatFileSize(long bytes)
{
string[] suffixes = { "B", "KB", "MB", "GB" };
double size = bytes;
int suffixIndex = 0;
while (size >= 1024 && suffixIndex < suffixes.Length – 1)
{
size /= 1024;
suffixIndex++;
}
return $"{size:0.00} {suffixes[suffixIndex]}";
}
断点续传下载核心方法
/// <summary>
/// 优化版断点续传下载(大缓冲区+进度节流+高效IO)
/// </summary>
/// <param name="url">文件下载地址</param>
/// <param name="savePath">文件保存路径</param>
/// <param name="progress">进度回调</param>
/// <param name="ct">取消令牌</param>
private async Task DownloadFileWithResumeAsync(string url, string savePath, IProgress<(long downloaded, long total)> progress = null, CancellationToken ct = default)
{
// 优化1:增大缓冲区到64KB(浏览器级别的缓冲区大小)
// 缓冲区太小会导致频繁的磁盘IO,太大会导致内存占用过高,64KB是经过验证的最佳实践
const int BUFFER_SIZE = 65536;
// 优化2:进度报告节流(每100ms只更新一次,避免日志刷屏、UI卡顿)
var progressThrottler = new ProgressThrottler(TimeSpan.FromMilliseconds(100), progress);
long existingLength = 0;
FileMode fileMode = FileMode.Create;
// 检测本地是否已存在该文件,准备断点续传
if (File.Exists(savePath))
{
existingLength = new FileInfo(savePath).Length;
// 已存在文件,使用Append模式,将新下载的数据追加到末尾
fileMode = FileMode.Append;
AppendLog($"检测到已下载 {FormatFileSize(existingLength)},尝试断点续传");
}
// 使用HttpRequestMessage,自定义请求头,实现断点续传
using (var request = new HttpRequestMessage(HttpMethod.Get, url))
{
// 如果已有已下载的内容,添加Range请求头
if (existingLength > 0)
{
request.Headers.Range = new RangeHeaderValue(existingLength, null);
}
// 使用HttpCompletionOption.ResponseHeadersRead,只读取响应头,不读取响应体
// 这样可以在拿到响应头后立即处理,而不用等待整个文件下载完成
using (var response = await _httpClient.SendAsync(request, HttpCompletionOption.ResponseHeadersRead, ct))
{
// 确保请求成功
response.EnsureSuccessStatusCode();
// 获取文件总大小
long totalLength = response.Content.Headers.ContentLength ?? 0;
// 处理断点续传的响应
if (existingLength > 0 && response.StatusCode == System.Net.HttpStatusCode.PartialContent)
{
// 206状态码,说明服务器支持断点续传,更新总文件大小
totalLength = response.Content.Headers.ContentRange?.Length ?? totalLength;
}
else if (existingLength > 0)
{
// 服务器返回了200而不是206,说明不支持断点续传,重新下载完整文件
AppendLog("服务器不支持断点续传,重新下载完整文件");
existingLength = 0;
fileMode = FileMode.Create;
}
// 优化3:使用异步流读写,全程不阻塞线程
// 先获取响应流
using (var stream = await response.Content.ReadAsStreamAsync())
{
// 打开本地文件流,使用异步模式,FileOptions.Asynchronous
using (var fileStream = new FileStream(savePath, fileMode, FileAccess.Write, FileShare.None, BUFFER_SIZE, true))
{
// 预分配文件空间(避免磁盘碎片化)
// 下载前就把文件的大小设置为总大小,避免磁盘频繁分配空间导致碎片化
if (totalLength > 0 && fileMode == FileMode.Create)
{
fileStream.SetLength(totalLength);
}
var buffer = new byte[BUFFER_SIZE];
long downloaded = existingLength;
int bytesRead;
// 优化4:循环异步读取响应流,写入本地文件
while ((bytesRead = await stream.ReadAsync(buffer, 0, buffer.Length, ct)) > 0)
{
// 异步写入文件
await fileStream.WriteAsync(buffer, 0, bytesRead, ct);
// 更新已下载的字节数
downloaded += bytesRead;
// 节流后的进度报告
progressThrottler.Report((downloaded, totalLength));
}
// 下载完成,强制刷新一次进度
progressThrottler.Flush();
AppendLog($"下载完成:{FormatFileSize(downloaded)} / {FormatFileSize(totalLength)}");
}
}
}
}
}
设计思路与避坑指南
⚠️ 踩坑实录:很多开发者在实现下载功能时,会使用WebClient,但WebClient已经被微软标记为过时,且不支持异步流式下载、断点续传的灵活控制,性能也远低于HttpClient。在.NET 开发中,所有的 HTTP 请求都应该优先使用HttpClient。
3.2 Git 环境自动化部署模块
MinGit 选型逻辑
Git 官方提供了一个MinGit版本,这是 Git 的便携版,无需安装,解压即可使用,体积远小于完整的 Git 安装包,非常适合我们的自动化部署场景。
🔍 技术科普:MinGit 是 Git for Windows 官方提供的最小化发行版,仅包含核心的 Git 命令行工具,没有 GUI 界面,无需安装,解压后配置环境变量即可使用,完美适配自动化部署场景。
模块核心流程
完整代码实现与解析
private async Task CheckAndInstallGitEnvironment()
{
AppendLog("=== 检测Git环境 ===");
try
{
var (exitCode, output, _) = await ExecuteCommand("git –version");
if (exitCode == 0 && !string.IsNullOrWhiteSpace(output))
{
AppendLog($"✅ 检测到Git:{output.Trim()}");
return;
}
}
catch { }
AppendLog("❌ 未检测到Git环境,将下载最新MinGit便携版…");
var (minGitUrl, minGitFileName) = await GetLatestMinGitZipUrl();
if (string.IsNullOrEmpty(minGitUrl))
throw new Exception("获取MinGit下载链接失败");
string zipTempPath = Path.Combine(Path.GetTempPath(), minGitFileName);
if (File.Exists(zipTempPath))
File.Delete(zipTempPath);
AppendLog($"下载MinGit:{minGitUrl}");
await DownloadFileWithResumeAsync(minGitUrl, zipTempPath, new Progress<(long, long)>(p =>
{
if (p.Item2 > 0)
{
int percent = (int)(p.Item1 * 100 / p.Item2);
AppendLog($"Git下载进度:{percent}%");
}
}));
AppendLog("开始解压MinGit…");
SevenZipHelper.Instance.Extract(zipTempPath, _gitInstallDir);
AppendLog("✅ MinGit解压完成");
if (File.Exists(zipTempPath)) File.Delete(zipTempPath);
AddPathToUserEnv(_gitInstallDir);
NotifyEnvironmentChange();
var verifyResult = await ExecuteCommand("git –version");
if (verifyResult.Item1 != 0)
throw new Exception("MinGit解压后验证失败,请检查7z解压是否完整");
AppendLog($"✅ Git验证成功:{verifyResult.Item2.Trim()}");
}
private async Task<(string url, string fileName)> GetLatestMinGitZipUrl()
{
string gitVersionsJson = await _httpClient.GetStringAsync(GIT_MIRROR_API);
List<GitVersionItem> gitVersions = JsonSerializer.Deserialize<List<GitVersionItem>>(gitVersionsJson);
List<GitVersionItem> stableVersions = new List<GitVersionItem>();
foreach (var v in gitVersions)
{
if (v.name.StartsWith("v") && v.name.Contains(".windows.")
&& !v.name.Contains("-rc") && !v.name.Contains("prerelease") && v.type == "dir")
{
stableVersions.Add(v);
}
}
GitVersionItem latest = null;
Version latestVersion = new Version(0, 0, 0);
foreach (var v in stableVersions)
{
Version current = ParseGitVersion(v.name);
if (current > latestVersion)
{
latestVersion = current;
latest = v;
}
}
if (latest == null) return (null, null);
string archSuffix = "";
switch (RuntimeInformation.OSArchitecture)
{
case Architecture.X64:
archSuffix = "64-bit";
break;
default:
throw new Exception($"当前仅支持x64架构");
}
string versionNum = latestVersion.ToString();
string fileName = $"MinGit-{versionNum}-{archSuffix}.zip";
string downloadUrl = $"{latest.url}{fileName}";
return (downloadUrl, fileName);
}
private Version ParseGitVersion(string versionName)
{
try
{
string v = versionName.Replace("v", "").Replace("/", "").Replace(".windows.", ".");
return Version.Parse(v);
}
catch { return new Version(0, 0, 0); }
}
public class GitVersionItem
{
public string name { get; set; }
public string url { get; set; }
public string type { get; set; }
}
设计思路与避坑指南
3.3 Node.js 环境版本校验与自动升级
Node.js 是 OpenClaw 的核心运行环境,对版本有严格的最低要求,这也是用户部署时最容易出问题的环节。我们需要实现 Node.js 环境的全自动检测、版本校验、自动升级、部署配置。
模块核心需求
完整代码实现与解析
private async Task CheckAndInstallNodeEnvironment()
{
AppendLog("=== 检测Node.js环境(OpenClaw要求最低版本:v" + OPENCLAW_MIN_NODE_VERSION + ")===");
var (hasNode, localNodeVersion) = await GetLocalNodeVersion();
if (hasNode)
{
AppendLog($"检测到本地Node.js版本:{localNodeVersion}");
bool isVersionEnough = CompareNodeVersion(localNodeVersion, OPENCLAW_MIN_NODE_VERSION) >= 0;
if (isVersionEnough)
{
AppendLog($"✅ 本地Node.js版本满足要求(≥v{OPENCLAW_MIN_NODE_VERSION}),无需升级");
return;
}
AppendLog($"⚠️ 本地Node.js版本过低(要求≥v{OPENCLAW_MIN_NODE_VERSION}),将强制下载最新版…");
}
else
{
AppendLog("❌ 未检测到Node.js环境,将下载最新版…");
}
var (nodeUrl, nodeFileName) = await GetLatestNodeZipUrl();
if (string.IsNullOrEmpty(nodeUrl))
throw new Exception("获取Node.js下载链接失败");
string zipTempPath = Path.Combine(Path.GetTempPath(), nodeFileName);
AppendLog($"下载Node.js:{nodeUrl}");
await DownloadFileWithResumeAsync(nodeUrl, zipTempPath, new Progress<(long, long)>(p =>
{
if (p.Item2 > 0)
{
int percent = (int)(p.Item1 * 100 / p.Item2);
if (percent % 5 == 0)
AppendLog($"Node.js下载进度:{percent}%");
}
}));
AppendLog("开始解压Node.js…");
SevenZipHelper.Instance.Extract(zipTempPath, _nodeInstallDir);
MoveNodeFilesFromSubDir(_nodeInstallDir);
AppendLog("✅ Node.js解压完成");
if (File.Exists(zipTempPath)) File.Delete(zipTempPath);
AddPathToUserEnv(_nodeInstallDir);
NotifyEnvironmentChange();
var (_, verifyVersion) = await GetLocalNodeVersion();
if (CompareNodeVersion(verifyVersion, OPENCLAW_MIN_NODE_VERSION) < 0)
throw new Exception($"解压后的Node.js版本({verifyVersion})仍低于要求的v{OPENCLAW_MIN_NODE_VERSION}");
AppendLog($"✅ Node.js验证成功:{verifyVersion}(满足OpenClaw最低要求)");
}
private async Task<(bool hasNode, string version)> GetLocalNodeVersion()
{
try
{
var (exitCode, output, _) = await ExecuteCommand("node –version");
if (exitCode == 0 && !string.IsNullOrWhiteSpace(output))
{
string version = output.Trim();
return (true, version);
}
return (false, string.Empty);
}
catch
{
return (false, string.Empty);
}
}
private int CompareNodeVersion(string version1, string version2)
{
try
{
Version v1 = Version.Parse(version1.TrimStart('v'));
Version v2 = Version.Parse(version2.TrimStart('v'));
return v1.CompareTo(v2);
}
catch
{
return -1;
}
}
private async Task<(string url, string fileName)> GetLatestNodeZipUrl()
{
string json = await _httpClient.GetStringAsync(NODEJS_MIRROR_API);
var nodeVersions = JsonSerializer.Deserialize<List<NodeVersionInfo>>(json);
if (nodeVersions == null || nodeVersions.Count == 0)
throw new Exception("Node版本列表为空");
NodeVersionInfo targetVersion = nodeVersions
.OrderByDescending(v => ParseNodeVersion(v.Version))
.First();
string targetVer = targetVersion.Version;
AppendLog($"选定Node.js版本:{targetVer}");
if (CompareNodeVersion(targetVer, OPENCLAW_MIN_NODE_VERSION) < 0)
throw new Exception($"找到的Node.js版本({targetVer})仍低于OpenClaw要求的v{OPENCLAW_MIN_NODE_VERSION}");
string arch = "";
switch (RuntimeInformation.OSArchitecture)
{
case Architecture.X64:
arch = "x64";
break;
default:
throw new Exception($"当前仅支持x64架构");
}
string fileType = $"win-{arch}-zip";
if (!targetVersion.Files.Contains(fileType))
throw new Exception($"版本 {targetVer} 无 {fileType} 包");
string fileName = $"node-{targetVer}-win-{arch}.zip";
string downloadUrl = $"https://cdn.npmmirror.com/binaries/node/{targetVer}/{fileName}";
return (downloadUrl, fileName);
}
private Version ParseNodeVersion(string versionStr)
{
try
{
string cleanVersion = versionStr.TrimStart('v');
return Version.Parse(cleanVersion);
}
catch
{
return new Version(0, 0, 0);
}
}
private void MoveNodeFilesFromSubDir(string rootDir)
{
var subDirs = Directory.GetDirectories(rootDir);
if (subDirs.Length == 1)
{
string subDir = subDirs[0];
foreach (var file in Directory.GetFiles(subDir))
{
string destFile = Path.Combine(rootDir, Path.GetFileName(file));
if (File.Exists(destFile)) File.Delete(destFile);
File.Move(file, destFile);
}
foreach (var dir in Directory.GetDirectories(subDir))
{
string destDir = Path.Combine(rootDir, Path.GetFileName(dir));
if (Directory.Exists(destDir)) Directory.Delete(destDir, true);
Directory.Move(dir, destDir);
}
Directory.Delete(subDir, true);
}
}
private void MoveNodeFilesFromSubDir(string rootDir, string subDirName)
{
var subDir = Path.Combine(rootDir, subDirName);
foreach (var file in Directory.GetFiles(subDir))
{
string destFile = Path.Combine(rootDir, Path.GetFileName(file));
if (File.Exists(destFile)) File.Delete(destFile);
File.Move(file, destFile);
}
foreach (var dir in Directory.GetDirectories(subDir))
{
string destDir = Path.Combine(rootDir, Path.GetFileName(dir));
if (Directory.Exists(destDir)) Directory.Delete(destDir, true);
Directory.Move(dir, destDir);
}
Directory.Delete(subDir, true);
}
public class NodeVersionInfo
{
[JsonPropertyName("version")]
public string Version { get; set; }
[JsonPropertyName("files")]
public List<string> Files { get; set; }
}
设计思路与避坑指南
3.4 Windows 环境变量持久化与实时生效
Windows 环境变量底层原理
🔍 技术科普:Windows 的环境变量分为两个级别:
我们的工具使用用户级环境变量,这是实现「免管理员权限安装」的核心。
环境变量生效的完整流程
很多开发者以为修改了注册表的环境变量就完事了,但实际上,修改注册表后,系统并不会自动更新环境变量,必须完成以下步骤,才能让环境变量真正生效:
完整代码实现与解析
private void AddPathToUserEnv(string pathToAdd)
{
using (var key = Registry.CurrentUser.OpenSubKey("Environment", writable: true))
{
if (key == null) return;
string currentPath = key.GetValue("PATH", "")?.ToString() ?? "";
bool exists = currentPath.Split(';')
.Any(p => p.Trim().Equals(pathToAdd.Trim(), StringComparison.OrdinalIgnoreCase));
if (!exists)
{
string newPath = $"{pathToAdd};{currentPath}".Trim(';');
key.SetValue("PATH", newPath, RegistryValueKind.String);
}
}
}
[DllImport("user32.dll", SetLastError = true, CharSet = CharSet.Auto)]
private static extern IntPtr SendMessageTimeout(IntPtr hWnd, uint Msg, IntPtr wParam, string lParam, uint fuFlags, uint uTimeout, out IntPtr lpdwResult);
private void NotifyEnvironmentChange()
{
SendMessageTimeout((IntPtr)0xFFFF, 0x1A, IntPtr.Zero, "Environment", 0x2, 5000, out _);
}
public static void RestartExplorer()
{
try
{
Process[] explorerProcesses = Process.GetProcessesByName("explorer");
foreach (Process p in explorerProcesses)
{
if (!p.HasExited)
{
p.Kill();
p.WaitForExit(1000);
}
}
Thread.Sleep(500);
string explorerPath = Path.Combine(Environment.GetFolderPath(Environment.SpecialFolder.Windows), "explorer.exe");
Process.Start(explorerPath);
Console.WriteLine("✅ Explorer 已成功重启");
}
catch (Exception ex)
{
Console.WriteLine($"❌ 重启 Explorer 时出错: {ex.Message}");
}
}
3.5 进程与命令执行的安全封装
执行系统命令是自动化安装程序的核心能力,我们需要执行git –version、node –version、npm install等命令,这里有非常多的坑,比如进程死锁、中文乱码、输出截断、超时卡死等。
进程重定向的死锁原理
🔍 技术科普:当我们重定向进程的标准输出(stdout)和标准错误(stderr)时,如果使用同步读取的方式,很容易出现死锁。
- 进程的 stdout 和 stderr 都有固定大小的缓冲区,如果缓冲区满了,进程会暂停执行,等待缓冲区被读取。
- 如果你先同步读取 stdout,再读取 stderr,当进程往 stderr 写入了大量数据,填满了 stderr 的缓冲区,进程会暂停,而你的程序还在等待 stdout 的输出,就会形成死锁,两个程序都卡住不动。
解决死锁的唯一正确方案是:使用异步事件监听的方式读取 stdout 和 stderr。
完整代码实现与解析
private async Task<(int exitCode, string output, string error)> ExecuteCommand(string command, string workingDirectory, int timeout = 300000)
{
var psi = new System.Diagnostics.ProcessStartInfo
{
FileName = "cmd.exe",
Arguments = $"/c {command}",
WorkingDirectory = string.IsNullOrEmpty(workingDirectory)
? Environment.GetFolderPath(Environment.SpecialFolder.UserProfile)
: workingDirectory,
UseShellExecute = false,
RedirectStandardOutput = true,
RedirectStandardError = true,
StandardOutputEncoding = Encoding.GetEncoding("GBK"),
StandardErrorEncoding = Encoding.GetEncoding("GBK"),
CreateNoWindow = true
};
psi.EnvironmentVariables["PATH"] = Environment.GetEnvironmentVariable("PATH", EnvironmentVariableTarget.Process);
using (var process = new Process { StartInfo = psi })
{
var outputBuilder = new StringBuilder();
var errorBuilder = new StringBuilder();
var outputWaitHandle = new TaskCompletionSource<bool>();
var errorWaitHandle = new TaskCompletionSource<bool>();
process.OutputDataReceived += (sender, e) =>
{
if (e.Data == null)
outputWaitHandle.SetResult(true);
else
outputBuilder.AppendLine(e.Data);
};
process.ErrorDataReceived += (sender, e) =>
{
if (e.Data == null)
errorWaitHandle.SetResult(true);
else
errorBuilder.AppendLine(e.Data);
};
process.Start();
process.BeginOutputReadLine();
process.BeginErrorReadLine();
bool exited = process.WaitForExit(timeout);
await Task.WhenAll(outputWaitHandle.Task, errorWaitHandle.Task);
if (!exited)
{
process.Kill();
throw new TimeoutException($"命令执行超时:{command}");
}
return (process.ExitCode, outputBuilder.ToString().Trim(), errorBuilder.ToString().Trim());
}
}
private async Task<(int exitCode, string output, string error)> ExecuteCommand(string command, string workingDirectory, bool enableRealTimeLog, int timeout = 300000)
{
if (!enableRealTimeLog)
{
return await ExecuteCommand(command, workingDirectory, timeout);
}
var psi = new System.Diagnostics.ProcessStartInfo
{
FileName = "cmd.exe",
Arguments = $"/c {command}",
WorkingDirectory = string.IsNullOrEmpty(workingDirectory)
? Environment.GetFolderPath(Environment.SpecialFolder.UserProfile)
: workingDirectory,
UseShellExecute = false,
RedirectStandardOutput = true,
RedirectStandardError = true,
StandardOutputEncoding = Encoding.GetEncoding("GBK"),
StandardErrorEncoding = Encoding.GetEncoding("GBK"),
CreateNoWindow = true
};
psi.EnvironmentVariables["PATH"] = Environment.GetEnvironmentVariable("PATH", EnvironmentVariableTarget.Process);
using (var process = new Process { StartInfo = psi })
{
var outputBuilder = new StringBuilder();
var errorBuilder = new StringBuilder();
var outputWaitHandle = new TaskCompletionSource<bool>();
var errorWaitHandle = new TaskCompletionSource<bool>();
string lastProgressLine = string.Empty;
process.OutputDataReceived += (sender, e) =>
{
if (e.Data == null)
{
outputWaitHandle.SetResult(true);
return;
}
string line = e.Data.TrimEnd('\\r', '\\n');
outputBuilder.AppendLine(line);
if (line.StartsWith("\\r") || line.Contains("⸨") || line.Contains("⠋") || line.Contains("⠙") || line.Contains("⠹") || line.Contains("⠸") || line.Contains("⠼") || line.Contains("⠴") || line.Contains("⠦") || line.Contains("⠧") || line.Contains("⠇") || line.Contains("⠏"))
{
lastProgressLine = line.TrimStart('\\r');
}
else
{
AppendLog(line);
}
};
process.ErrorDataReceived += (sender, e) =>
{
if (e.Data == null)
{
errorWaitHandle.SetResult(true);
return;
}
string line = e.Data.TrimEnd('\\r', '\\n');
errorBuilder.AppendLine(line);
AppendLog($"⚠️ {line}");
};
process.Start();
process.BeginOutputReadLine();
process.BeginErrorReadLine();
bool exited = process.WaitForExit(timeout);
await Task.WhenAll(outputWaitHandle.Task, errorWaitHandle.Task);
if (!string.IsNullOrEmpty(lastProgressLine))
{
AppendLog(lastProgressLine);
}
if (!exited)
{
process.Kill();
throw new TimeoutException($"命令执行超时:{command}");
}
return (process.ExitCode, outputBuilder.ToString().Trim(), errorBuilder.ToString().Trim());
}
}
private async Task<(int exitCode, string output, string error)> ExecuteCommand(string command, int timeout = 300000)
{
return await ExecuteCommand(command, null, timeout);
}
private async Task SetNpmRegistry()
{
var result = await ExecuteCommand($"npm config set registry {NPM_MIRROR_URL}");
if (result.Item1 != 0)
throw new Exception($"设置镜像源失败:{result.Item3}");
var verify = await ExecuteCommand("npm config get registry");
if (verify.Item1 == 0 && verify.Item2.Trim() == NPM_MIRROR_URL)
AppendLog($"✅ 镜像源已设置为:{NPM_MIRROR_URL}");
else
throw new Exception($"镜像源验证失败:{verify.Item3}");
}
private async Task DownloadOpenClawPackage()
{
AppendLog("=== 下载 OpenClaw 安装包(npm pack 模式)===");
await CheckAndInstallNodeEnvironment();
try
{
AppendLog("执行 npm pack openclaw 命令…");
var (exitCode, output, error) = await ExecuteCommand("npm pack openclaw@latest", Path.GetTempPath());
AppendLog($"npm pack 输出:{output}");
if (exitCode != 0)
throw new Exception($"npm pack 执行失败:{error.Trim()}");
string tgzFileName = output.Trim();
if (string.IsNullOrEmpty(tgzFileName) || !tgzFileName.EndsWith(".tgz"))
throw new Exception($"无法解析 npm pack 输出的文件名:{output}");
_openClawPackageName = tgzFileName;
string sourceTgzPath = Path.Combine(Path.GetTempPath(), tgzFileName);
if (!File.Exists(sourceTgzPath))
throw new Exception($"npm pack 生成的文件不存在:{sourceTgzPath}");
AppendLog($"✅ OpenClaw 安装包下载完成:{sourceTgzPath}");
}
finally { }
}
设计思路与避坑指南
踩坑实录:很多开发者执行命令时,会这样写:
string output = process.StandardOutput.ReadToEnd();
string error = process.StandardError.ReadToEnd();
这种同步读取的方式,100% 会出现死锁问题,当进程输出大量错误信息时,程序会直接卡死。绝对不要使用这种方式,必须使用异步事件监听的方式读取输出。
3.6 7-Zip 解压组件封装与资源嵌入
解压是自动化安装程序的核心能力,我们需要解压 Git、Node.js 的 zip 包,以及 OpenClaw 的 tgz 包。7-Zip 是目前最强大的开源解压工具,支持几乎所有的压缩格式,我们基于 7-Zip 的命令行工具,封装一个线程安全、全格式支持的解压助手类。
7-Zip 选型逻辑
单例模式的线程安全设计
我们的解压助手类使用线程安全的懒加载单例模式,确保整个程序生命周期内只有一个实例,避免多线程下的资源竞争问题。
🔍 技术科普:Lazy<T>是.NET 提供的线程安全的懒加载类,它可以确保在多线程环境下,实例只会被创建一次,完美实现线程安全的单例模式,无需我们自己写双重校验锁。
完整代码实现与解析
using System;
using System.Diagnostics;
using System.IO;
using System.Text;
public class SevenZipHelper
{
private static Lazy<SevenZipHelper> _lazyInstance = new Lazy<SevenZipHelper>(() => new SevenZipHelper());
public static SevenZipHelper Instance => _lazyInstance.Value;
private readonly string _7zPath;
private readonly string _7zDllPath;
private SevenZipHelper()
{
if (!Environment.Is64BitProcess)
{
throw new InvalidOperationException("当前进程非 x64 架构!该版本仅支持 64 位 Windows 系统和 x64 编译的程序。");
}
string candidate7zPath = Path.Combine(AppDomain.CurrentDomain.BaseDirectory, "x64", "7z.exe");
if (!File.Exists(candidate7zPath))
{
candidate7zPath = Path.Combine(AppDomain.CurrentDomain.BaseDirectory, "7z.exe");
}
_7zPath = candidate7zPath;
_7zDllPath = Path.Combine(Path.GetDirectoryName(_7zPath), "7z.dll");
Check7zFilesExists();
}
public static void InitInstance(string sevenZPath)
{
if (!_lazyInstance.IsValueCreated)
{
_lazyInstance = new Lazy<SevenZipHelper>(() => new SevenZipHelper(sevenZPath));
}
else
{
throw new InvalidOperationException("SevenZipHelper 单例已初始化,无法重复设置路径!");
}
}
private SevenZipHelper(string sevenZPath)
{
if (!Environment.Is64BitProcess)
{
throw new InvalidOperationException("当前进程非 x64 架构!该版本仅支持 64 位 Windows 系统和 x64 编译的程序。");
}
_7zPath = Path.Combine(sevenZPath, "7z.exe");
_7zDllPath = Path.Combine(sevenZPath, "7z.dll");
Check7zFilesExists();
}
private void Check7zFilesExists()
{
if (!File.Exists(_7zPath))
{
throw new FileNotFoundException(
$"未找到 x64 版本的 7z.exe!路径:{_7zPath}\\n请将 x64 版本的 7z.exe 复制到程序目录。",
_7zPath);
}
if (!File.Exists(_7zDllPath))
{
throw new FileNotFoundException(
$"未找到 x64 版本的 7z.dll!路径:{_7zDllPath}\\n7z.dll 必须与 7z.exe 放在同一目录。",
_7zDllPath);
}
}
public string Compress(string sourcePath, string outputArchivePath, int compressionLevel = 5, string password = null)
{
if (string.IsNullOrEmpty(sourcePath) || !File.Exists(sourcePath) && !Directory.Exists(sourcePath))
throw new ArgumentException("源文件/目录不存在", nameof(sourcePath));
if (string.IsNullOrEmpty(outputArchivePath))
throw new ArgumentNullException(nameof(outputArchivePath));
compressionLevel = compressionLevel < 0 ? 0 : (compressionLevel > 9 ? 9 : compressionLevel);
var argsBuilder = new StringBuilder();
argsBuilder.Append($"a -t7z \\"{outputArchivePath}\\" \\"{sourcePath}\\" -mx{compressionLevel} -bb1");
if (!string.IsNullOrEmpty(password))
argsBuilder.Append($" -p{password}");
return Execute7zCommand(argsBuilder.ToString());
}
public string Extract(string archivePath, string outputDir, string password = null)
{
if (string.IsNullOrEmpty(archivePath) || !File.Exists(archivePath))
throw new ArgumentException("压缩包文件不存在", nameof(archivePath));
if (string.IsNullOrEmpty(outputDir))
throw new ArgumentNullException(nameof(outputDir));
Directory.CreateDirectory(outputDir);
string archiveExt = Path.GetExtension(archivePath).ToLower();
string archiveName = Path.GetFileName(archivePath).ToLower();
bool isTgz = archiveExt == ".tgz" || (archiveExt == ".gz" && archiveName.EndsWith(".tar.gz"));
if (isTgz)
{
string tempDir = Path.Combine(Path.GetTempPath(), $"7zTemp_{Guid.NewGuid():N}");
Directory.CreateDirectory(tempDir);
var gzipArgs = new StringBuilder();
gzipArgs.Append($"x \\"{archivePath}\\" -o\\"{tempDir}\\" -y -bb1");
if (!string.IsNullOrEmpty(password))
gzipArgs.Append($" -p{password}");
string gzipLog = Execute7zCommand(gzipArgs.ToString());
AppendLog($"解压gzip外层完成:{gzipLog}");
string[] tarFiles = Directory.GetFiles(tempDir, "*.tar");
if (tarFiles.Length == 0)
{
Directory.Delete(tempDir, true);
throw new Exception($"解压.tgz后未找到tar文件!临时目录:{tempDir}");
}
string tarPath = tarFiles[0];
var tarArgs = new StringBuilder();
tarArgs.Append($"x -ttar \\"{tarPath}\\" -o\\"{outputDir}\\" -y -bb1");
if (!string.IsNullOrEmpty(password))
tarArgs.Append($" -p{password}");
string tarLog = Execute7zCommand(tarArgs.ToString());
AppendLog($"解压tar内层完成:{tarLog}");
File.Delete(tarPath);
Directory.Delete(tempDir, true);
return $"解压gzip日志:{gzipLog}\\n解压tar日志:{tarLog}";
}
else
{
var argsBuilder = new StringBuilder();
argsBuilder.Append($"x \\"{archivePath}\\" -o\\"{outputDir}\\" -y -bb1");
if (!string.IsNullOrEmpty(password))
argsBuilder.Append($" -p{password}");
return Execute7zCommand(argsBuilder.ToString());
}
}
private void AppendLog(string message)
{
Console.WriteLine($"[{DateTime.Now:HH:mm:ss}] {message}");
}
private string Execute7zCommand(string arguments)
{
var processStartInfo = new ProcessStartInfo
{
FileName = _7zPath,
Arguments = arguments,
CreateNoWindow = true,
RedirectStandardOutput = true,
RedirectStandardError = true,
UseShellExecute = false,
StandardOutputEncoding = Encoding.UTF8,
StandardErrorEncoding = Encoding.UTF8
};
using (var process = new Process { StartInfo = processStartInfo })
{
try
{
process.Start();
string output = process.StandardOutput.ReadToEnd();
string error = process.StandardError.ReadToEnd();
process.WaitForExit();
if (process.ExitCode != 0)
{
throw new Exception($"7z.exe 执行失败!退出码:{process.ExitCode}\\n错误信息:{error}\\n输出日志:{output}");
}
return $"输出日志:{output}\\n错误日志:{error}";
}
catch (Exception ex)
{
throw new Exception($"执行 7z.exe 命令失败!命令参数:{arguments}", ex);
}
}
}
}
3.7 嵌入资源释放
为了避免用户需要额外携带 7z.exe 和 7z.dll,我们将两个文件作为嵌入资源打包到 EXE 中,程序启动时自动释放到用户 AppData 目录。
private void ExtractEmbedded7zFiles()
{
if (!Directory.Exists(_appDir))
{
Directory.CreateDirectory(_appDir);
}
ExtractResourceToFile(Resources._7z_exe, "7z.exe", _appDir);
ExtractResourceToFile(Resources._7z_dll, "7z.dll", _appDir);
}
private static void ExtractResourceToFile(byte[] bytes, string resourceName, string outputPath)
{
var file = Path.Combine(outputPath, resourceName);
using (FileStream fileStream = new FileStream(file, FileMode.Create, FileAccess.Write))
{
fileStream.Write(bytes, 0, bytes.Length);
}
File.SetAttributes(file, FileAttributes.Normal);
}
四、全局命令启动脚本的设计与实现
4.1 为什么需要这三个脚本
ExtractResourceToFile(Resources.openclaw, "openclaw", _npmGlobalInstallPath);
ExtractResourceToFile(Resources.openclaw_ps1, "openclaw.ps1", _npmGlobalInstallPath);
ExtractResourceToFile(Resources.openclaw_cmd, "openclaw.cmd", _npmGlobalInstallPath);
这三个脚本的核心目的是:覆盖 Windows 下的 CMD、PowerShell 以及类 Linux 终端(如 Git Bash)环境,让用户在任何终端都能直接输入openclaw命令,全局调用 OpenClaw 的核心逻辑openclaw.mjs。
4.2 三个脚本的完整实现
4.2.1 类 Linux 终端(Git Bash/MINGW):openclaw(Shell 脚本)
#!/bin/sh
basedir=$(dirname "$(echo "$0" | sed -e 's,\\\\,/,g')")
case `uname` in
*CYGWIN*|*MINGW*|*MSYS*)
if command -v cygpath > /dev/null 2>&1; then
basedir=`cygpath -w "$basedir"`
fi
;;
esac
if [ -x "$basedir/node" ]; then
exec "$basedir/node" "$basedir/node_modules/openclaw/openclaw.mjs" "$@"
else
exec node "$basedir/node_modules/openclaw/openclaw.mjs" "$@"
fi
核心设计细节:
- 路径处理:通过sed将 Windows 路径的\\转为/,适配类 Unix 终端;同时兼容 CYGWIN/MINGW/MSYS,通过cygpath转换路径。
- Node.js 优先级:优先使用脚本所在目录的node,确保版本一致性;不存在则调用系统全局node。
- 参数透传:通过$@完整透传所有命令行参数。
4.2.2 Windows CMD 终端:openclaw.cmd
@ECHO off
GOTO start
:find_dp0
SET dp0=%~dp0
EXIT /b
:start
SETLOCAL
CALL :find_dp0
IF EXIST "%dp0%\\node.exe" (
SET "_prog=%dp0%\\node.exe"
) ELSE (
SET "_prog=node"
SET PATHEXT=%PATHEXT:;.JS;=;%
)
endLocal & goto #_undefined_# 2>NUL || title %COMSPEC% & "%_prog%" "%dp0%\\node_modules\\openclaw\\openclaw.mjs" %*
核心设计细节:
- 路径定位:通过:find_dp0获取脚本所在绝对路径%~dp0。
- 兼容处理:优先使用本地node.exe,否则调用全局node,并临时移除PATHEXT中的.JS后缀。
- 参数透传:通过%*完整透传所有命令行参数。
4.2.3 Windows PowerShell 终端:openclaw.ps1
#!/usr/bin/env pwsh
$basedir=Split-Path $MyInvocation.MyCommand.Definition -Parent
$exe=""
if ($PSVersionTable.PSVersion -lt "6.0" -or $IsWindows) {
$exe=".exe"
}
$ret=0
if (Test-Path "$basedir/node$exe") {
if ($MyInvocation.ExpectingInput) {
$input | & "$basedir/node$exe" "$basedir/node_modules/openclaw/openclaw.mjs" $args
} else {
& "$basedir/node$exe" "$basedir/node_modules/openclaw/openclaw.mjs" $args
}
$ret=$LASTEXITCODE
} else {
if ($MyInvocation.ExpectingInput) {
$input | & "node$exe" "$basedir/node_modules/openclaw/openclaw.mjs" $args
} else {
& "node$exe" "$basedir/node_modules/openclaw/openclaw.mjs" $args
}
$ret=$LASTEXITCODE
}
exit $ret
核心设计细节:
- 版本 / 系统适配:检测 PowerShell 版本或 Windows 系统,为node追加.exe后缀。
- 管道输入支持:通过$MyInvocation.ExpectingInput判断并传递管道输入。
- 退出码透传:捕获并返回$LASTEXITCODE。
五、工程化单文件打包
我们的设计目标是最终打包为单个 EXE 文件,用户下载即可运行,无需任何额外的依赖。但我们的程序引用了 AntdUI 等第三方库,编译后会生成多个 DLL 文件,如果只把 EXE 发给用户,会出现「缺少 dll 无法运行」的错误。
Costura.Fody 就是用来解决这个问题的,它可以将所有引用的托管 DLL 嵌入到最终的 EXE 中,程序启动时自动从资源中加载对应的程序集,实现真正的单文件分发。
Costura.Fody 工作原理
🔍 技术科普:Costura.Fody 是基于 Fody 的一个织入组件,它在编译时会做以下事情:
接入与配置步骤
最佳实践与避坑指南
⚠️ 踩坑实录:很多开发者会忘记将非托管 DLL 作为嵌入资源释放,导致程序在开发环境能正常运行,发给用户后,出现「无法加载 DLL」的错误。必须记住,Costura.Fody 只能处理托管 DLL,非托管 DLL 需要我们自己处理。
六、总结
本文完整拆解了 OpenClaw 全自动化安装工具的核心实现,涵盖了 Windows 桌面开发、网络编程、进程管理、系统 API 调用、工程化打包等核心技术点。这个工具不仅解决了 OpenClaw 的部署门槛问题,更可以作为通用的 Windows 自动化安装框架,适配其他工具的部署需求。
写在最后
Windows 桌面开发看似简单,但实际上有非常多的底层细节和坑,只有真正理解 Windows 系统的底层机制,才能开发出稳定、易用、兼容性强的桌面程序。
希望本书能帮助你掌握 Windows 自动化安装程序的开发技巧,也希望你能基于这个框架,开发出更多优秀的工具,降低普通用户使用开源软件的门槛。
如果本文对你有帮助,欢迎点赞、收藏、评论,你的支持是我持续分享的动力!