提示:文章写完后,目录可以自动生成,如何生成可参考右边的帮助文档
文章目录
- 前言
- 一、下载 MSYS2并配置环境
-
- 1.下载 MSYS2
- 2.配置MSYS2环境
- 3.配置 Windows 环境变量
- 二、下载 VS code
前言
MSYS2是GCC的“安装器”,Windows环境变量是让系统能找到GCC的“路标”,VS Code是调用GCC来编译代码的“工位”,而C语言代码则是这一切操作的核心“原材料”。下面我们将安装MSYS2 与VS code并配置Windows 环境变量。
#mermaid-svg-FHumutxPmQLOg9wE{font-family:\”trebuchet ms\”,verdana,arial,sans-serif;font-size:16px;fill:#333;}@keyframes edge-animation-frame{from{stroke-dashoffset:0;}}@keyframes dash{to{stroke-dashoffset:0;}}#mermaid-svg-FHumutxPmQLOg9wE .edge-animation-slow{stroke-dasharray:9,5!important;stroke-dashoffset:900;animation:dash 50s linear infinite;stroke-linecap:round;}#mermaid-svg-FHumutxPmQLOg9wE .edge-animation-fast{stroke-dasharray:9,5!important;stroke-dashoffset:900;animation:dash 20s linear infinite;stroke-linecap:round;}#mermaid-svg-FHumutxPmQLOg9wE .error-icon{fill:#552222;}#mermaid-svg-FHumutxPmQLOg9wE .error-text{fill:#552222;stroke:#552222;}#mermaid-svg-FHumutxPmQLOg9wE .edge-thickness-normal{stroke-width:1px;}#mermaid-svg-FHumutxPmQLOg9wE .edge-thickness-thick{stroke-width:3.5px;}#mermaid-svg-FHumutxPmQLOg9wE .edge-pattern-solid{stroke-dasharray:0;}#mermaid-svg-FHumutxPmQLOg9wE .edge-thickness-invisible{stroke-width:0;fill:none;}#mermaid-svg-FHumutxPmQLOg9wE .edge-pattern-dashed{stroke-dasharray:3;}#mermaid-svg-FHumutxPmQLOg9wE .edge-pattern-dotted{stroke-dasharray:2;}#mermaid-svg-FHumutxPmQLOg9wE .marker{fill:#333333;stroke:#333333;}#mermaid-svg-FHumutxPmQLOg9wE .marker.cross{stroke:#333333;}#mermaid-svg-FHumutxPmQLOg9wE svg{font-family:\”trebuchet ms\”,verdana,arial,sans-serif;font-size:16px;}#mermaid-svg-FHumutxPmQLOg9wE p{margin:0;}#mermaid-svg-FHumutxPmQLOg9wE g.classGroup text{fill:#9370DB;stroke:none;font-family:\”trebuchet ms\”,verdana,arial,sans-serif;font-size:10px;}#mermaid-svg-FHumutxPmQLOg9wE g.classGroup text .title{font-weight:bolder;}#mermaid-svg-FHumutxPmQLOg9wE .cluster-label text{fill:#333;}#mermaid-svg-FHumutxPmQLOg9wE .cluster-label span{color:#333;}#mermaid-svg-FHumutxPmQLOg9wE .cluster-label span p{background-color:transparent;}#mermaid-svg-FHumutxPmQLOg9wE .cluster rect{fill:#ffffde;stroke:#aaaa33;stroke-width:1px;}#mermaid-svg-FHumutxPmQLOg9wE .cluster text{fill:#333;}#mermaid-svg-FHumutxPmQLOg9wE .cluster span{color:#333;}#mermaid-svg-FHumutxPmQLOg9wE .nodeLabel,#mermaid-svg-FHumutxPmQLOg9wE .edgeLabel{color:#131300;}#mermaid-svg-FHumutxPmQLOg9wE .edgeLabel .label rect{fill:#ECECFF;}#mermaid-svg-FHumutxPmQLOg9wE .label text{fill:#131300;}#mermaid-svg-FHumutxPmQLOg9wE .labelBkg{background:#ECECFF;}#mermaid-svg-FHumutxPmQLOg9wE .edgeLabel .label span{background:#ECECFF;}#mermaid-svg-FHumutxPmQLOg9wE .classTitle{font-weight:bolder;}#mermaid-svg-FHumutxPmQLOg9wE .node rect,#mermaid-svg-FHumutxPmQLOg9wE .node circle,#mermaid-svg-FHumutxPmQLOg9wE .node ellipse,#mermaid-svg-FHumutxPmQLOg9wE .node polygon,#mermaid-svg-FHumutxPmQLOg9wE .node path{fill:#ECECFF;stroke:#9370DB;stroke-width:1px;}#mermaid-svg-FHumutxPmQLOg9wE .divider{stroke:#9370DB;stroke-width:1;}#mermaid-svg-FHumutxPmQLOg9wE g.clickable{cursor:pointer;}#mermaid-svg-FHumutxPmQLOg9wE g.classGroup rect{fill:#ECECFF;stroke:#9370DB;}#mermaid-svg-FHumutxPmQLOg9wE g.classGroup line{stroke:#9370DB;stroke-width:1;}#mermaid-svg-FHumutxPmQLOg9wE .classLabel .box{stroke:none;stroke-width:0;fill:#ECECFF;opacity:0.5;}#mermaid-svg-FHumutxPmQLOg9wE .classLabel .label{fill:#9370DB;font-size:10px;}#mermaid-svg-FHumutxPmQLOg9wE .relation{stroke:#333333;stroke-width:1;fill:none;}#mermaid-svg-FHumutxPmQLOg9wE .dashed-line{stroke-dasharray:3;}#mermaid-svg-FHumutxPmQLOg9wE .dotted-line{stroke-dasharray:1 2;}#mermaid-svg-FHumutxPmQLOg9wE #compositionStart,#mermaid-svg-FHumutxPmQLOg9wE .composition{fill:#333333!important;stroke:#333333!important;stroke-width:1;}#mermaid-svg-FHumutxPmQLOg9wE #compositionEnd,#mermaid-svg-FHumutxPmQLOg9wE .composition{fill:#333333!important;stroke:#333333!important;stroke-width:1;}#mermaid-svg-FHumutxPmQLOg9wE #dependencyStart,#mermaid-svg-FHumutxPmQLOg9wE .dependency{fill:#333333!important;stroke:#333333!important;stroke-width:1;}#mermaid-svg-FHumutxPmQLOg9wE #dependencyStart,#mermaid-svg-FHumutxPmQLOg9wE .dependency{fill:#333333!important;stroke:#333333!important;stroke-width:1;}#mermaid-svg-FHumutxPmQLOg9wE #extensionStart,#mermaid-svg-FHumutxPmQLOg9wE .extension{fill:transparent!important;stroke:#333333!important;stroke-width:1;}#mermaid-svg-FHumutxPmQLOg9wE #extensionEnd,#mermaid-svg-FHumutxPmQLOg9wE .extension{fill:transparent!important;stroke:#333333!important;stroke-width:1;}#mermaid-svg-FHumutxPmQLOg9wE #aggregationStart,#mermaid-svg-FHumutxPmQLOg9wE .aggregation{fill:transparent!important;stroke:#333333!important;stroke-width:1;}#mermaid-svg-FHumutxPmQLOg9wE #aggregationEnd,#mermaid-svg-FHumutxPmQLOg9wE .aggregation{fill:transparent!important;stroke:#333333!important;stroke-width:1;}#mermaid-svg-FHumutxPmQLOg9wE #lollipopStart,#mermaid-svg-FHumutxPmQLOg9wE .lollipop{fill:#ECECFF!important;stroke:#333333!important;stroke-width:1;}#mermaid-svg-FHumutxPmQLOg9wE #lollipopEnd,#mermaid-svg-FHumutxPmQLOg9wE .lollipop{fill:#ECECFF!important;stroke:#333333!important;stroke-width:1;}#mermaid-svg-FHumutxPmQLOg9wE .edgeTerminals{font-size:11px;line-height:initial;}#mermaid-svg-FHumutxPmQLOg9wE .classTitleText{text-anchor:middle;font-size:18px;fill:#333;}#mermaid-svg-FHumutxPmQLOg9wE .label-icon{display:inline-block;height:1em;overflow:visible;vertical-align:-0.125em;}#mermaid-svg-FHumutxPmQLOg9wE .node .label-icon path{fill:currentColor;stroke:revert;stroke-width:revert;}#mermaid-svg-FHumutxPmQLOg9wE :root{–mermaid-font-family:\”trebuchet ms\”,verdana,arial,sans-serif;}
输入
集成调用
使命令全局可用
提供/安装
自动配置路径
«C语言开发环境»
开发工具链
«设计图纸»
C语言代码
描述程序逻辑
源文件: hello.c
«施工队»
编译器GCC
编译: .c -> .exe
链接: 生成可执行文件
«办公桌+工具箱»
VSCode
语法高亮
自动补全
代码导航
调试集成
«道路与路标系统»
Windows环境变量
PATH搜索路径
系统级工具定位
«物流与仓储中心»
MSYS2
安装GCC
更新工具链
管理Linux风格工具
一、下载 MSYS2并配置环境
1.下载 MSYS2
下载链接: https://www.msys2.org/
安装 X86版本
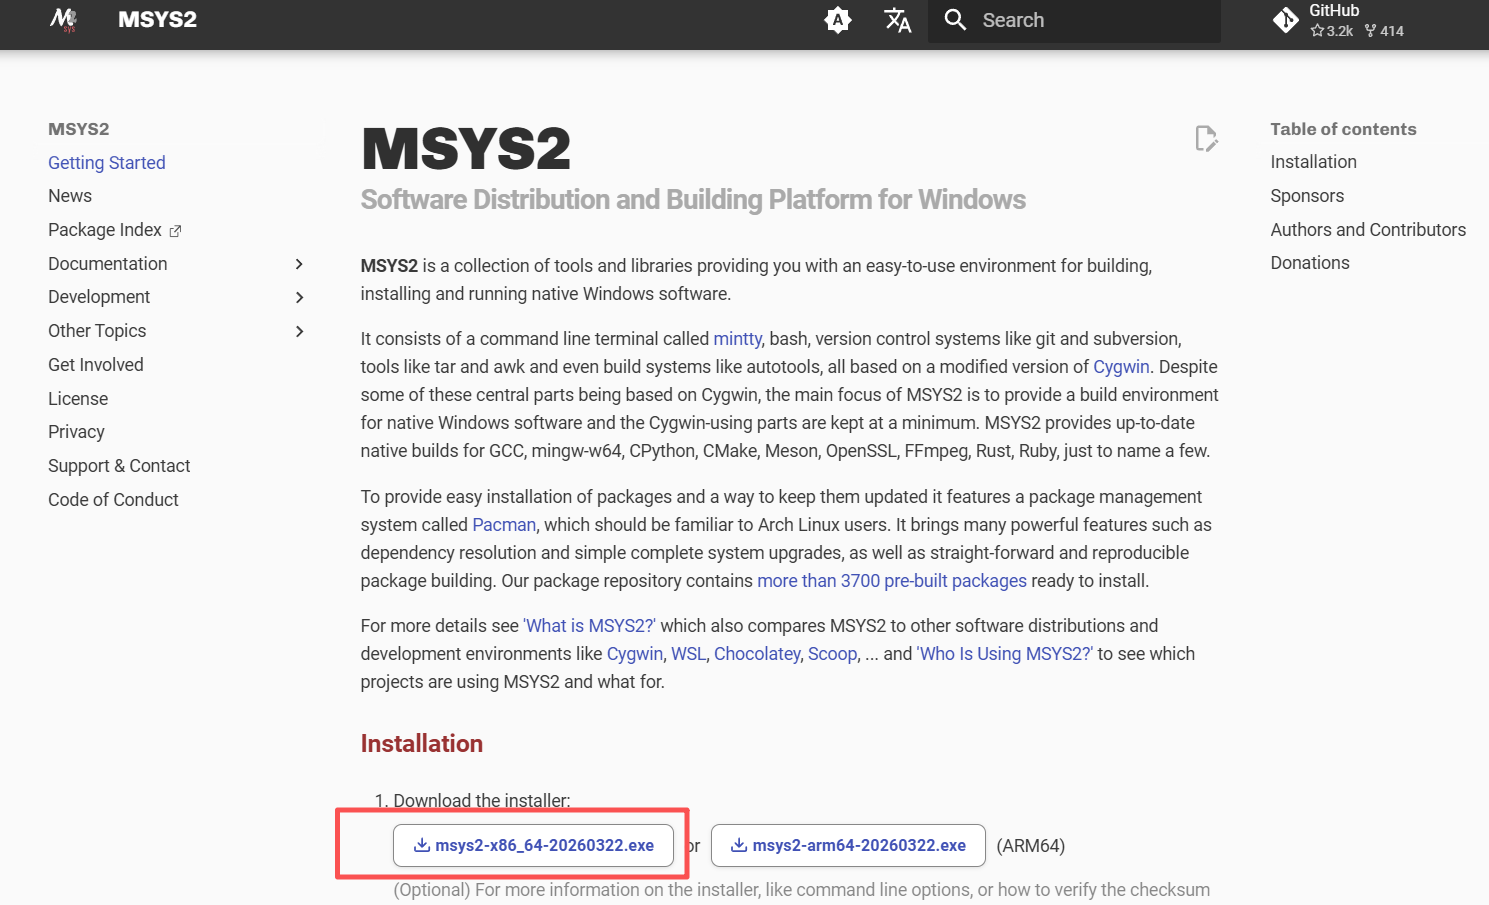
在下载中找到下载的应用程序,双击进行下载。

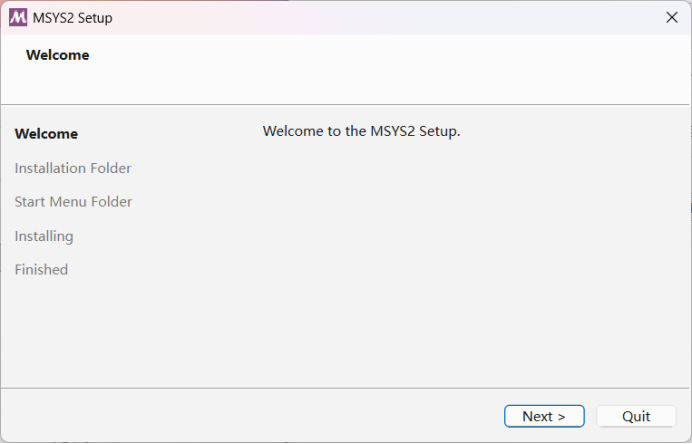
点击next
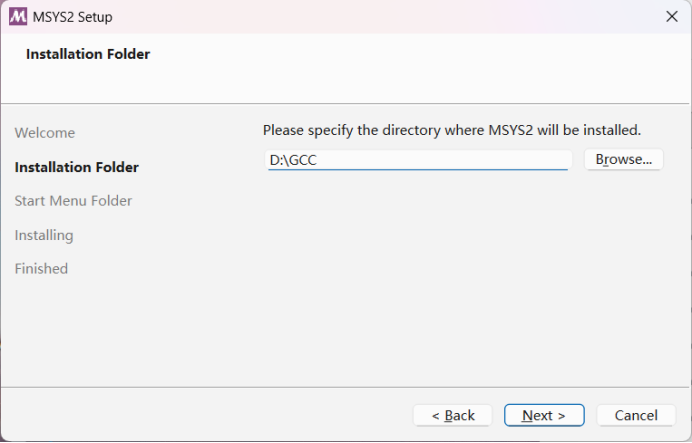
选择安装的位置
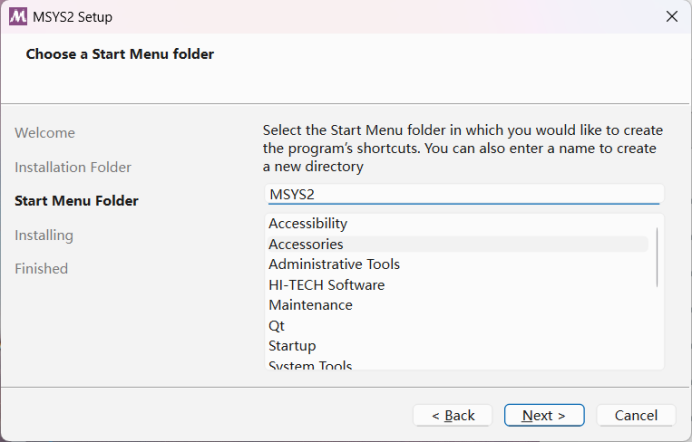
点击next
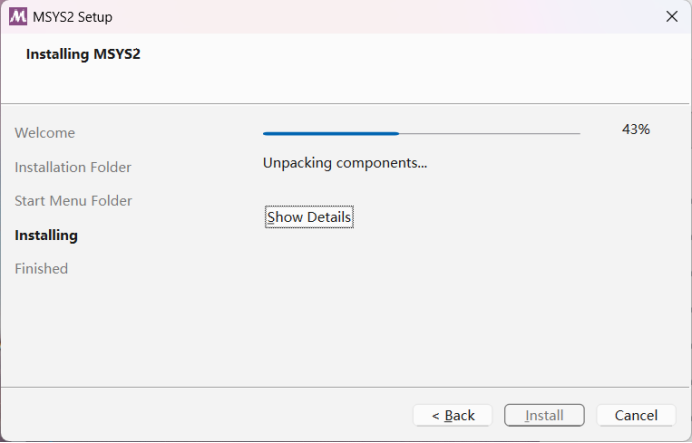
点击install
点击next
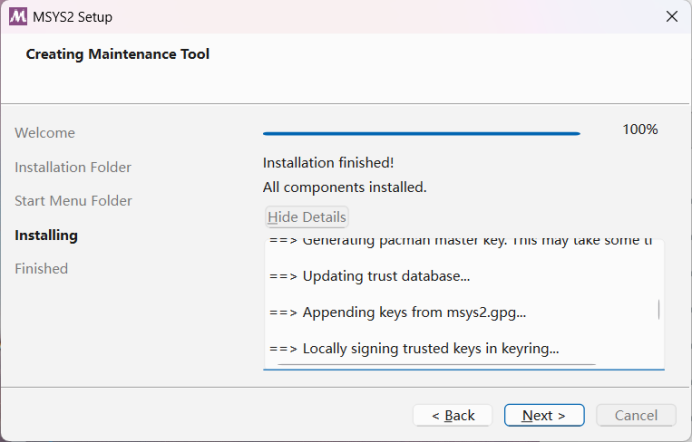
点击finish
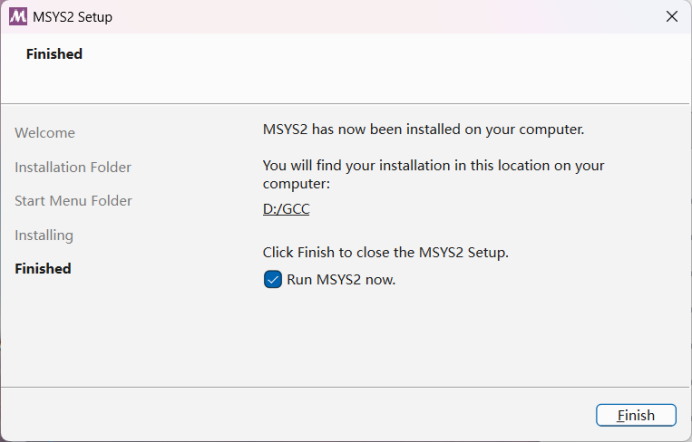
2.配置MSYS2环境
打开 MSYS2 终端,输入命令:notepad /etc/pacman.d/mirrorlist.mingw,编辑镜像配置文件。
notepad /etc/pacman.d/mirrorlist.mingw
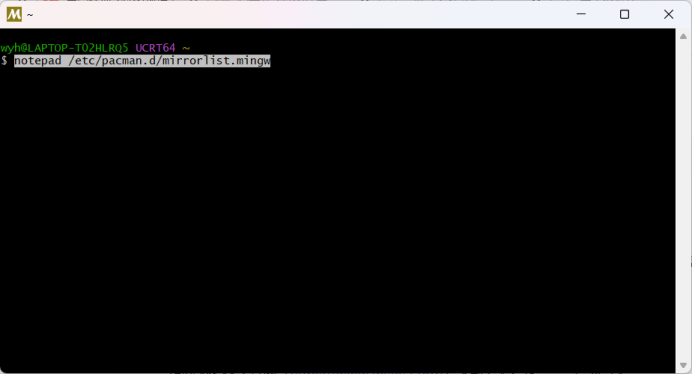 在文件开头添加清华镜像源:
Server = https://mirrors.tuna.tsinghua.edu.cn/msys2/mingw/$repo/
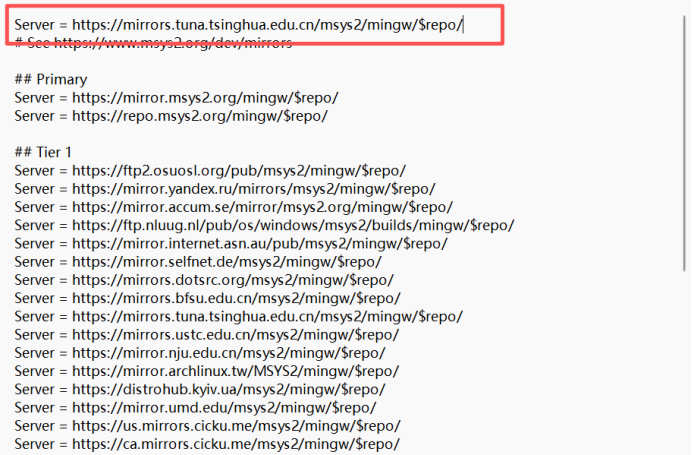 更换为国内镜像源,在终端中依次执行下面的三条命令。每条命令执行后,如果提示输入密码,直接按回车就行。 1.配置 MSYS 核心源
echo "Server = https://mirrors.tuna.tsinghua.edu.cn/msys2/msys/\\$arch" > /etc/pacman.d/mirrorlist.msys
2.配置 32位 兼容工具链源
echo "Server = https://mirrors.tuna.tsinghua.edu.cn/msys2/mingw/i686" > /etc/pacman.d/mirrorlist.mingw32
echo "Server = https://mirrors.tuna.tsinghua.edu.cn/msys2/mingw/x86_64" > /etc/pacman.d/mirrorlist.mingw64
 更新软件包数据库并重新安装 1.输入:pacman -Sy,更新包数据库
pacman -Sy
 2.安装 GCC 工具链
pacman -S –needed base-devel mingw-w64-ucrt-x86_64-toolchain
在看到 Enter a selection (default=all): 的提示时,直接按回车键即可。 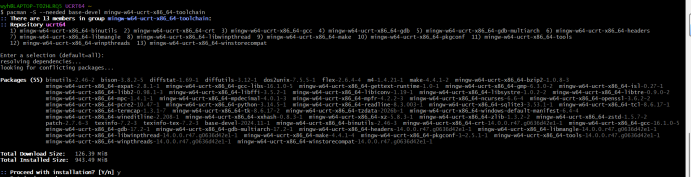 3.验证安装 在同一个终端中,输入以下命令,能看到 GCC 的版本信息就是成功了。
gcc –version

3.配置 Windows 环境变量
为了能在 VS Code 或任何命令行里都能直接使用 gcc 命令,需要配置一下 Windows 系统变量。在 Windows 的搜索框里搜“环境变量”来打开设置界面。 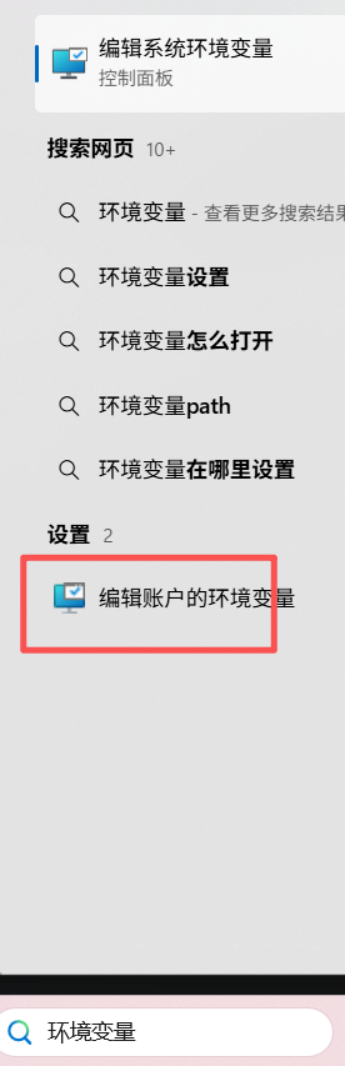
双击path
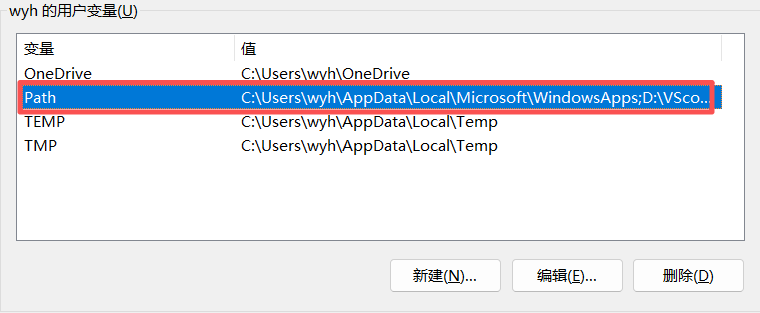
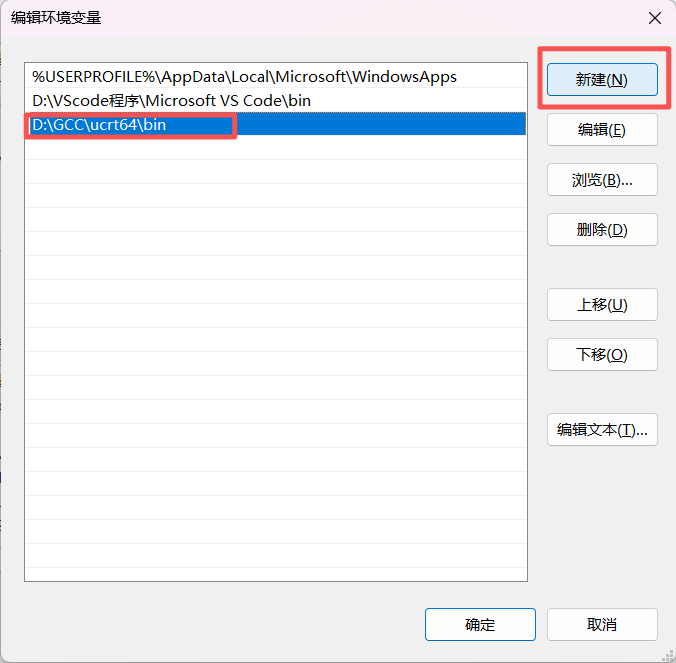
点击新建,然后输入MSYS2的下载路径中bin文件的路径
二、下载 VS code
下载链接: https://code.visualstudio.com/download/
安装 System installer版本
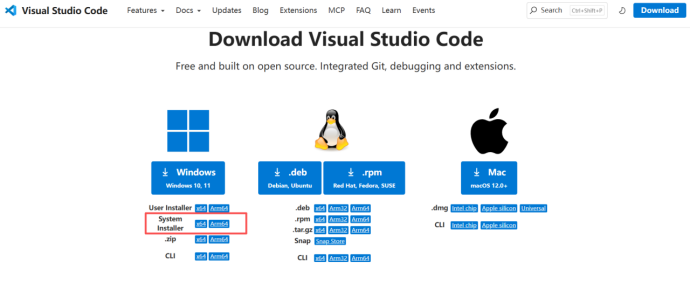 下载过程不过多阐述了,按照类似于MSYS2的步骤进行下载,下载后打开VS code
安装C/C++ Extension Pack ,C/C++ Extension Pack 安装后的作用是它会自动帮你装上下面这些扩展: C/C++ (核心):提供代码补全、调试、语法高亮等功能,是必需的基础。 C/C++ Themes (主题):提供更细致的代码颜色主题。 CMake 和 CMake Tools (构建工具):用于管理复杂的C/C++项目。 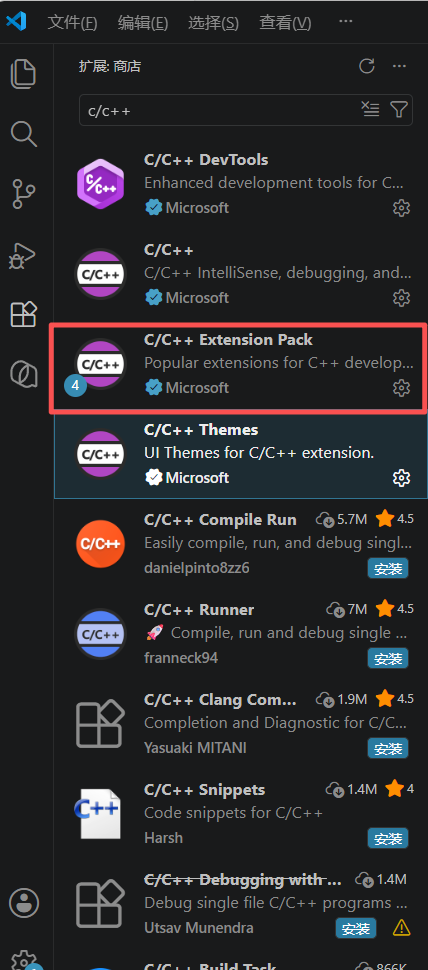
新建一个文件夹
点击文件,选择打开文件夹,选择自己刚才新建的文件夹

点击新建文件

命名为hello.c
 复制这段代码到文件中
#include <stdio.h>
int main() {
printf("Hello, World!\\n");
return 0;
}

ctrl+s保存后,点击终端,选择新建终端

在下方出现终端
 在终端中输入gcc hello.c -o hello.exe后enter,会出现一个exe的可执行文件
gcc hello.c -o hello.exe
在这里插入代码片
输入 : .\\hello.exe后就会打印出Hello, World!,恭喜你运行了你的第一个C语言程序。
.\\hello.exe