想在Utools上插件用weble,它采用的是chromium内核,但是Electron 默认不会弹出设备选择窗口,注意node_modules要在utools进去,不然用node库,还是用不了,直接使用web-ble那就会报用户取消选择的错误,所以overflower一下,发现这个问题是一直有的,找到了方案:2022 年 Electron 应用中使用 Web Bluetooth,同时Electron官方也给出案例的使用,关键点就是没有弹出窗口,要在main程序中拦截"select-bluetooth-device"事件,然后手动处理,官方也不提供只能自己写。
一、Electron的Web Bluetooth
要实现不让它自动取消,就要手动拦截取消自动处理,然后通过preload为中间组件,发送出去,代码如下:
// 在主进程捕获 Web Bluetooth 请求
mainWindow.webContents.on("select-bluetooth-device", (event, deviceList, callback) => {
event.preventDefault();// 禁止默认系统选择弹窗
// 保存回调函数以便稍后使用
selectCallback = callback;
// 把设备列表发给渲染进程
win.webContents.send("ble-device-list", deviceList);
console.log("Bluetooth device list dispatched.");
});
// 当用户在自定义窗口选择了连接设备
ipcMain.on("ble-device-selected", (_evt, deviceId) => {
console.log("Choose the Device ID: ${deviceId}.");
bluetoothCallback(deviceId);
});
// 用户取消选择
ipcMain.on("ble-device-cancel", () => {
console.log("User cancelled the requestDevice().");
bluetoothCallback('');
});
preload.js为中间组件,代码如下:
const { contextBridge, ipcRenderer } = require("electron");
contextBridge.exposeInMainWorld("electronAPI", {
onBLEDeviceList: (callback) => ipcRenderer.on("ble-device-list", callback),
selectBLEDevice: (deviceId) => ipcRenderer.send("ble-device-selected", deviceId),
cancelBLEDevice: () => ipcRenderer.send("ble-device-cancel"),
});
在render.js调用中间件,代码如下:
const listEl = document.getElementById("device-list");
const scenBtn = document.getElementById("scenBtn");
const selectBtn = document.getElementById("select");
const cancelBtn = document.getElementById("cancel");
let selectedDeviceId = null;
listEl.addEventListener("change", () => {
selectedDeviceId = listEl.value;
console.log("当前选中:", selectedDeviceId);
});
selectBtn.addEventListener("click", () => {
if (!selectedDeviceId) {
alert("请先选择一个设备");
return;
}
console.log("用户选中:", selectedDeviceId);
window.electronAPI?.selectBLEDevice(selectedDeviceId);
});
cancelBtn.addEventListener("click", ()=>{
if(!selectedDeviceId)return;
window.electronAPI?.cancelBLEDevice();
listEl.innerHTML = "";
selectedDeviceId=null;
});
scenBtn.addEventListener("click", async () => {
try {
console.log("开始连接");
// 1. 请求 BLE 设备
const device = await navigator.bluetooth.requestDevice({
acceptAllDevices: true,
});
console.log('设备:', device.name);
} catch (err) {
console.error("❌ 请求失败:", err);
}
});
// 监听主进程发送的设备列表
window.electronAPI?.onBLEDeviceList((_evt, deviceList) => {
// 清空旧选项(可选)
listEl.innerHTML = "";
deviceList.forEach(device => {
const option = document.createElement("option");
option.value = device.deviceId; // 选项值
option.textContent = `${device.deviceName || "未知设备"} (${device.deviceId})`; // 显示的文字
listEl.appendChild(option);
});
// 确保 UI 刷新
listEl.value = selectedDeviceId || deviceList[0]?.deviceId || "";
});
二、Node的abandonware/noble库的使用
为什么解决了electron的webble,又要继续用node包,因为这utools是electron写的,主程序的main插件是接触不到的,要不是utools自己支持不然就实现不了,解决方案还是node库现实一点,这个nobel好像还行,但不维护了所以用abandonware/noble库,参考的是:electron nodejs 检测蓝牙适配器可行方案与npm 包 @abandonware/noble 使用教程,这个感觉能用是能,但很奇怪第一次扫描扫不出名称,再次扫可以出来所以它是没有初始化,这就很坑,感觉有用也不好用,preload.js代码如下:
const noble = require('@abandonware/noble');
noble.on('stateChange', async (state) => {
if (state === 'poweredOn') {
await noble.startScanningAsync([],false);//初始化,[] = 所有服务,true = 允许重复广播
}
});
let targetDevice=null;
window.services = {
startScanning: () => {
noble.startScanningAsync();
},
};
var _gatt;
var _service;
var _deviceName;
var _chrct_cube;
var UUID_SUFFIX = '-0000-1000-8000-00805f9b34fb';
var SERVICE_UUID = '0000fff0' + UUID_SUFFIX;
var CHRCT_UUID_CUBE = '0000fff6' + UUID_SUFFIX;
const TARGET_NAME = 'QY-QYSC-S-D2D3';
noble.on('discover', async (peripheral)=> {
const deviceName= `${peripheral.advertisement.localName || "未知设备"} (${peripheral.address})`;
console.log('发现设备,名称:', deviceName);
if (TARGET_NAME === peripheral.advertisement.localName) {
await noble.stopScanningAsync();
console.log('找到目标设备,停止扫描,准备连接…');
try {
console.log("开始连接");
await peripheral.connectAsync();
// // 发现指定服务和特征
// const { services, characteristics } = await peripheral.discoverSomeServicesAndCharacteristicsAsync(
// [SERVICE_UUID],
// [CHRCT_UUID_CUBE]
// );
const services=await peripheral.discoverServicesAsync([SERVICE_UUID]);
const characteristics=await services[0].discoverCharacteristicsAsync([CHRCT_UUID_CUBE]);
console.log('找到服务:', services[0]);
const cubeChar = characteristics[0];
console.log('找到特征:', cubeChar);
// ========== 订阅通知(noble 方式)==========
if (cubeChar.properties.includes('notify') || cubeChar.properties.includes('indicate')) {
cubeChar.on('data', (data, isNotification) => {
console.log('收到数据:', data.toString('hex'));
onCubeEvent(data); // 你的处理函数
});
await cubeChar.subscribeAsync();
console.log('已订阅通知');
} else {
console.log('特征不支持通知');
}
console.log('连接成功!');
} catch (err) {
console.error("❌ 请求失败:", err);
}
}
});
而调用也很方便,代码如下:
$(function(){
const $listEl = $('#device-list');
const $scenBtn = $('#scenBtn');
const $selectBtn = $('#select');
const $cancelBtn = $('#cancel');
$scenBtn.click(function(){
console.log(" 开始写 jQuery 代码");
window.services.startScanning();
});
//…
});
三、Node的webbluetooth库的使用
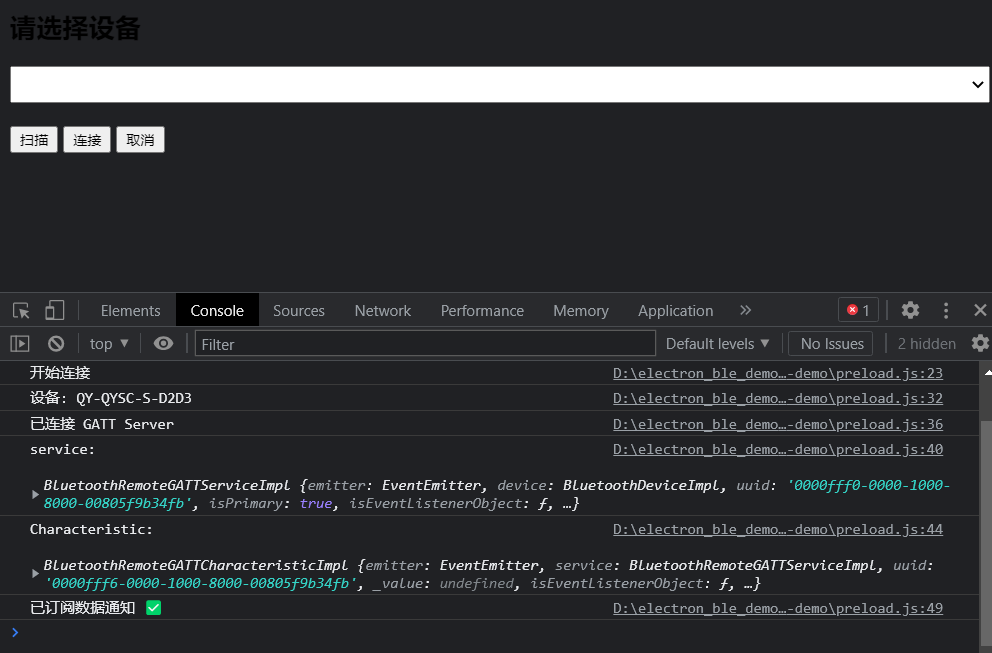
这才是真正可行的解决方案,Node.js 实现的 Web Bluetooth 规范的Type Script库,先是utools导入npm库,它的github为Node Web Bluetooth,好用可以点start支持,还有npm 包与官方文档的参考,这才是现代化的库,与原版本webble用法一样,只要将变量名换一下就可以了,这库确实好用,代码如下:
const bluetooth = require('webbluetooth').bluetooth;
console.log("蓝牙ble测试");
var _gatt;
var _service;
var _deviceName;
var _chrct_cube;
var UUID_SUFFIX = '-0000-1000-8000-00805f9b34fb';
var SERVICE_UUID = '0000fff0' + UUID_SUFFIX;
var CHRCT_UUID_CUBE = '0000fff6' + UUID_SUFFIX;
var decoder = null;
var deviceMac = 'CC:A3:00:00:D2:D3';
var KEYS = ['NoDg7ANAjGkEwBYCc0xQnADAVgkzGAzHNAGyRTanQi5QIFyHrjQMQgsC6QA'];
async function connect() {
console.log("开始连接");
// 1. 请求 BLE 设备
const device = await bluetooth.requestDevice({
filters: [{
name: 'QY-QYSC-S-D2D3'
}],
optionalServices: [SERVICE_UUID] // 这里加上你要访问的所有 service UUID
});
console.log('设备:', device.name);
// 2. 连接 GATT 服务
const server = await device.gatt.connect();
console.log('已连接 GATT Server');
// 3. 获取 Service
const service = await server.getPrimaryService(SERVICE_UUID);
console.log('service:\\n',service);
// 4. 获取 Characteristic
const characteristic = await service.getCharacteristic(CHRCT_UUID_CUBE);
console.log('Characteristic:\\n', characteristic);
// 5. 订阅数据通知
_chrct_cube=await characteristic.startNotifications();
_chrct_cube.addEventListener('characteristicvaluechanged', onCubeEvent);
console.log('已订阅数据通知 ✅');
}
window.services = {
startScanning:async () => {
connect();
},
};
//数据处理函数
function onCubeEvent(event) {
console.log("aaaaaaaaaaaaaaaa");
}
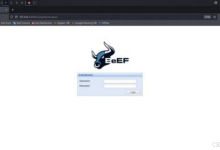
在Utools上用这个库的实现,如下图所示:
最后,写个ble-Demo一个是utools的,另一个electron的拦截实现,都要npm install然后,一个npm start另一个用utools选择:electron_ble_demo https://github.com/10555gff/electron_ble_demo