👋 大家好,欢迎来到我的技术博客! 📚 在这里,我会分享学习笔记、实战经验与技术思考,力求用简单的方式讲清楚复杂的问题。 🎯 本文将围绕NumPy这个话题展开,希望能为你带来一些启发或实用的参考。 🌱 无论你是刚入门的新手,还是正在进阶的开发者,希望你都能有所收获!
文章目录
- Python NumPy – 数组的维度压缩 squeeze 删除单维度 📊
-
- 什么是单维度?🤔
- squeeze() 方法详解 🔍
-
- 基础用法示例 💡
- 实际应用场景 🚀
-
- 数据预处理中的维度管理
- 图像处理中的维度调整
- 科学计算中的维度优化
- 高级用法和技巧 ⚡
-
- 条件性 squeeze 操作
- 批量处理中的应用
- 错误处理和最佳实践 🛡️
-
- 常见错误及解决方案
- 性能考虑 💨
- 与其他维度操作的对比 🔄
- 实际项目案例研究 📈
-
- 机器学习模型输出处理
- 数据可视化准备
- 内存管理和效率优化 💾
-
- 内存视图 vs 副本
- 大规模数据处理优化
- 与其他库的集成 🤝
-
- 与Pandas的结合使用
- 与Matplotlib的配合
- 最佳实践总结 ✅
- 性能基准测试 📊
- 常见问题解答 ❓
-
- Q1: squeeze会改变数组的数据吗?
- Q2: 什么时候应该使用squeeze?
- Q3: squeeze和reshape有什么区别?
- 结语 🎯
Python NumPy – 数组的维度压缩 squeeze 删除单维度 📊
在数据科学和机器学习的世界中,NumPy 作为 Python 生态系统中最基础也是最重要的库之一,为我们提供了强大的多维数组操作能力。今天我们要探讨的是一个看似简单但实际应用非常广泛的 NumPy 方法 —— squeeze()。这个方法专门用于删除数组中的单维度条目,也就是那些大小为1的维度。
什么是单维度?🤔
在深入学习 squeeze() 方法之前,让我们先理解什么是"单维度"。在 NumPy 中,数组的每个维度都有一个大小,当某个维度的大小为1时,我们就称这个维度为单维度。
import numpy as np
# 创建不同形状的数组来演示维度概念
arr_1d = np.array([1, 2, 3, 4, 5])
print(f"一维数组形状: {arr_1d.shape}") # (5,)
arr_2d = np.array([[1, 2, 3], [4, 5, 6]])
print(f"二维数组形状: {arr_2d.shape}") # (2, 3)
# 创建包含单维度的数组
arr_single_dim = np.array([[[[1, 2, 3]]]]) # 形状为 (1, 1, 1, 3)
print(f"包含单维度的数组形状: {arr_single_dim.shape}") # (1, 1, 1, 3)
# 另一个例子:行向量和列向量
row_vector = np.array([[1, 2, 3]]) # 形状为 (1, 3)
col_vector = np.array([[1], [2], [3]]) # 形状为 (3, 1)
print(f"行向量形状: {row_vector.shape}")
print(f"列向量形状: {col_vector.shape}")
从上面的例子可以看出,当我们处理数据时经常会遇到包含单维度的情况。这些单维度有时是必要的(比如保持矩阵运算的一致性),但在某些情况下我们可能希望去掉它们以简化数据结构。
squeeze() 方法详解 🔍
numpy.squeeze() 是 NumPy 提供的一个非常实用的方法,它的主要功能是从数组的形状中移除长度为1的维度。让我们来看看它的基本语法:
numpy.squeeze(a, axis=None)
参数说明:
- a: 输入数组
- axis: 可选参数,指定要删除的单维度。如果不指定,则删除所有长度为1的维度
返回值:去除单维度后的新数组视图,如果原数组没有单维度则返回原数组本身。
基础用法示例 💡
让我们通过一些具体的例子来理解 squeeze() 的工作原理:
import numpy as np
# 示例1:删除所有单维度
original_array = np.array([[[1, 2, 3]]]) # 形状为 (1, 1, 3)
print(f"原始数组形状: {original_array.shape}")
squeezed_array = np.squeeze(original_array)
print(f"squeeze后的数组形状: {squeezed_array.shape}")
print(f"squeeze后的数组内容: {squeezed_array}")
# 示例2:只删除特定轴上的单维度
array_with_multiple_singles = np.array([[[[5, 6, 7, 8]]]]) # 形状为 (1, 1, 1, 4)
print(f"\\n原始数组形状: {array_with_multiple_singles.shape}")
# 只删除第0轴的单维度
partial_squeeze = np.squeeze(array_with_multiple_singles, axis=0)
print(f"只删除axis=0后的形状: {partial_squeeze.shape}")
# 只删除第1轴的单维度(注意这里的索引)
try:
partial_squeeze_axis1 = np.squeeze(array_with_multiple_singles, axis=1)
print(f"只删除axis=1后的形状: {partial_squeeze_axis1.shape}")
except ValueError as e:
print(f"错误: {e}")
需要注意的是,当你指定了 axis 参数时,该轴必须确实是长度为1的维度,否则会抛出异常。
实际应用场景 🚀
数据预处理中的维度管理
在机器学习项目中,我们经常需要处理来自不同源的数据,这些数据可能具有不同的维度结构。squeeze() 在这种场景下非常有用:
import numpy as np
# 模拟从数据库或文件读取的数据
def simulate_data_loading():
"""模拟数据加载过程"""
# 假设我们有一个批量处理函数,即使只有一个样本也返回批次维度
single_sample = np.random.rand(1, 28, 28) # 模拟单个图像样本 (1, 28, 28)
return single_sample
# 加载数据
raw_data = simulate_data_loading()
print(f"原始数据形状: {raw_data.shape}")
# 如果我们知道这只是一个样本,可以使用squeeze去除批次维度
processed_data = np.squeeze(raw_data, axis=0)
print(f"处理后数据形状: {processed_data.shape}")
# 这样做可以让后续处理更加直观
print(f"现在可以直接访问像素: processed_data[0][0] = {processed_data[0][0]:.4f}")
图像处理中的维度调整
在计算机视觉任务中,图像数据经常需要在不同的维度表示之间转换:
import numpy as np
# 模拟图像处理管道
def image_processing_pipeline():
"""模拟图像处理流程"""
# 原始RGB图像 (height, width, channels)
image = np.random.randint(0, 256, size=(224, 224, 3), dtype=np.uint8)
# 添加批次维度进行批处理 (batch_size, height, width, channels)
batched_image = np.expand_dims(image, axis=0)
print(f"批处理后图像形状: {batched_image.shape}")
# 经过某些处理后,如果只需要单张图像
if batched_image.shape[0] == 1:
single_image = np.squeeze(batched_image, axis=0)
print(f"提取单张图像后形状: {single_image.shape}")
return single_image
return batched_image
result_image = image_processing_pipeline()
科学计算中的维度优化
在科学计算中,我们经常遇到需要简化数据结构的情况:
import numpy as np
# 模拟物理实验数据分析
def analyze_experiment_data():
"""分析实验数据"""
# 假设有多个传感器的测量数据,但某次实验只有一个时间点
sensor_data = np.random.randn(1, 5, 1) # (时间点数, 传感器数, 测量次数)
print(f"原始传感器数据形状: {sensor_data.shape}")
# 去除单时间点和单测量次数的维度
simplified_data = np.squeeze(sensor_data)
print(f"简化后数据形状: {simplified_data.shape}")
# 现在可以更容易地进行统计分析
mean_values = np.mean(simplified_data, axis=0)
std_values = np.std(simplified_data, axis=0)
print("各传感器统计信息:")
for i, (mean_val, std_val) in enumerate(zip(mean_values, std_values)):
print(f" 传感器{i+1}: 均值={mean_val:.4f}, 标准差={std_val:.4f}")
return simplified_data
experiment_result = analyze_experiment_data()
高级用法和技巧 ⚡
条件性 squeeze 操作
有时候我们需要根据数组的实际形状来决定是否进行 squeeze 操作:
import numpy as np
def conditional_squeeze(arr, axis=None):
"""条件性的squeeze操作"""
if axis is not None:
# 检查指定轴是否为单维度
if arr.shape[axis] == 1:
return np.squeeze(arr, axis=axis)
else:
print(f"警告: 轴{axis}不是单维度,跳过squeeze")
return arr
else:
# 检查是否存在单维度
if 1 in arr.shape:
return np.squeeze(arr)
else:
print("数组中不存在单维度,返回原数组")
return arr
# 测试条件性squeeze
test_arrays = [
np.array([[[1, 2, 3]]]), # 包含单维度
np.array([[1, 2, 3], [4, 5, 6]]), # 不包含单维度
np.array([[[[7, 8]]]]) # 多个单维度
]
for i, arr in enumerate(test_arrays):
print(f"\\n测试数组{i+1}原始形状: {arr.shape}")
result = conditional_squeeze(arr)
print(f"处理后形状: {result.shape}")
批量处理中的应用
在处理批量数据时,squeeze 操作可以帮助我们更好地管理内存和提高效率:
import numpy as np
def process_batch_data(batch_data):
"""处理批量数据并优化存储"""
print(f"输入批量数据形状: {batch_data.shape}")
# 如果批次大小为1,考虑squeeze掉批次维度
if batch_data.shape[0] == 1:
optimized_data = np.squeeze(batch_data, axis=0)
print(f"批次大小为1,优化后形状: {optimized_data.shape}")
return optimized_data
else:
print(f"批次大小为{batch_data.shape[0]},保持原形状")
return batch_data
# 模拟不同批次大小的数据处理
batch_sizes = [1, 5, 1, 10]
for batch_size in batch_sizes:
data = np.random.rand(batch_size, 3, 224, 224) # 模拟图像数据
processed = process_batch_data(data)
print("-" * 40)
错误处理和最佳实践 🛡️
常见错误及解决方案
import numpy as np
# 错误示例1:尝试squeeze非单维度
def demonstrate_errors():
"""演示常见的squeeze错误"""
arr = np.array([[1, 2, 3], [4, 5, 6]]) # 形状为 (2, 3)
print(f"数组形状: {arr.shape}")
try:
# 尝试squeeze不存在的轴
result = np.squeeze(arr, axis=2)
except np.AxisError as e:
print(f"AxisError: {e}")
try:
# 尝试squeeze非单维度轴
result = np.squeeze(arr, axis=0)
except ValueError as e:
print(f"ValueError: {e}")
demonstrate_errors()
# 正确的做法
def safe_squeeze_operations():
"""安全的squeeze操作示例"""
# 使用条件检查
def safe_squeeze(arr, axis=None):
try:
if axis is not None and axis < len(arr.shape):
if arr.shape[axis] == 1:
return np.squeeze(arr, axis=axis)
else:
print(f"轴{axis}不是单维度")
return arr
elif axis is None:
return np.squeeze(arr)
else:
print(f"无效的轴索引: {axis}")
return arr
except Exception as e:
print(f"操作失败: {e}")
return arr
# 测试安全操作
test_arr = np.array([[[1, 2, 3]]])
print(f"测试数组形状: {test_arr.shape}")
result1 = safe_squeeze(test_arr, axis=0) # 安全的操作
result2 = safe_squeeze(test_arr, axis=1) # 不安全的操作
return result1, result2
safe_results = safe_squeeze_operations()
性能考虑 💨
虽然 squeeze() 操作通常很快,但在大规模数据处理中仍需注意性能影响:
import numpy as np
import time
def performance_comparison():
"""比较不同squeeze策略的性能"""
# 创建大型数组进行测试
large_array = np.random.rand(1, 1000, 1000, 1)
print(f"大数组形状: {large_array.shape}")
# 方法1:直接squeeze所有单维度
start_time = time.time()
squeezed_all = np.squeeze(large_array)
time_all = time.time() – start_time
print(f"全部squeeze耗时: {time_all:.6f}秒")
print(f"结果形状: {squeezed_all.shape}")
# 方法2:指定轴squeeze
start_time = time.time()
squeezed_specific = np.squeeze(large_array, axis=0)
squeezed_specific = np.squeeze(squeezed_specific, axis=–1)
time_specific = time.time() – start_time
print(f"指定轴squeeze耗时: {time_specific:.6f}秒")
print(f"最终形状: {squeezed_specific.shape}")
# 方法3:检查后再squeeze
start_time = time.time()
if 1 in large_array.shape:
squeezed_conditional = np.squeeze(large_array)
else:
squeezed_conditional = large_array
time_conditional = time.time() – start_time
print(f"条件squeeze耗时: {time_conditional:.6f}秒")
performance_comparison()
与其他维度操作的对比 🔄
为了更好地理解 squeeze() 的作用,让我们将其与相关的维度操作进行对比:
import numpy as np
# 对比squeeze、expand_dims和reshape
def dimension_operation_comparison():
"""对比不同的维度操作"""
original = np.array([1, 2, 3, 4, 5])
print(f"原始数组形状: {original.shape}")
# expand_dims – 添加维度
expanded = np.expand_dims(original, axis=0)
print(f"expand_dims(axis=0)后: {expanded.shape}")
expanded2 = np.expand_dims(expanded, axis=–1)
print(f"再次expand_dims(axis=-1)后: {expanded2.shape}")
# squeeze – 删除维度
squeezed_back = np.squeeze(expanded2)
print(f"squeeze后恢复到: {squeezed_back.shape}")
# reshape – 重新组织维度
reshaped = np.reshape(original, (1, 5, 1))
print(f"reshape到(1,5,1): {reshaped.shape}")
fully_squeezed = np.squeeze(reshaped)
print(f"完全squeeze后: {fully_squeezed.shape}")
dimension_operation_comparison()
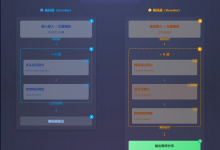
渲染错误: Mermaid 渲染失败: Parse error on line 2: …TD A[原始数组 shape=(5,)] –> B[expand_d ———————-^ Expecting 'SQE', 'DOUBLECIRCLEEND', 'PE', '-)', 'STADIUMEND', 'SUBROUTINEEND', 'PIPE', 'CYLINDEREND', 'DIAMOND_STOP', 'TAGEND', 'TRAPEND', 'INVTRAPEND', 'UNICODE_TEXT', 'TEXT', 'TAGSTART', got 'PS'
实际项目案例研究 📈
机器学习模型输出处理
在深度学习中,模型的输出往往包含不必要的维度,需要通过 squeeze 操作进行清理:
import numpy as np
class ModelOutputProcessor:
"""模型输出处理器"""
def __init__(self):
self.processing_log = []
def process_classification_output(self, model_output):
"""处理分类模型输出"""
self.processing_log.append(f"接收到模型输出,形状: {model_output.shape}")
# 分类模型输出通常是 (batch_size, num_classes)
# 如果batch_size=1,我们可以squeeze掉批次维度
if model_output.shape[0] == 1:
squeezed_output = np.squeeze(model_output, axis=0)
self.processing_log.append(f"Squeeze后形状: {squeezed_output.shape}")
# 获取预测类别
predicted_class = np.argmax(squeezed_output)
confidence = np.max(squeezed_output)
self.processing_log.append(f"预测类别: {predicted_class}, 置信度: {confidence:.4f}")
return predicted_class, confidence
return model_output
def process_regression_output(self, model_output):
"""处理回归模型输出"""
self.processing_log.append(f"接收到回归输出,形状: {model_output.shape}")
# 回归输出可能是 (batch_size, 1) 或 (batch_size,)
if len(model_output.shape) > 1 and model_output.shape[1] == 1:
squeezed_output = np.squeeze(model_output, axis=1)
self.processing_log.append(f"Squeeze后形状: {squeezed_output.shape}")
return squeezed_output
return model_output
def get_processing_log(self):
"""获取处理日志"""
return self.processing_log
# 演示模型输出处理
processor = ModelOutputProcessor()
# 分类模型输出示例
classification_output = np.array([[0.1, 0.7, 0.2]]) # 单个样本的三分类输出
result_class, result_confidence = processor.process_classification_output(classification_output)
# 回归模型输出示例
regression_output = np.array([[25.3], [30.1], [22.8]]) # 三个样本的回归输出
processed_regression = processor.process_regression_output(regression_output)
# 打印处理日志
print("处理日志:")
for log_entry in processor.get_processing_log():
print(f" {log_entry}")
数据可视化准备
在准备数据进行可视化时,squeeze 操作可以帮助我们获得更合适的数组形状:
import numpy as np
class DataVisualizationPreparer:
"""数据可视化准备器"""
def __init__(self):
self.data_cache = {}
def prepare_timeseries_data(self, raw_data):
"""准备时间序列数据"""
print(f"原始时间序列数据形状: {raw_data.shape}")
# 时间序列数据可能有额外的批次维度
if len(raw_data.shape) > 2:
# 去除多余的单维度
prepared_data = np.squeeze(raw_data)
print(f"准备后数据形状: {prepared_data.shape}")
return prepared_data
return raw_data
def prepare_heatmap_data(self, raw_data):
"""准备热力图数据"""
print(f"原始热力图数据形状: {raw_data.shape}")
# 确保数据是二维的
while len(raw_data.shape) > 2:
for axis in range(len(raw_data.shape)):
if raw_data.shape[axis] == 1:
raw_data = np.squeeze(raw_data, axis=axis)
break
else:
# 如果没有单维度,break循环
break
print(f"准备后热力图数据形状: {raw_data.shape}")
return raw_data
def prepare_scatter_data(self, x_data, y_data):
"""准备散点图数据"""
print(f"X数据原始形状: {x_data.shape}")
print(f"Y数据原始形状: {y_data.shape}")
# 确保两个数组都是一维的
x_prepared = np.squeeze(x_data)
y_prepared = np.squeeze(y_data)
print(f"X数据准备后形状: {x_prepared.shape}")
print(f"Y数据准备后形状: {y_prepared.shape}")
# 检查形状是否匹配
if x_prepared.shape != y_prepared.shape:
print("警告: X和Y数据形状不匹配!")
return x_prepared, y_prepared
# 演示数据可视化准备
preparer = DataVisualizationPreparer()
# 准备不同类型的数据
timeseries_raw = np.random.rand(1, 100, 1) # 带有多余维度的时间序列
heatmap_raw = np.random.rand(1, 50, 50, 1) # 带有多余维度的热力图数据
scatter_x_raw = np.array([[[1, 2, 3, 4, 5]]]) # 散点图X数据
scatter_y_raw = np.array([[[2, 4, 6, 8, 10]]]) # 散点图Y数据
# 处理数据
timeseries_ready = preparer.prepare_timeseries_data(timeseries_raw)
heatmap_ready = preparer.prepare_heatmap_data(heatmap_raw)
scatter_x_ready, scatter_y_ready = preparer.prepare_scatter_data(scatter_x_raw, scatter_y_raw)
内存管理和效率优化 💾
内存视图 vs 副本
了解 squeeze() 返回的是视图还是副本对于内存管理非常重要:
import numpy as np
def memory_view_analysis():
"""分析squeeze操作的内存视图特性"""
# 创建原始数组
original = np.arange(24).reshape(2, 1, 3, 4)
print(f"原始数组形状: {original.shape}")
print(f"原始数组ID: {id(original)}")
# 执行squeeze操作
squeezed = np.squeeze(original)
print(f"Squeeze后形状: {squeezed.shape}")
print(f"Squeeze后数组ID: {id(squeezed)}")
# 检查是否为同一内存
print(f"是否共享内存: {np.shares_memory(original, squeezed)}")
# 修改squeeze后的数组会影响原数组吗?
print(f"修改前原数组[0,0,0]: {original[0,0,0]}")
squeezed[0,0] = 999
print(f"修改后原数组[0,0,0]: {original[0,0,0]}")
# 当指定axis时的行为
print("\\n— 指定axis的情况 —")
specific_squeeze = np.squeeze(original, axis=1)
print(f"指定axis=1后形状: {specific_squeeze.shape}")
print(f"是否共享内存: {np.shares_memory(original, specific_squeeze)}")
memory_view_analysis()
大规模数据处理优化
在处理大规模数据集时,合理的使用 squeeze() 可以显著减少内存占用:
import numpy as np
def large_scale_optimization():
"""大规模数据处理优化示例"""
def process_with_squeeze(data_batch):
"""使用squeeze优化处理"""
# 如果批次大小为1,squeeze掉批次维度
if data_batch.shape[0] == 1:
return np.squeeze(data_batch, axis=0)
return data_batch
def process_without_squeeze(data_batch):
"""不使用squeeze的处理"""
return data_batch
# 模拟大数据处理场景
batch_size = 1
feature_size = 1000000 # 1M特征
# 创建模拟数据
large_data = np.random.rand(batch_size, feature_size)
print(f"原始数据形状: {large_data.shape}")
print(f"原始数据内存占用: {large_data.nbytes / 1024 / 1024:.2f} MB")
# 使用squeeze优化
optimized_data = process_with_squeeze(large_data)
print(f"优化后数据形状: {optimized_data.shape}")
print(f"优化后数据内存占用: {optimized_data.nbytes / 1024 / 1024:.2f} MB")
# 计算节省的内存
memory_saved = large_data.nbytes – optimized_data.nbytes
print(f"节省内存: {memory_saved / 1024 / 1024:.2f} MB")
large_scale_optimization()
与其他库的集成 🤝
与Pandas的结合使用
在数据分析工作中,NumPy 和 Pandas 经常一起使用,squeeze 操作在这种环境下也很有用:
import numpy as np
import pandas as pd
def numpy_pandas_integration():
"""NumPy与Pandas集成示例"""
# 创建带有单维度的NumPy数组
numpy_array = np.array([[[1, 2, 3, 4, 5]]])
print(f"NumPy数组形状: {numpy_array.shape}")
# squeeze操作
squeezed_array = np.squeeze(numpy_array)
print(f"Squeeze后形状: {squeezed_array.shape}")
# 转换为Pandas Series
series_data = pd.Series(squeezed_array)
print(f"Pandas Series形状: {series_data.shape}")
print("Series数据:")
print(series_data)
# 从Pandas DataFrame创建数组并squeeze
df = pd.DataFrame({'A': [1], 'B': [2], 'C': [3]})
print(f"\\nDataFrame形状: {df.shape}")
# 转换为NumPy数组
df_array = df.values
print(f"转换后数组形状: {df_array.shape}")
# 如果需要,可以进一步squeeze
if df_array.shape[0] == 1:
final_array = np.squeeze(df_array, axis=0)
print(f"最终数组形状: {final_array.shape}")
numpy_pandas_integration()
与Matplotlib的配合
在数据可视化中,正确的数组形状对于绘图函数很重要:
import numpy as np
import matplotlib.pyplot as plt
def visualization_preparation():
"""可视化数据准备示例"""
# 创建带有多余维度的数据
x_data = np.linspace(0, 10, 100)
y_data_raw = np.sin(x_data).reshape(1, –1, 1) # 添加多余维度
print(f"原始Y数据形状: {y_data_raw.shape}")
# 准备数据用于绘图
y_data_ready = np.squeeze(y_data_raw)
print(f"准备后Y数据形状: {y_data_ready.shape}")
# 现在可以正确绘图了
plt.figure(figsize=(10, 6))
plt.plot(x_data, y_data_ready, label='sin(x)')
plt.xlabel('X')
plt.ylabel('Y')
plt.title('使用squeeze准备的数据可视化')
plt.legend()
plt.grid(True)
plt.show()
# 注意:在实际环境中取消注释下面一行来显示图形
# visualization_preparation()
最佳实践总结 ✅
基于前面的所有讨论,让我总结一些使用 squeeze() 的最佳实践:
import numpy as np
class SqueezeBestPractices:
"""Squeeze操作最佳实践指南"""
@staticmethod
def safe_squeeze(arr, axis=None):
"""
安全的squeeze操作
Parameters:
arr : numpy array
输入数组
axis : int or None
要squeeze的轴,None表示squeeze所有单维度
Returns:
numpy array
squeeze后的数组
"""
try:
if axis is not None:
# 检查轴的有效性和是否为单维度
if 0 <= axis < len(arr.shape) and arr.shape[axis] == 1:
return np.squeeze(arr, axis=axis)
else:
print(f"警告: 轴{axis}无效或不是单维度")
return arr
else:
# squeeze所有单维度
return np.squeeze(arr)
except Exception as e:
print(f"squeeze操作失败: {e}")
return arr
@staticmethod
def conditional_squeeze(arr, target_shape):
"""
根据目标形状有条件地进行squeeze
Parameters:
arr : numpy array
输入数组
target_shape : tuple
目标形状
Returns:
numpy array
处理后的数组
"""
current_shape = arr.shape
print(f"当前形状: {current_shape}, 目标形状: {target_shape}")
# 如果当前形状已经是目标形状,直接返回
if current_shape == target_shape:
return arr
# 否则尝试squeeze
squeezed = np.squeeze(arr)
if squeezed.shape == target_shape:
print("成功squeeze到目标形状")
return squeezed
else:
print("无法squeeze到目标形状")
return arr
@staticmethod
def batch_squeeze(arrays_list):
"""
批量处理squeeze操作
Parameters:
arrays_list : list of numpy arrays
数组列表
Returns:
list of numpy arrays
处理后的数组列表
"""
results = []
for i, arr in enumerate(arrays_list):
print(f"处理数组{i+1}, 形状: {arr.shape}")
squeezed = np.squeeze(arr)
print(f" squeeze后形状: {squeezed.shape}")
results.append(squeezed)
return results
# 演示最佳实践
practices = SqueezeBestPractices()
# 安全squeeze示例
print("=== 安全squeeze示例 ===")
test_array = np.array([[[1, 2, 3]]])
safe_result = practices.safe_squeeze(test_array, axis=0)
unsafe_result = practices.safe_squeeze(test_array, axis=1) # 这会给出警告
print("\\n=== 条件squeeze示例 ===")
conditional_test = np.array([[[4, 5, 6]]])
target = (3,) # 我们想要的是一维数组
conditional_result = practices.conditional_squeeze(conditional_test, target)
print("\\n=== 批量squeeze示例 ===")
batch_arrays = [
np.array([[[1, 2]]]),
np.array([[[[3, 4, 5]]]]),
np.array([[6, 7, 8]]) # 这个已经是最简形式
]
batch_results = practices.batch_squeeze(batch_arrays)
性能基准测试 📊
让我们进行一些性能测试来了解 squeeze() 在不同情况下的表现:
import numpy as np
import time
def performance_benchmark():
"""性能基准测试"""
def time_function(func, *args, **kwargs):
"""计时函数执行时间"""
start = time.perf_counter()
result = func(*args, **kwargs)
end = time.perf_counter()
return result, end – start
# 测试不同大小的数组
sizes = [(1, 100), (1, 1000), (1, 10000), (1, 100000)]
print("数组大小\\t\\tsqueeze时间(s)\\t\\t内存节省(MB)")
print("-" * 60)
for size in sizes:
# 创建测试数组
original = np.random.rand(*size)
expanded = np.expand_dims(original, axis=0) # 添加批次维度
# 测试squeeze性能
squeezed, exec_time = time_function(np.squeeze, expanded)
# 计算内存节省
memory_saved = (expanded.nbytes – squeezed.nbytes) / (1024 * 1024)
print(f"{str(expanded.shape):<15}\\t{exec_time:.8f}\\t\\t{memory_saved:.4f}")
performance_benchmark()
常见问题解答 ❓
Q1: squeeze会改变数组的数据吗?
不会!squeeze() 只会改变数组的形状,不会改变其中存储的数据。它返回的是原数组的一个视图(在大多数情况下),所以数据是相同的。
Q2: 什么时候应该使用squeeze?
当你遇到以下情况时应该考虑使用 squeeze():
- 数组中有不必要的单维度
- 需要将数据传递给期望特定形状的函数
- 想要简化数组结构以便于理解和操作
Q3: squeeze和reshape有什么区别?
squeeze() 只能删除长度为1的维度,而 reshape() 可以完全重新组织数组的形状。squeeze() 更具体和安全,因为它确保不会丢失数据。
结语 🎯
通过这篇详细的介绍,我们深入了解了 NumPy 中 squeeze() 方法的强大功能和广泛应用。从基础概念到高级应用,从性能优化到实际项目案例,我们看到了这个看似简单的方法在数据科学工作流中的重要价值。
记住这些关键点:
掌握 squeeze() 的使用不仅能让你的代码更加简洁高效,还能帮助你更好地理解和管理多维数据结构。在你的下一个数据科学项目中,不妨试试这个强大的工具!
如果你想了解更多关于 NumPy 的其他功能,建议查看 NumPy官方文档,那里有最权威和详细的参考资料。同时,SciPy Lecture Notes 也是一个很好的学习资源,包含了丰富的科学计算教程。
Happy coding! 🐍📊
🙌 感谢你读到这里! 🔍 技术之路没有捷径,但每一次阅读、思考和实践,都在悄悄拉近你与目标的距离。 💡 如果本文对你有帮助,不妨 👍 点赞、📌 收藏、📤 分享 给更多需要的朋友! 💬 欢迎在评论区留下你的想法、疑问或建议,我会一一回复,我们一起交流、共同成长 🌿 🔔 关注我,不错过下一篇干货!我们下期再见!✨